Creating a Pluto flyby using unaligned New Horizons images
Introduction
Last month, a few days before NASA’s New Horizons probe made its historic flyby of Pluto, I posted a GIF of it doing so to Reddit.
To produce this GIF, I wrote a Python script to process unaligned JPEG images directly from the New Horizons jhuapl.edu LORRI page. The script translates and rotates input images such that background stars in the image line up, which are then composed into a GIF. The result is a timelapse of New Horizon’s view, as if the camera were pointing in the same direction for the duration.
Back when I made the original post the code was very much a prototype due to me rushing to get the image out before the point of closest approach. I’ve since cleaned up the code, and put it on GitHub. In this post I’ll describe how it works.
The process breaks down into these steps:
- Extracting star coordinates from the input images.
- Aligning images. This involves determining a transformation that will map the position of stars in the first image to the corresponding positions in all other images.
- Outputting images. This involves transforming all images into the reference frame of the first image, and writing the resulting image to disk. Input images that were taken at approximately the same time are combined into the same output image.
I won’t cover how to obtain the input images from the JHUAPL website as this is not very interesting (although it is included in the source code). Note for this project only the short-exposure 100-150 msec images are used.
Extracting star coordinates
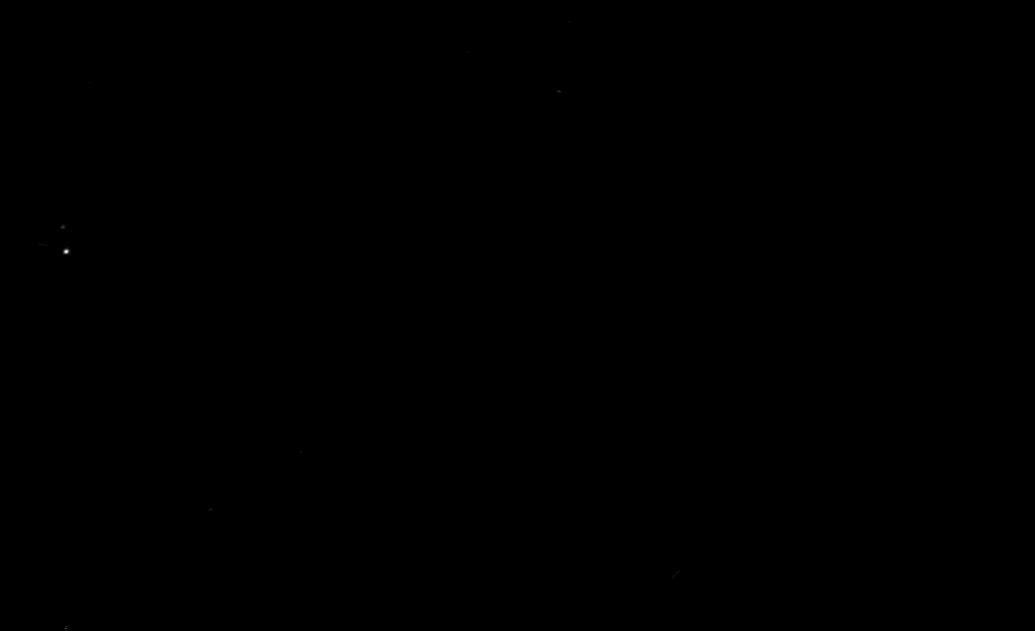
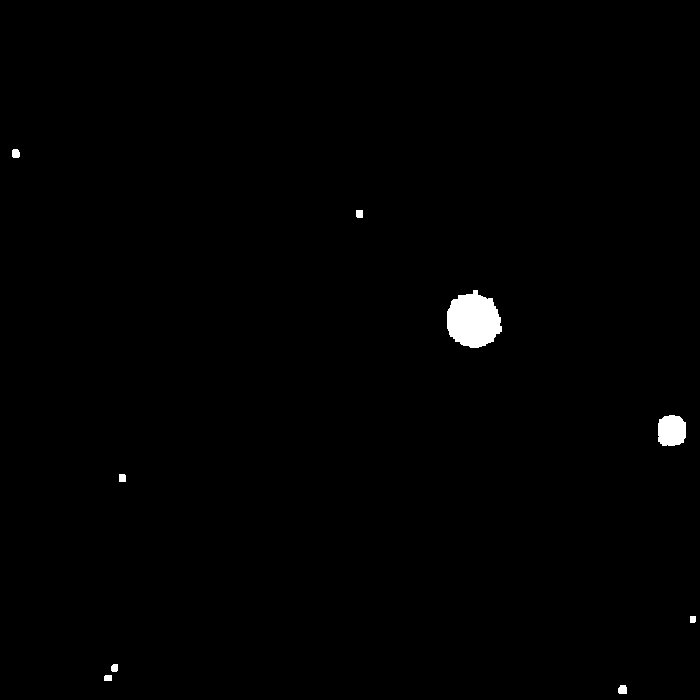
Looking at one of the input images we wish to compose, it doesn’t appear at first as if there are any background stars at all:
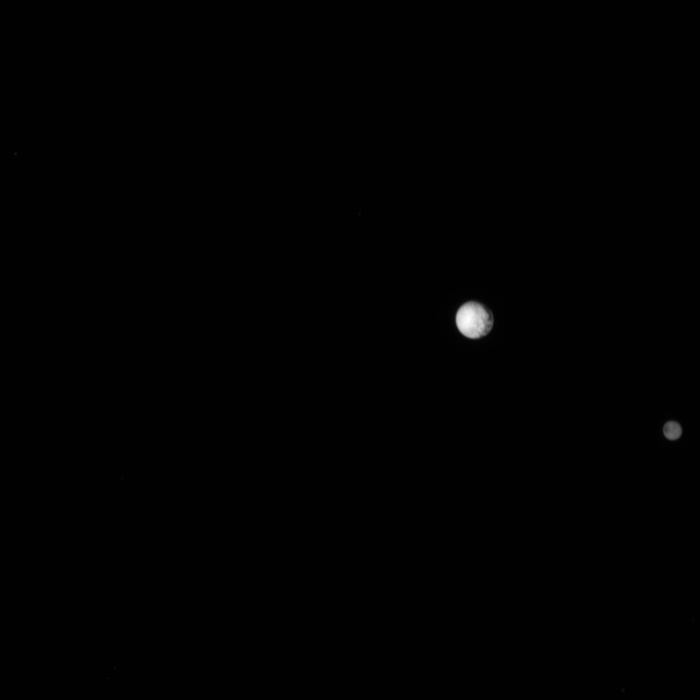
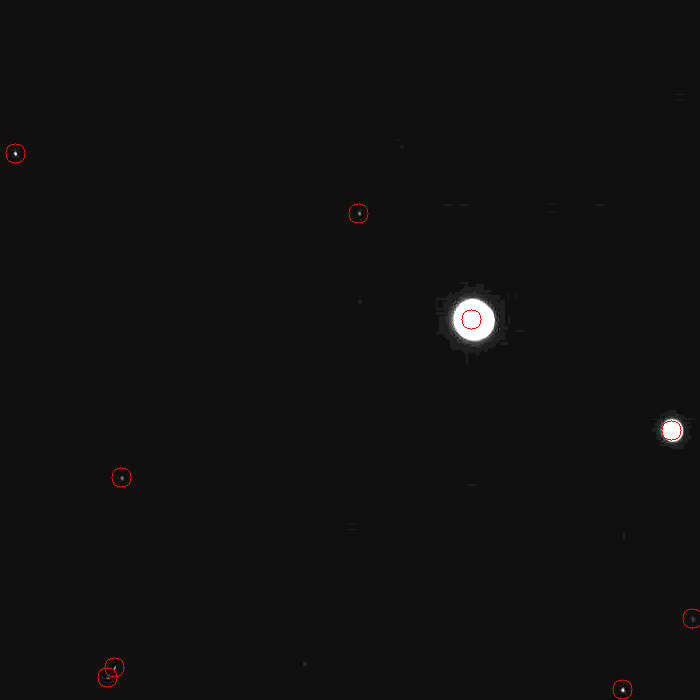
However, stretch the brightness 16 times and a few become visible:
Given such an input image we wish to obtain the x, y coordinates of each
star. To do so we first
threshold the
input image:
THRESHOLD_FRACTION = 0.025
THRESHOLD_BIAS = 2
def extract(im):
hist = numpy.histogram(im, bins=range(256))[0]
for thr in range(256):
if sum(hist[thr + 1:]) < (im.shape[0] * im.shape[1] *
THRESHOLD_FRACTION):
break
else:
raise ExtractFailed("Image too bright")
thr += THRESHOLD_BIAS
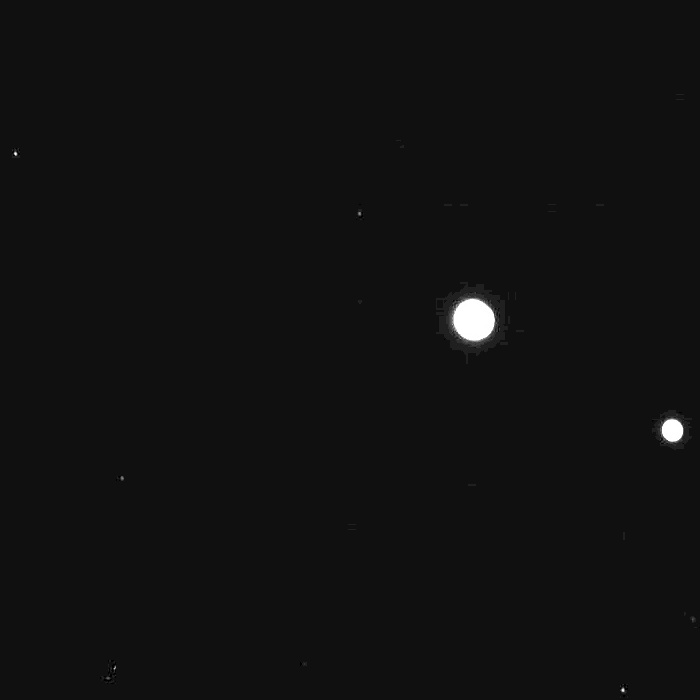
_, thresh_im = cv2.threshold(im, thr, 255, cv2.THRESH_BINARY)This code picks the smallest thresholding constanting thr such that less than
2.5% of the thresholded image is white, then adds 2 to it. The resulting image
is:
The idea is to make a mask such that contiguous white regions in the
thresholded image correspond with stars in the original image. The value of
THRESHOLD_FRACTION was chosen on the basis that 97% or more of an image is
just background blackness, which is strictly darker the stars we wish to
detect, so thresholding on this will remove almost all of the background
pixels. Due to sensor noise there are still some background pixels which get
through at this level. THRESHOLD_BIAS is chosen to account for this.
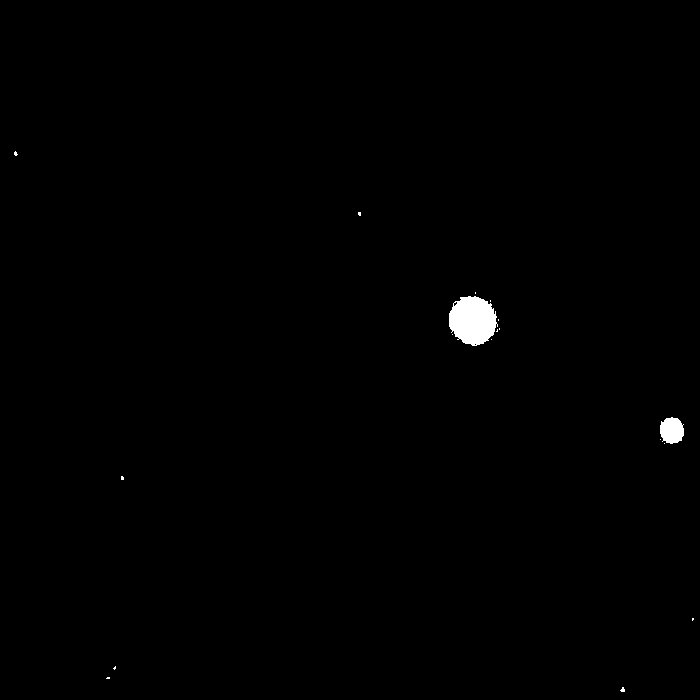
The above isn’t perfect: Some stars can have multiple contiguous regions associated with them or, as is the case above, Pluto or its moon Charon can generate multiple regions around its fringe. Having a significant number of false positives may cause problems for the next step, so let’s account for this by dilating the mask by a small amount, thereby joining up nearby regions:
    DILATION_SIZE = 9
    ...
    thresh_im = cv2.dilate(thresh_im, numpy.ones((DILATION_SIZE,
                                                  DILATION_SIZE)))
This gives the following:
At this point we assume each contiguous region is a star. This obviously isn’t true for the regions associated with Pluto and Charon, but the next step should handle the small number of false positives adequately.
So how do we go from our mask to a list of star coordinates? We start by using
cv2.findContours to extract contiguous regions:
    contours, _ = cv2.findContours(thresh_im, mode=cv2.RETR_EXTERNAL,
                                   method=cv2.CHAIN_APPROX_NONE)
    contours = [c for c in contours if len(c) > 1]
    if len(contours) > MAX_STARS:
        raise ExtractFailed("Too many stars ({})".format(len(contours)))
    if len(contours) < MIN_STARS:
        raise ExtractFailed("Not enough stars ({})".format(len(contours)))
And then mask the original image by each contiguous region, using cv2.moments
to determine the centre-of-mass of the star, in terms of pixel coordinates:
for idx, contour in enumerate(contours):
x, y, w, h = cv2.boundingRect(contour)
sub_im_mask = numpy.zeros((h, w), dtype=numpy.uint8)
cv2.drawContours(sub_im_mask,
contours,
idx,
color=1,
thickness=-1,
offset=(-x, -y))
sub_im = im[y:y + h, x:x + w] * sub_im_mask
m = cv2.moments(sub_im)
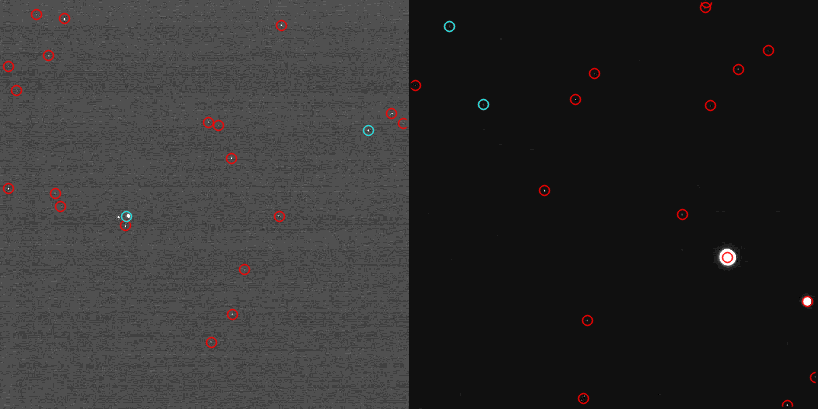
yield Star(x=(x + m['m10'] / m['m00']), y=(y + m['m01'] / m['m00']))Here’s the result, plotted over the stretched input image:
There are other approaches to star extraction in particular I’ve previously had success with Lang et al.’s method described in section 2.1 of the paper Astrometry.net: Blind astrometric calibration of arbitrary astronomical images, however it wasn’t effective in this case possibly due to the highly quantized nature of the brightness-stretched images. External tools are available too, such as SExtractor which I didn’t try but may be worth considering if you’re looking to do star extraction yourself.
Aligning images
In this step, for each input image we seek to find an affine transformation
(rotation and translation only) which maps points on the first image to
corresponding points on the image in question. Given a function register_pair
which takes stars from two images and returns a transformation to map the first
image on to the second it is easy enough to write an algorithm that behaves
well:
REGISTRATION_RETRIES = 3

def register_many(stars_seq):
    stars_it = iter(stars_seq)

    # First image is defined to have the identity transformation.
    registered = [(next(stars_it), numpy.matrix(numpy.identity(3)))]
    yield RegistrationResult(exception=None, transform=registered[0][1])

    # Attempt to find transformations for the remaining images.
    for stars2 in stars_it:
        for stars1, M1 in [registered[0]] + registered[-REGISTRATION_RETRIES:]:
            try:
                M2 = register_pair(stars1, stars2)
            except RegistrationFailed as e:
                yield RegistrationResult(exception=e, transform=None)
            yield RegistrationResult(exception=None, transform=(M1 * M2))
        registered.append((stars2, (M1 * M2)))
What this does is to attempt to align each image directly with the first image.
If this succeeds the transformation is simply the one returned by
register_pair. Otherwise, the image is aligned with the third to last
successfully registered image, then the second to last, and so on. If one of
these succeeds the desired transformation is just the previously registered
image’s transformation composed with that of transformation just returned by
register_pair.
This technique works quite well: The majority of images line up with the first image directly, but if they don’t (typically because they have a small set of detected stars that intersect with the first image) then they are lined up with the images that they are most similar to. Preferring to pair with the first image is desirable as it prevents alignment errors accumulating.
Aligning pairs of images
This is all well and good, but how does register_pair() work? Well, it starts
by randomly selecting 2 pairs of stars, the first of each pair being from the
first image, and the second of each pair being from the second image:
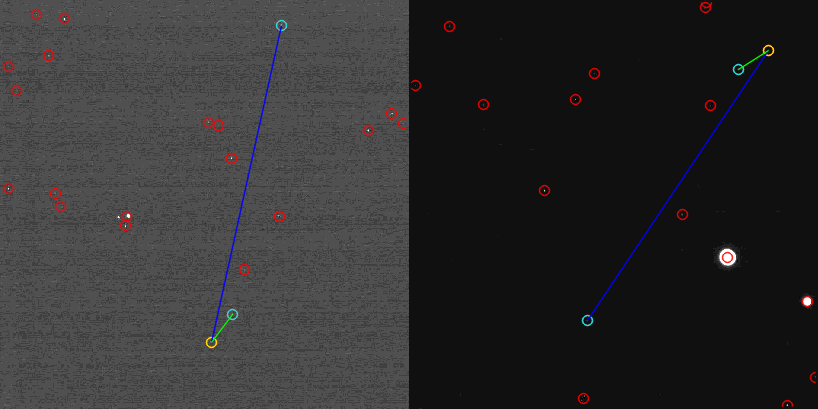
This is a hypothetical correspondence between the two images: The first star chosen in the first image should correspond with the first star chosen in the second image, and the second star in the first image should correspond with the second star in the second image. Given we’re only permitting rotation and translation and not scaling, we can immediately reject the hypothesis if the distance between the two stars is different for the two images (up to a predetermined margin of error), as is the case above.
The procedure is restarted until a hypothetical correspondence is found with (approximately) equal distances between the two stars in either image:
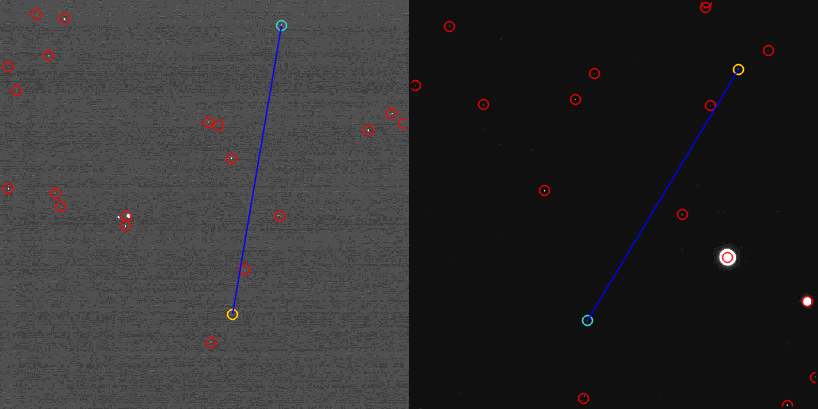
Note that the blue lines are the same length. For remaining images in this section lines of the same colour will be of the same length
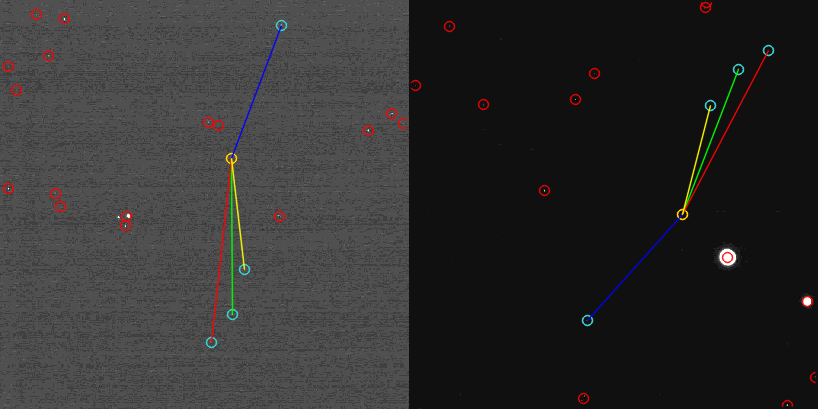
We have a reasonable hypothesis at this point, but it could just be that the two stars are coincidentally the same distance apart in each image, and are in fact images of completely different stars. We attempt to strengthen the hypothesis by performing an exhaustive search on remaining pairs of stars (one from each image), and seeing how many pairs fit the hypothesis.
A pair is said to fit the hypothesis if in either image, the star described by the new pair has the same distance to the stars in the hypothesis. For example:
The new star (yellow) has the same distance to the first star (denoted by a blue line) in either image. Similarly it has the same distance to the second star (denoted by a green line) in either image.
As pairs are found they are added to the hypothetical correspondence. As such, the 4th star must have the same distance to the first 3 stars in either image:

…and the 5th star must have the same distance to the first 4 stars in either image:
If at the end of this procedure there are at least 4 stars in the hypothetical correspondence the hypothesis is accepted. A Procrustes Analysis is performed on the correspondences which calculates a best-fit translation/rotation so that the stars in the first image line up with the corresponding stars in the second image.
If there are fewer than 4 stars, the procedure is restarted. If after 100,000 restarts no registration has been found the registration is failed.
Here’s the code for the above:
def _find_correspondences(stars1, stars2):
    stars1 = list(stars1)
    stars2 = list(stars2)

    for i in range(MAX_ITERS):
        model = _pick_random_model(stars1, stars2)
        if not _fits_model(model[1], model[:1]):
            continue

        for s1 in stars1:
            if s1 in (pair[0] for pair in model):
                continue
            for s2 in stars2:
                if s2 in (pair[1] for pair in model):
                    continue
                if _fits_model((s1, s2), model):
                    model.append((s1, s2))

        if len(model) >= NUM_STARS_TO_PAIR:
            return model

    raise RegistrationFailed

def _transformation_from_correspondences(correspondences):
    # Use a Procrustes analysis to compute a matrix M from correspondences.
    # Omitted for brevity. See reg.py in the repository for the full version.

def register_pair(stars1, stars2):
    return _transformation_from_correspondences(
                                         _find_correspondences(stars1, stars2))
The above algorithm is an example of the RANSAC method. In this case the model is just the set of correspondences found so far. We could equally have calculated an explicit transform after finding the initial 2 pairs, and used this to test for inliers, however this approach would be senstive to the initial pair being close together. In that case the transform would not provide an accurate rotation parameter, which might lead to a correct hypothesis being rejected.
Stacking
The stacking phase isn’t particularly complex. It proceeds as follows:
- Find a bounding rectangle for all the images. This is done by translating all image corners into the reference frame of the first image, then finding the element-wise minimum and maximum. This gives the top-left and bottom-right corner of the bounding box, respectively.
- An output image (consisting of zeros, ie. black) is then created with the
same dimensions as the bounding rectangle. Images are drawn onto this blank
canvas, using
cv2.warpAffineto rotate and translate the images by the transformation found during the alignment step. - If an image is about to be processed which was taken more than 4 hours after the previous image, the current output image is written to disk, and a fresh image created. This avoids images taken at (approximately) the same time from taking up lots of frames in the animation.
The result is then composed into a GIF using ImageMagick.
Credits
LORRI images courtesy of NASA/Johns Hopkins University Applied Physics Laboratory/Southwest Research Institute.
If you enjoyed this post, please consider supporting my efforts: