Path tracing Quake in Blender
Introduction
This week twenty-five years ago, Quake broke new ground in game engine realism. It was one of the first commercial games to have fully texture mapped 3D scenes rendered in real-time, with pre-computed lightmaps adding an extra layer of atmosphere.
Still, the requirement that the game run in real time on meagre 1996 hardware, placed massive constraints on graphical realism. In this post I want to explore how the game can be made to look better, with modern hardware and offline rendering.
I am going to talk about how I wrote a script for converting Quake demo files into Blender scenes. Blender is a free and open source 3D modelling and rendering application. Its renderer, Cycles, is a path tracer capable of producing photorealistic imagery, supporting features such as motion blur, depth of field, a comprehensive shader system, and much more. By exporting to Blender we get to use all of these features for free, without having to write a new renderer. My objective is to use the original game assets as much as possible, while relying on Blender’s accurate lighting simulation to improve realism.
Throughout this post I will be linking to the source code, which is part of my pyquake repository. If you want to have a go at importing your own demos into Blender, I have put together some instructions, but I probably won’t respond to any issues or PRs. I encourage you to make a fork if you are interested in maintaining this project.
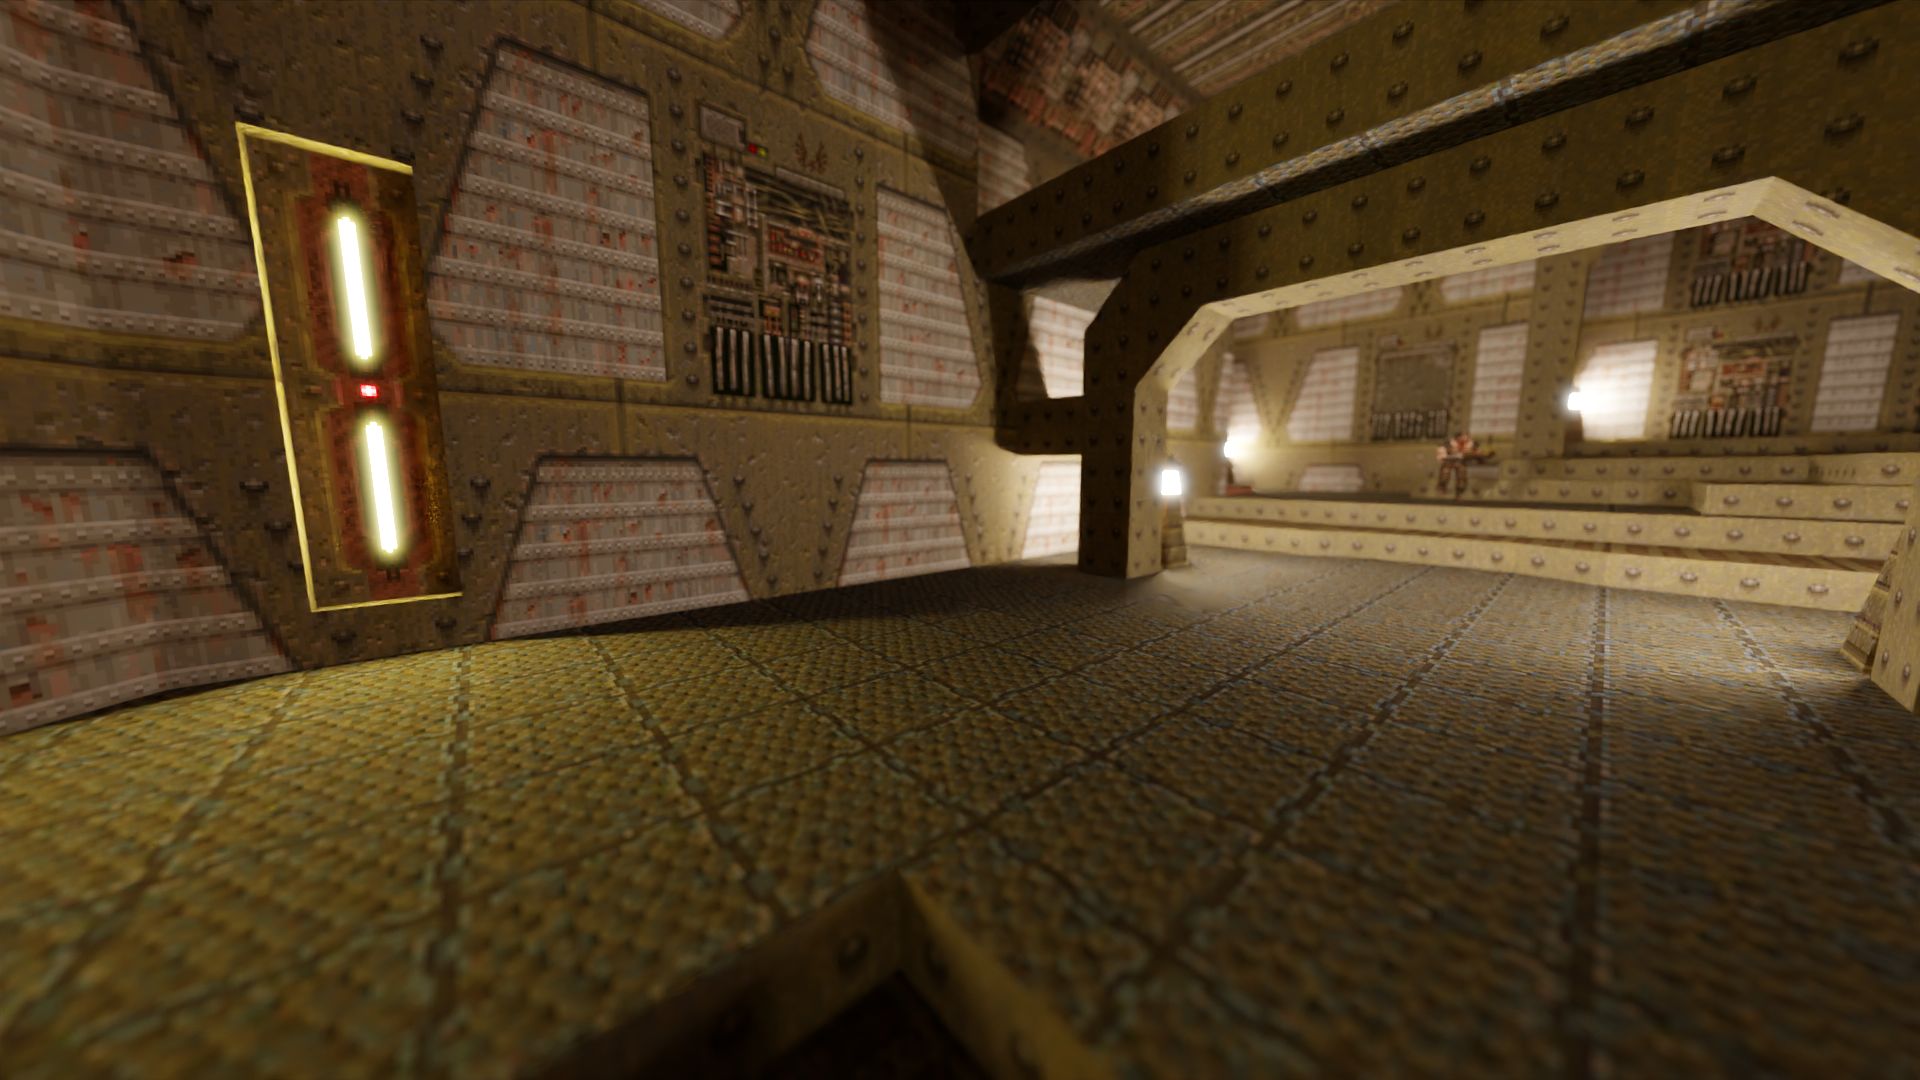
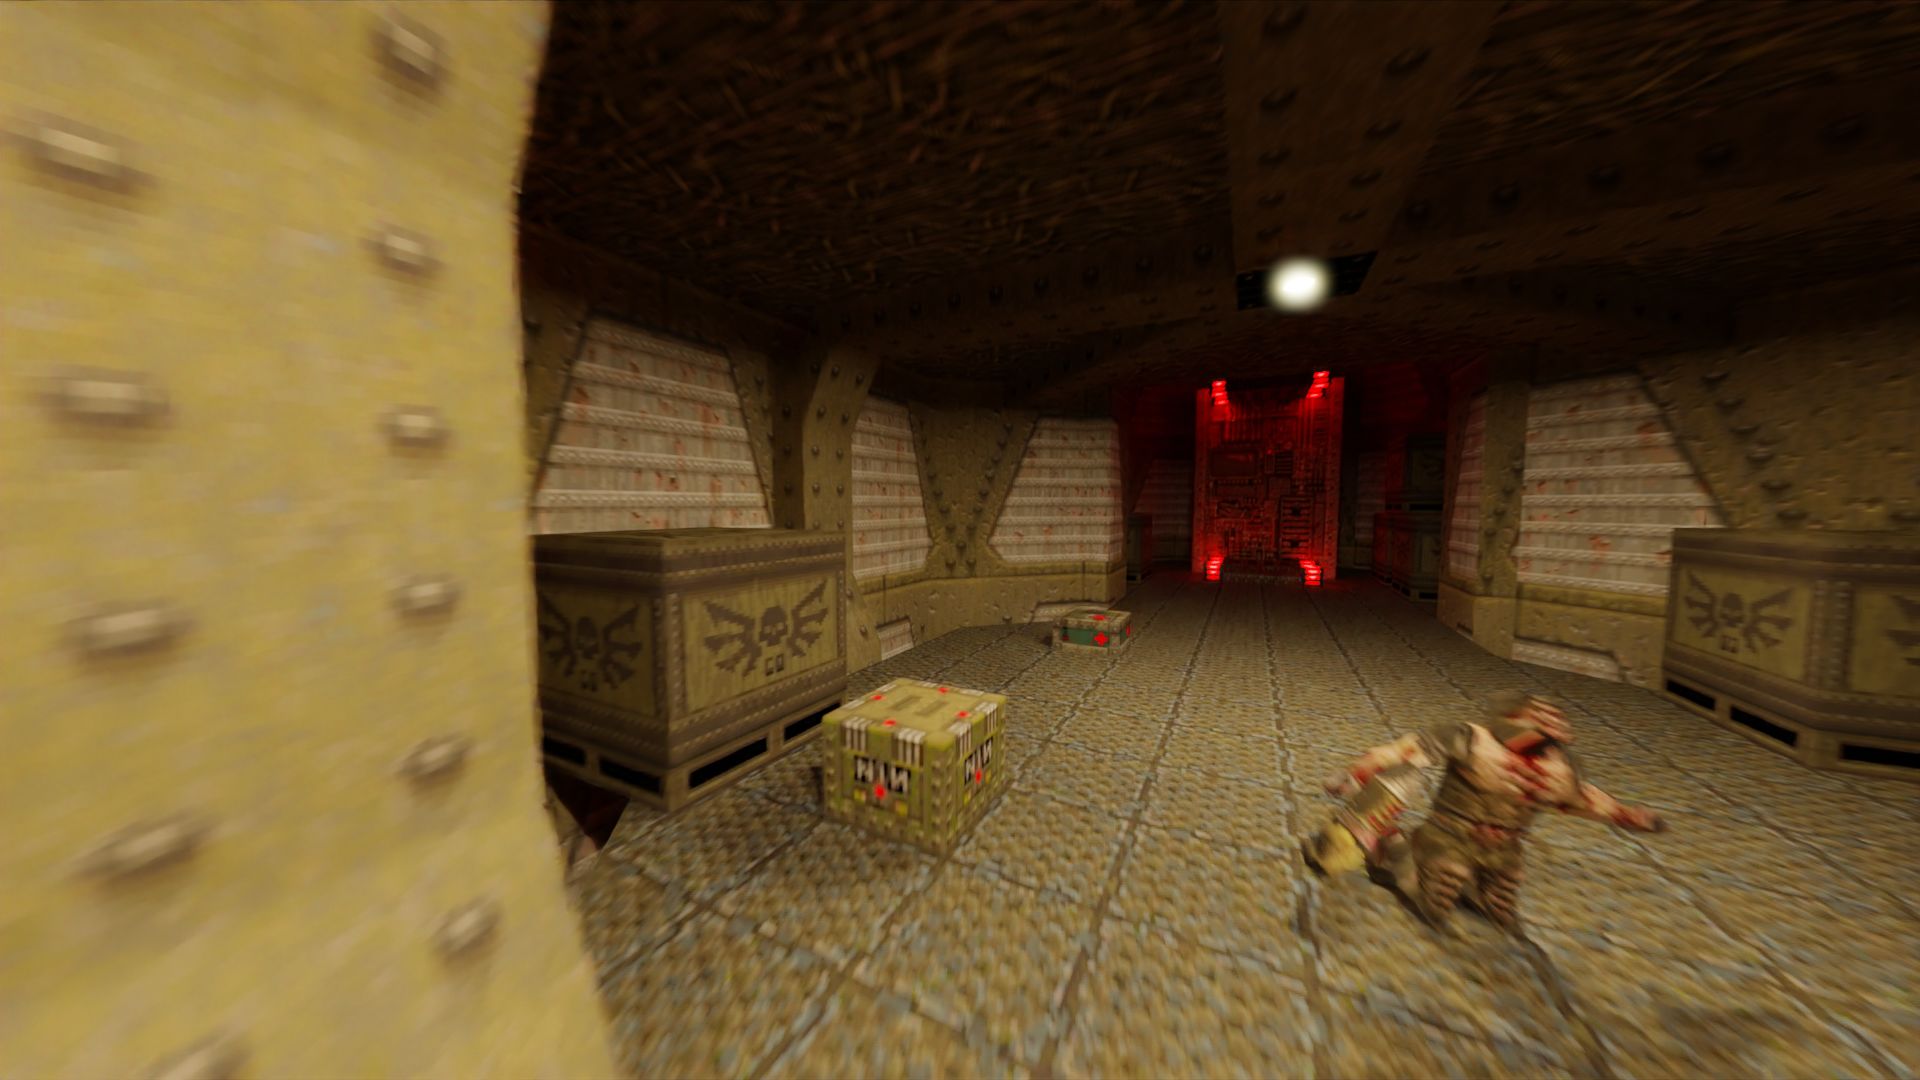
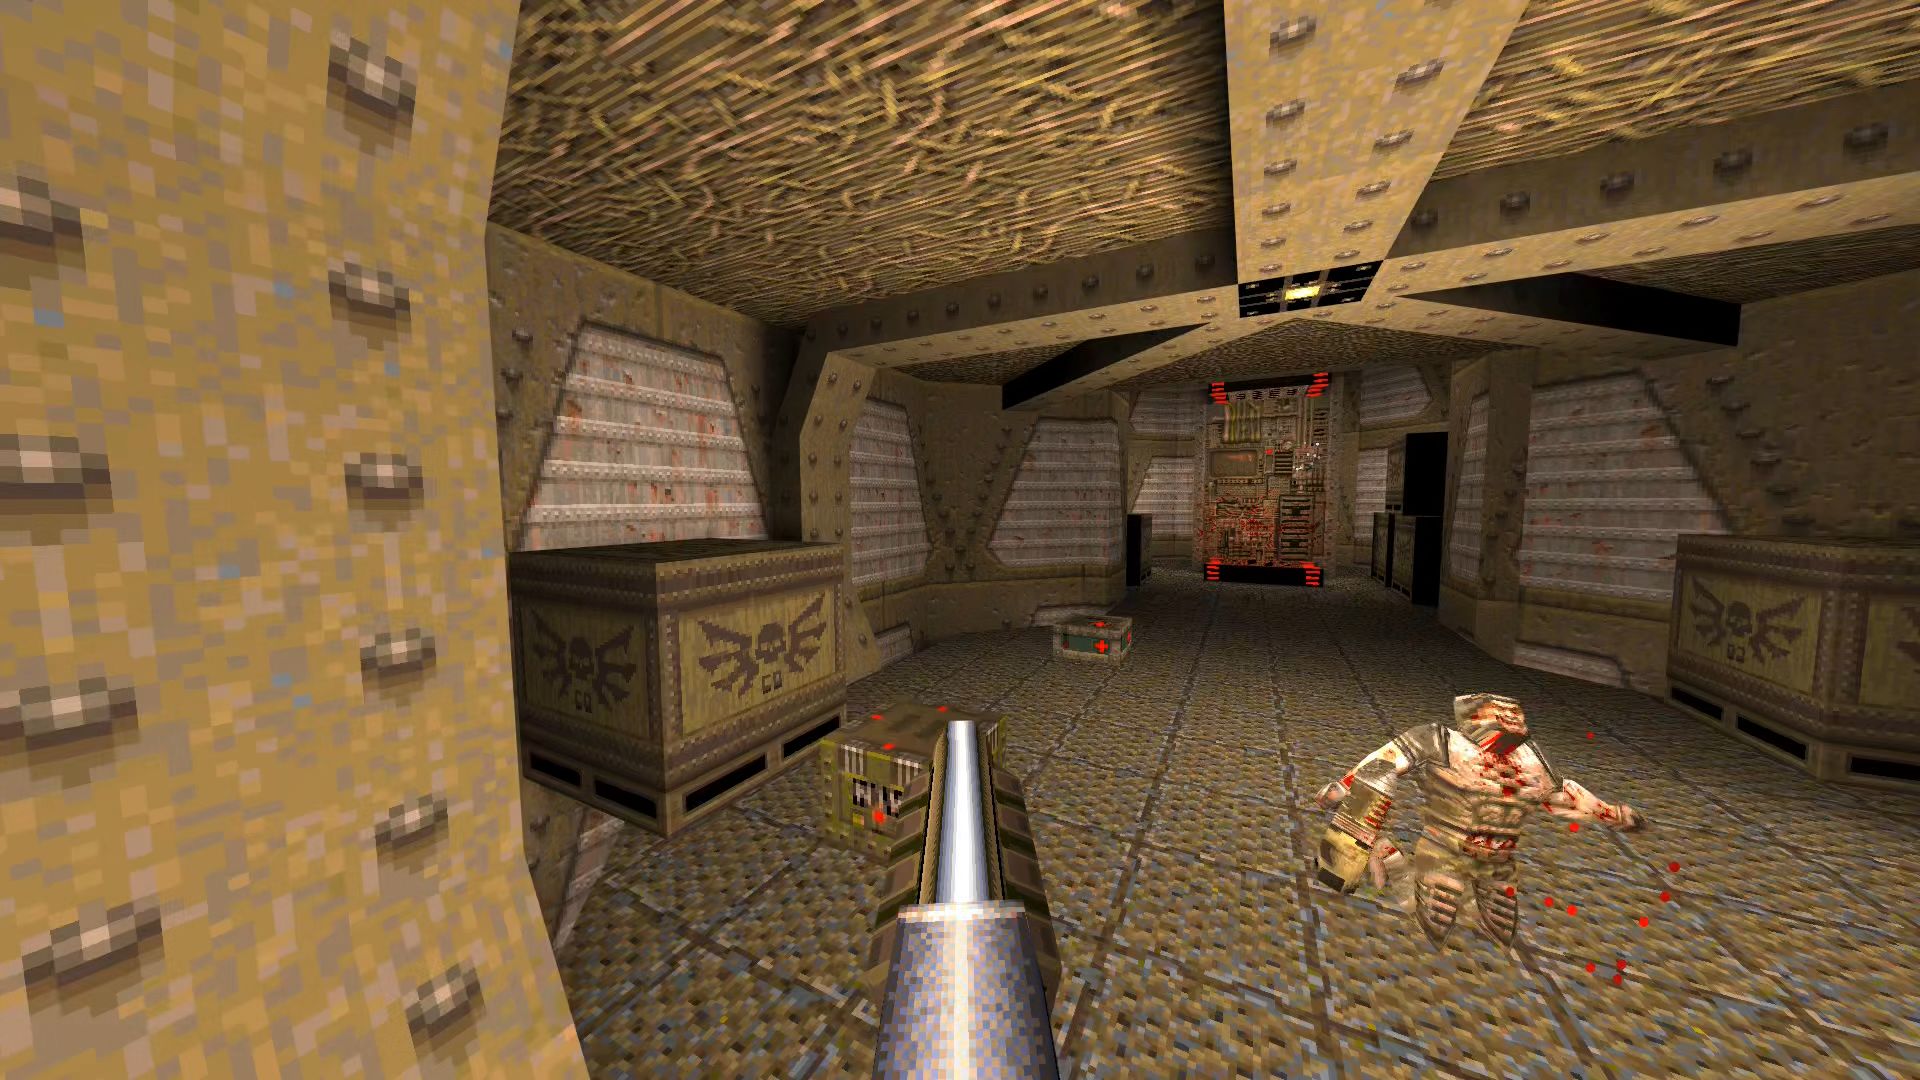
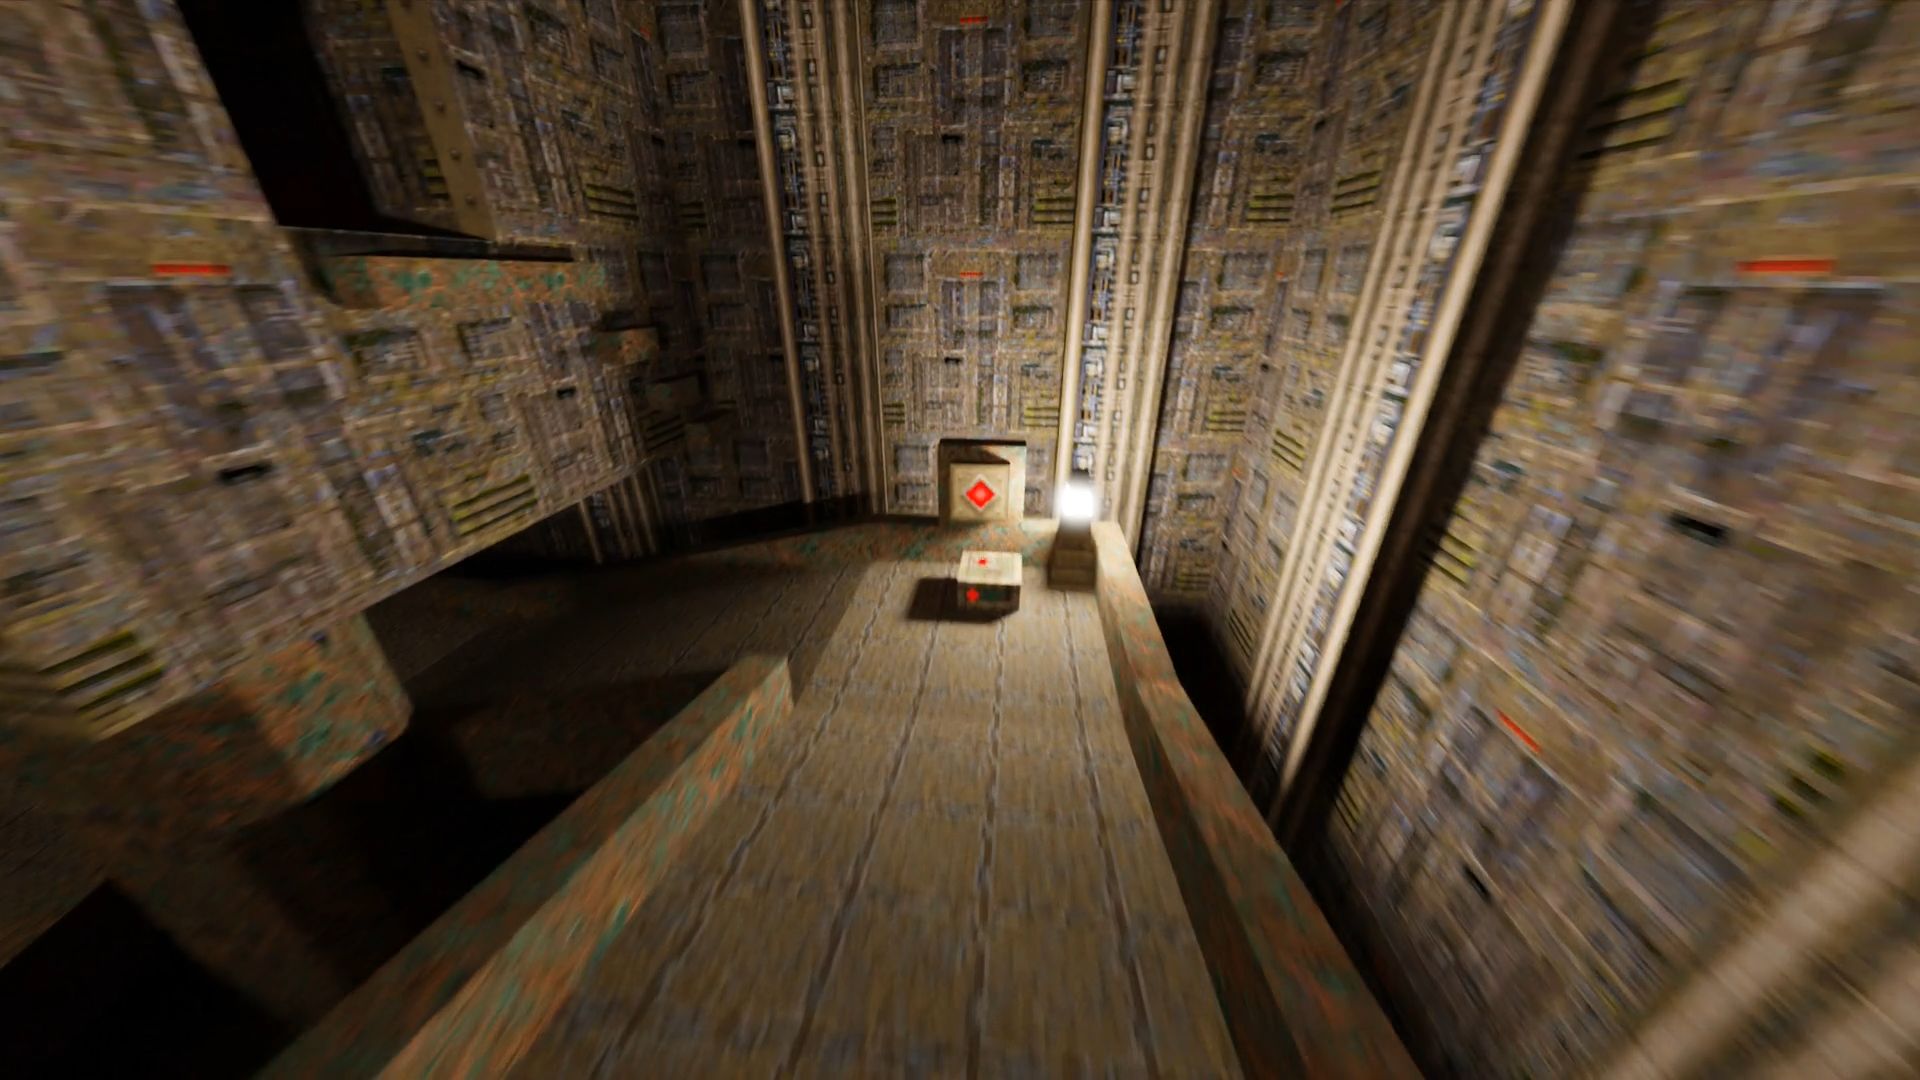
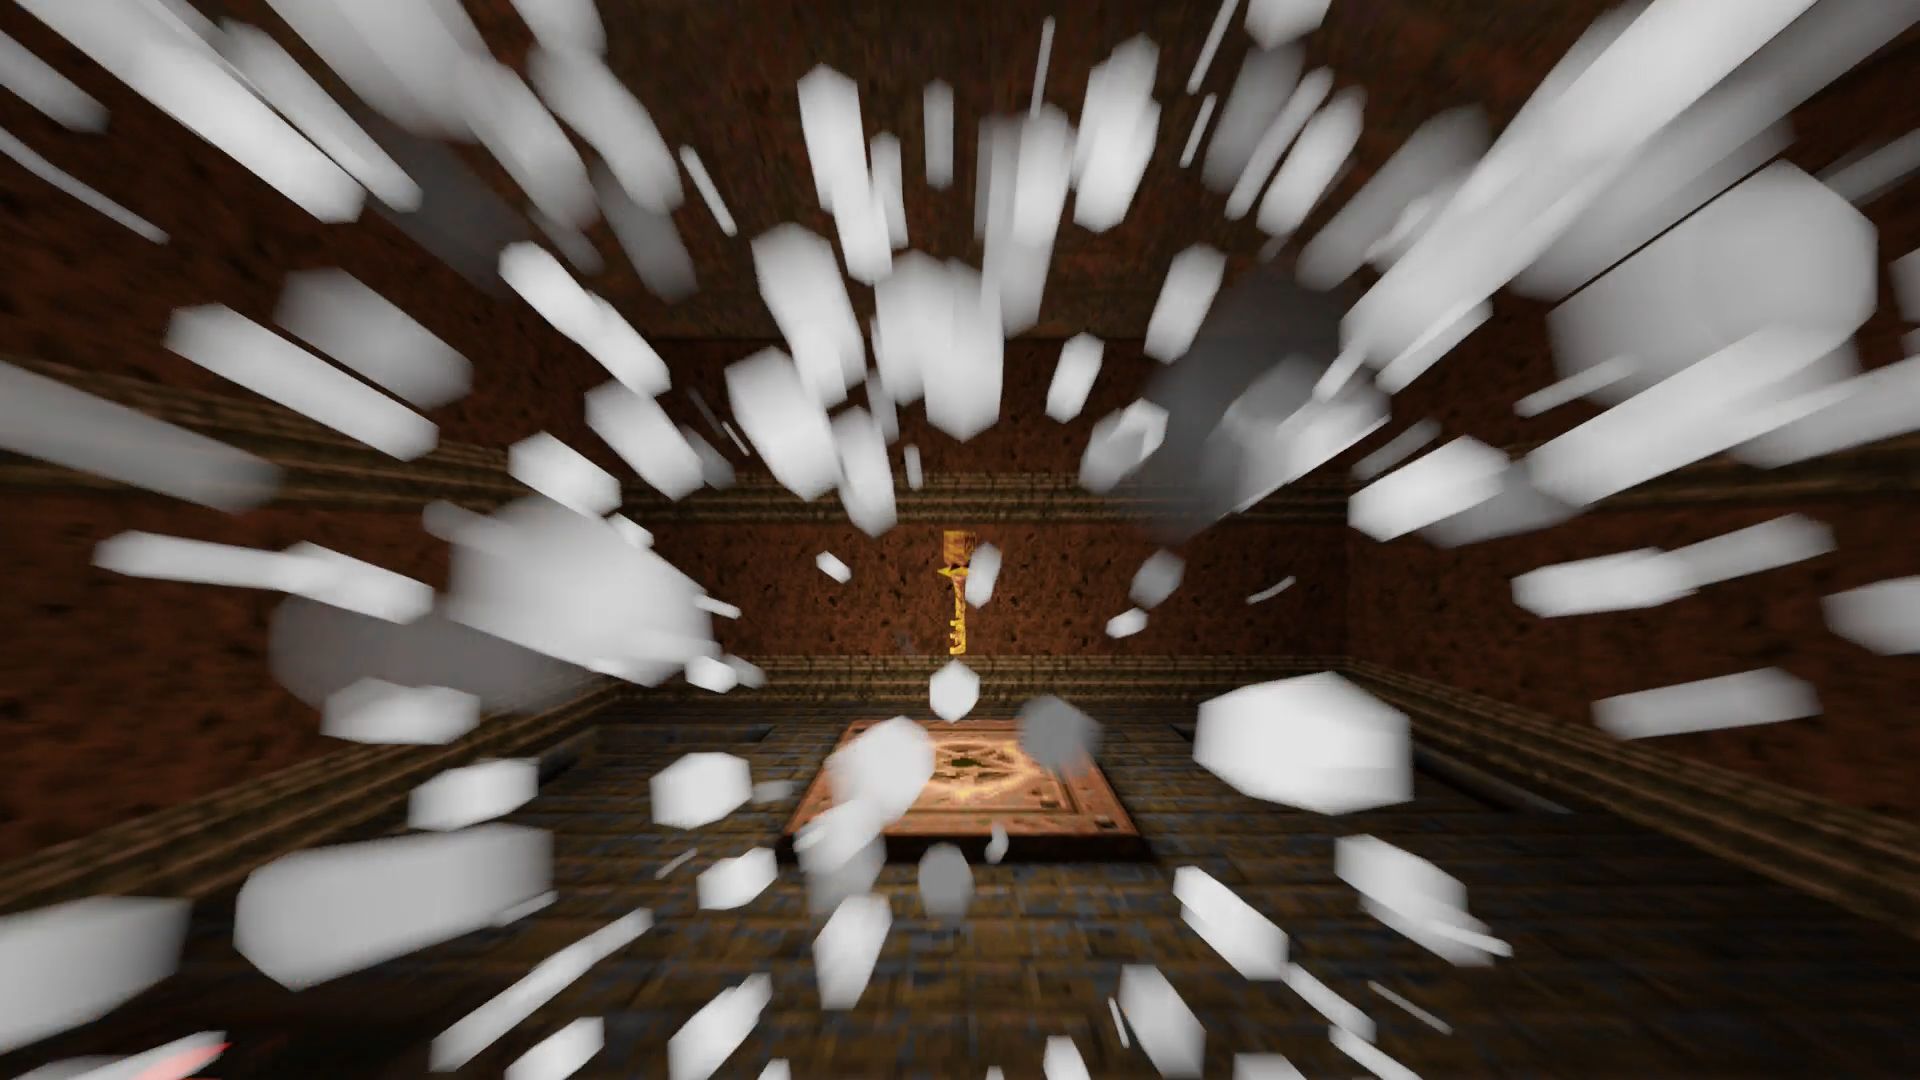
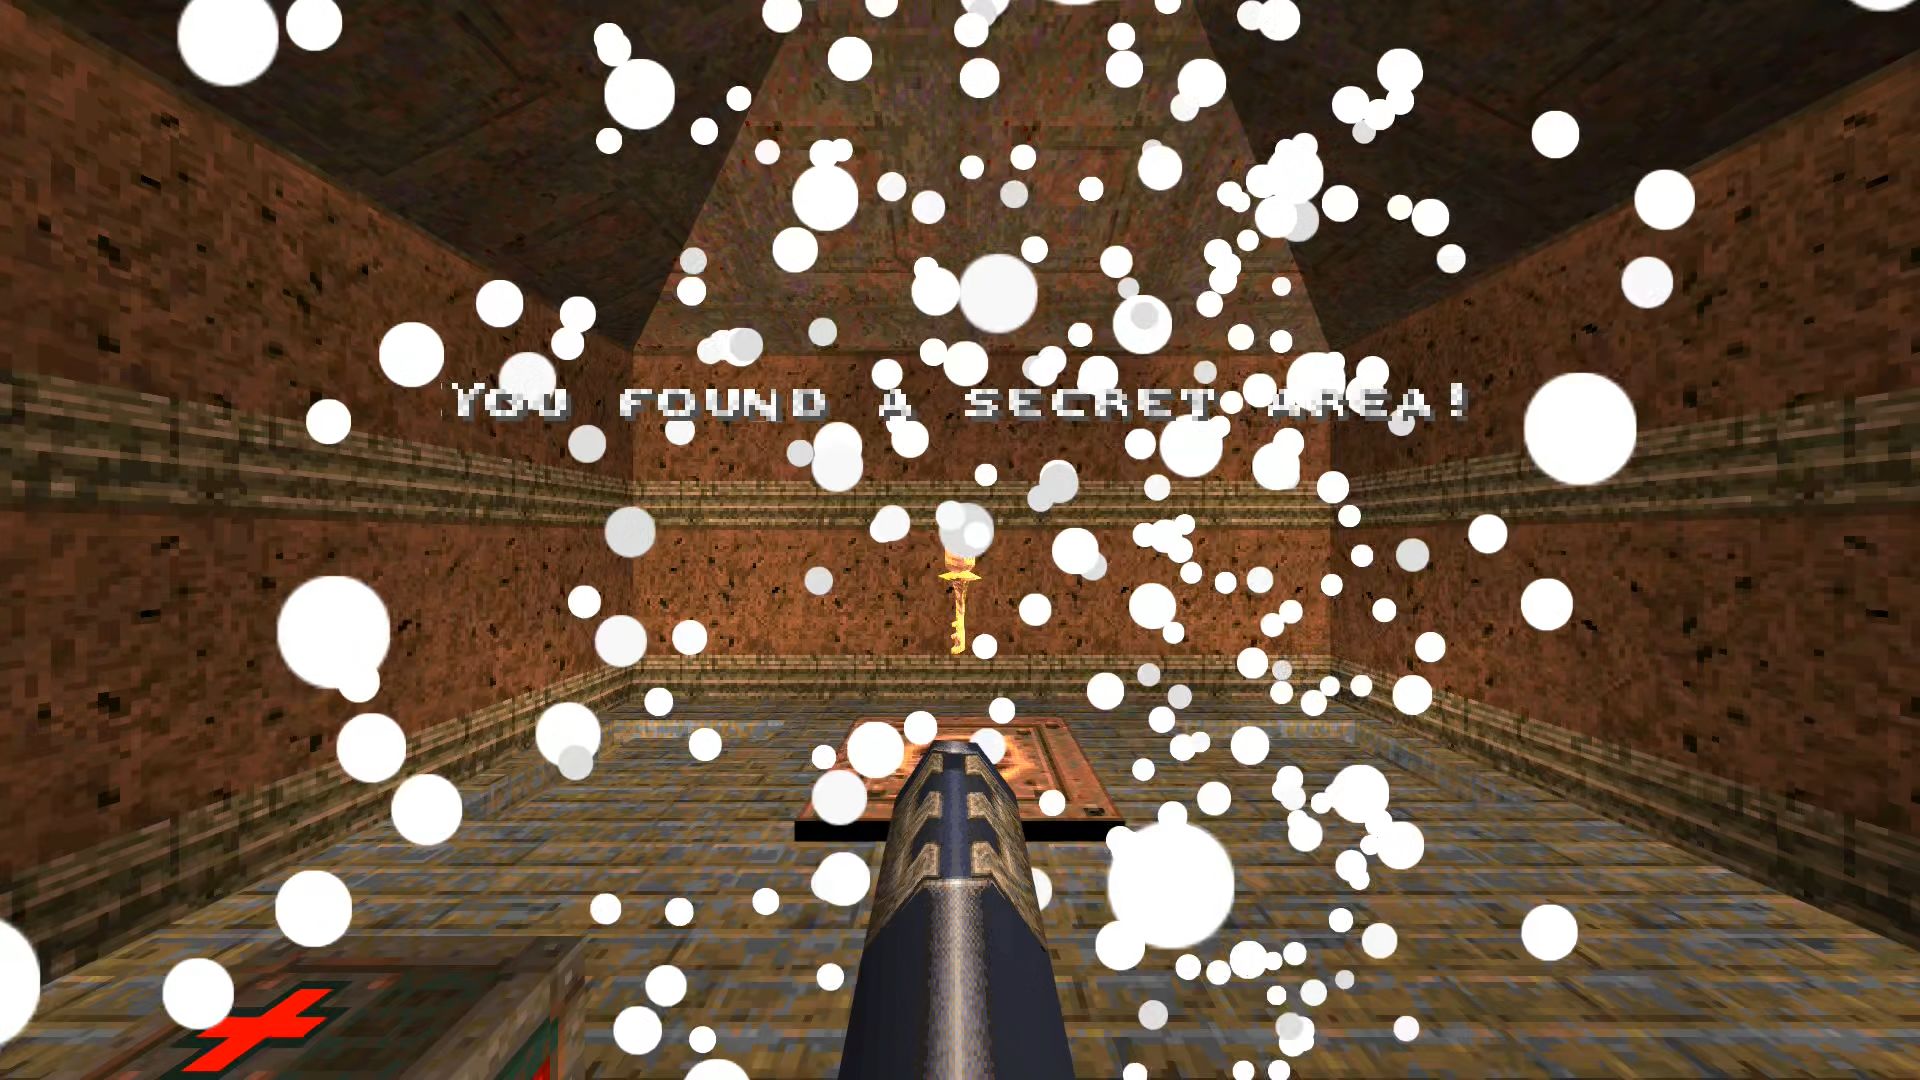
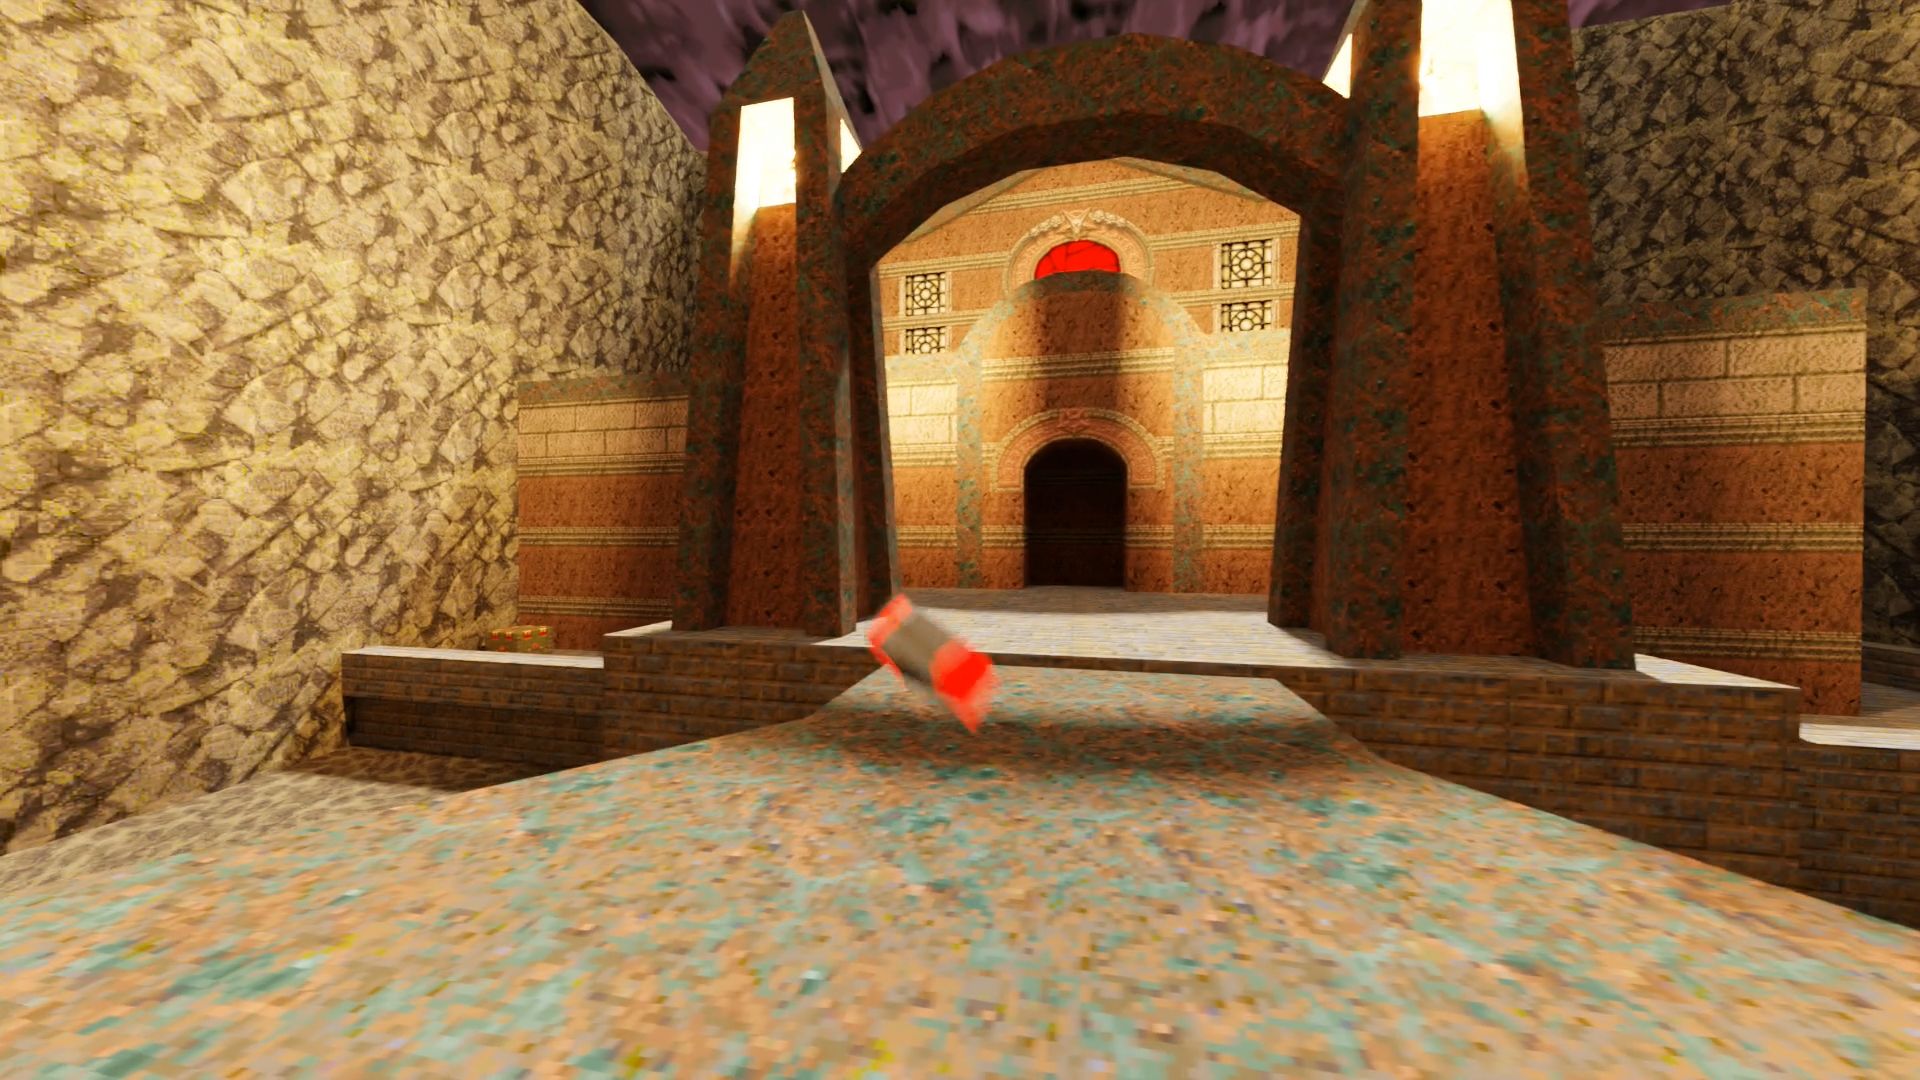
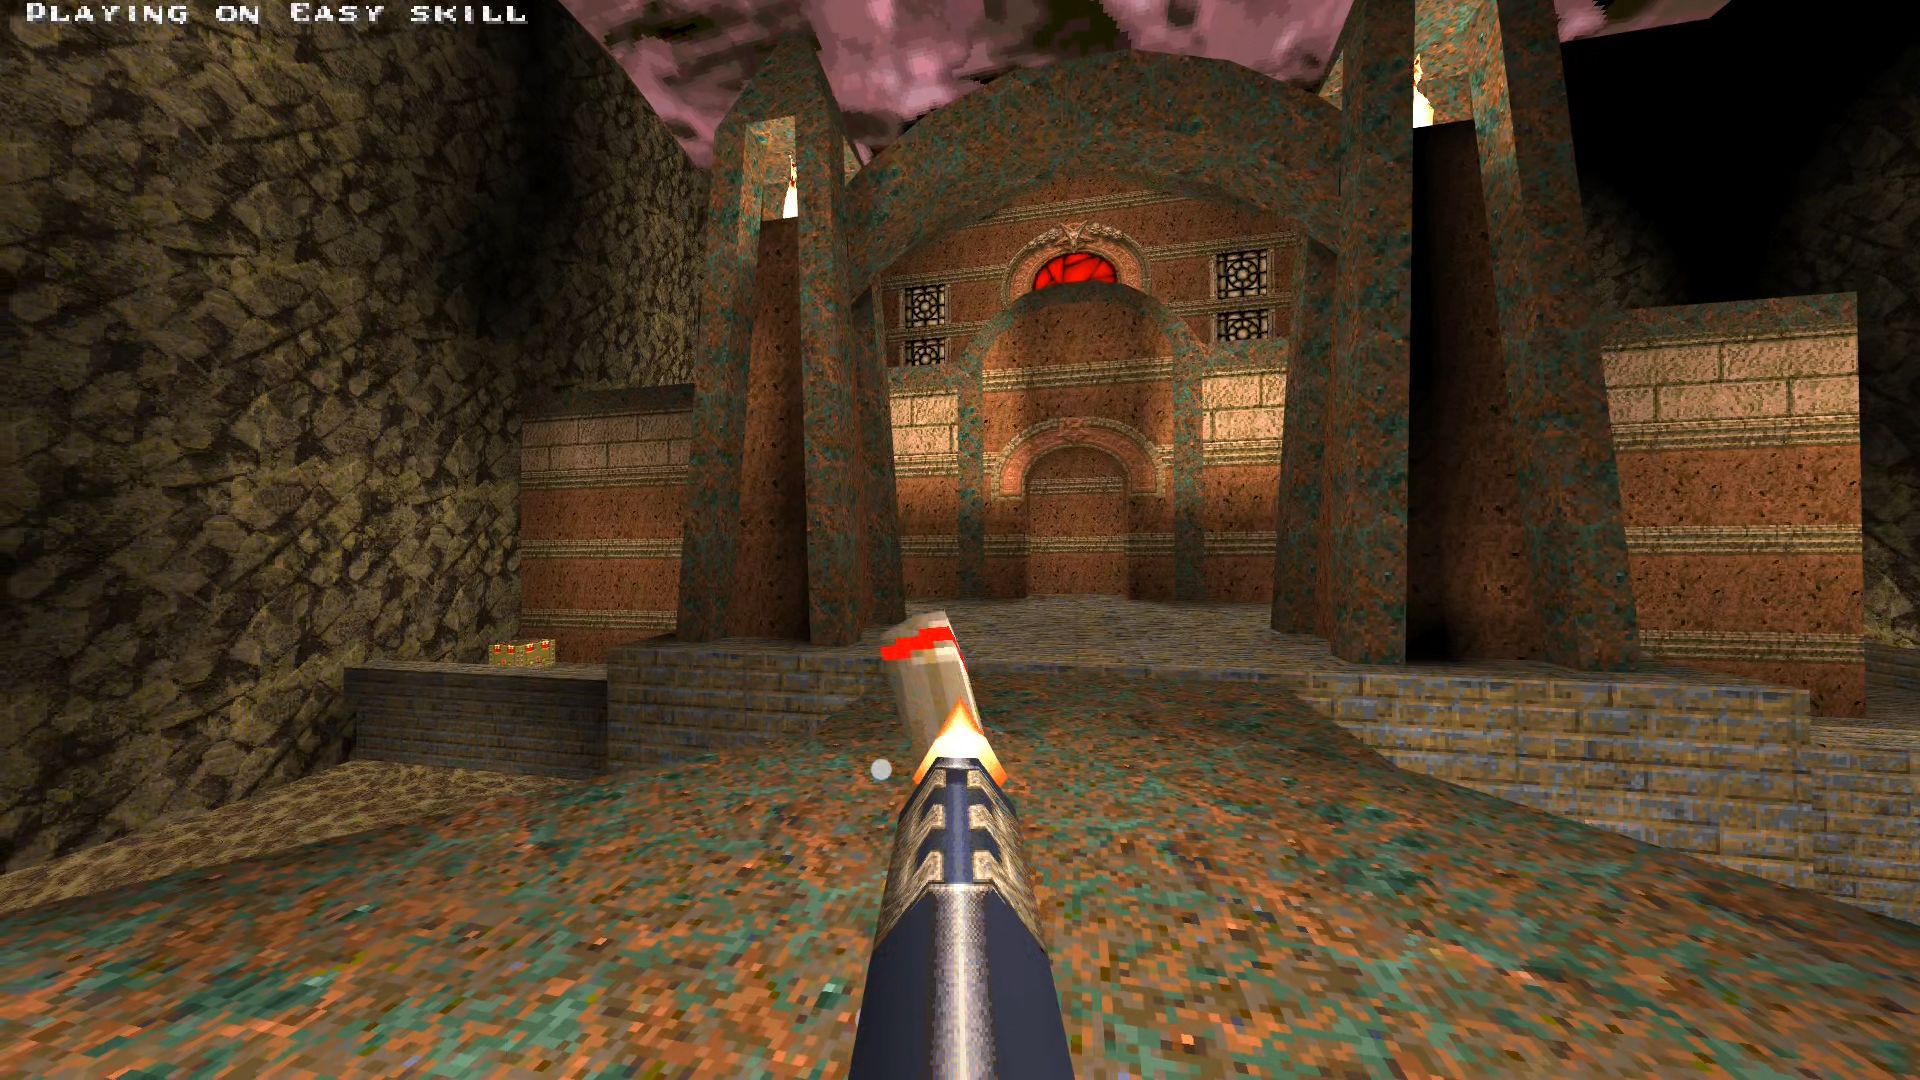
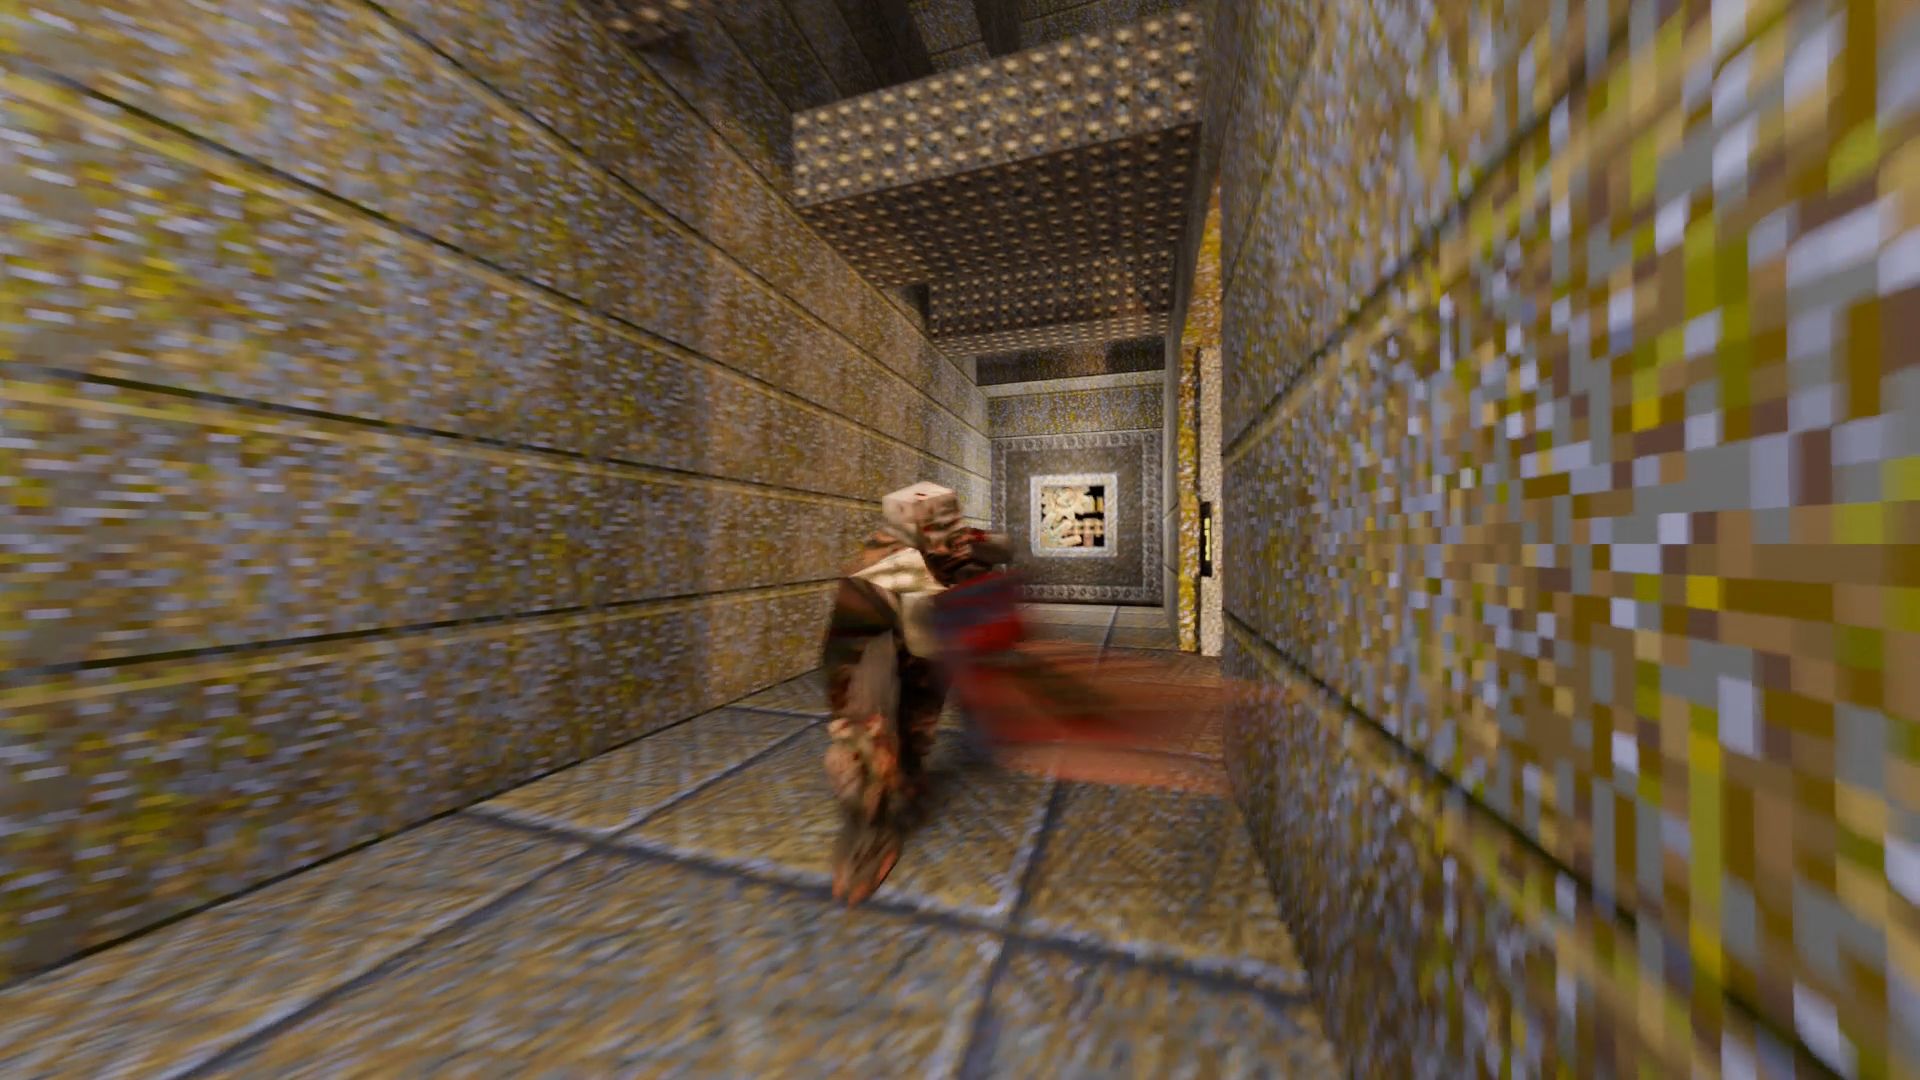
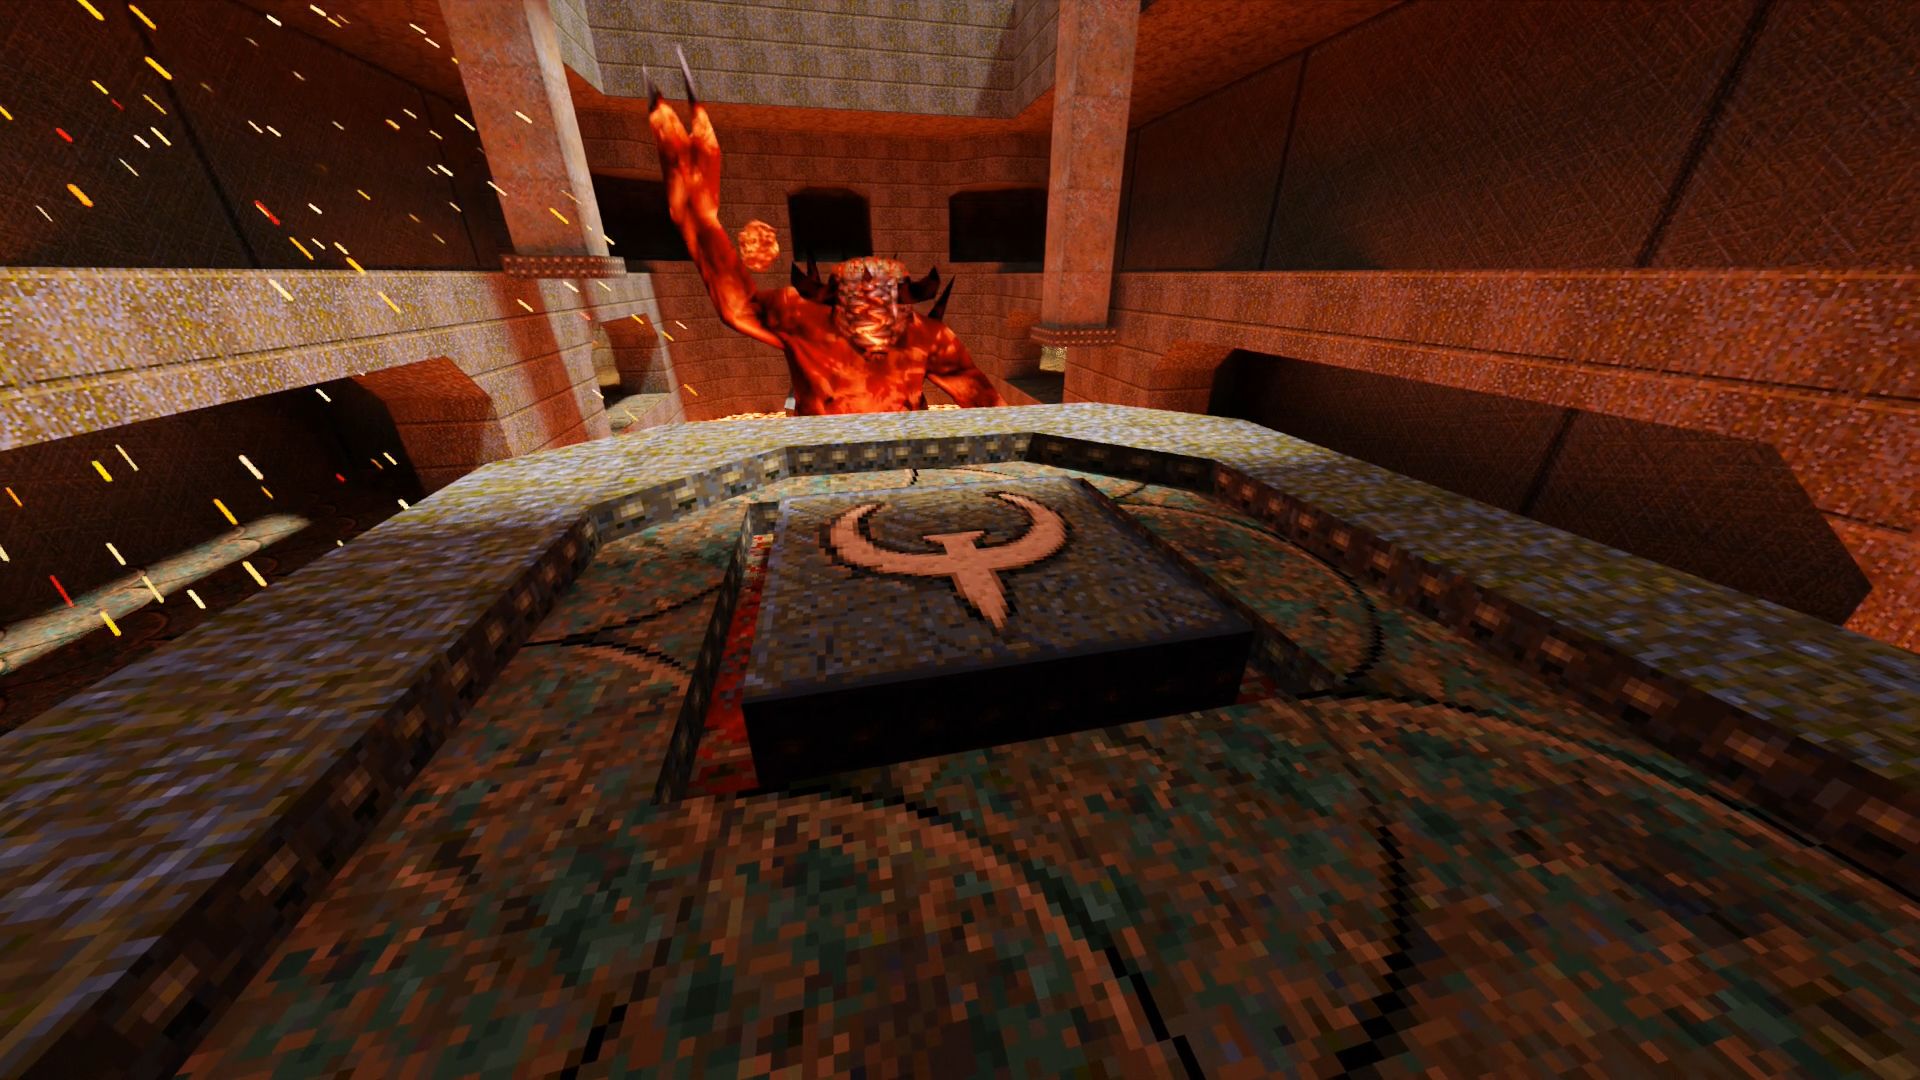
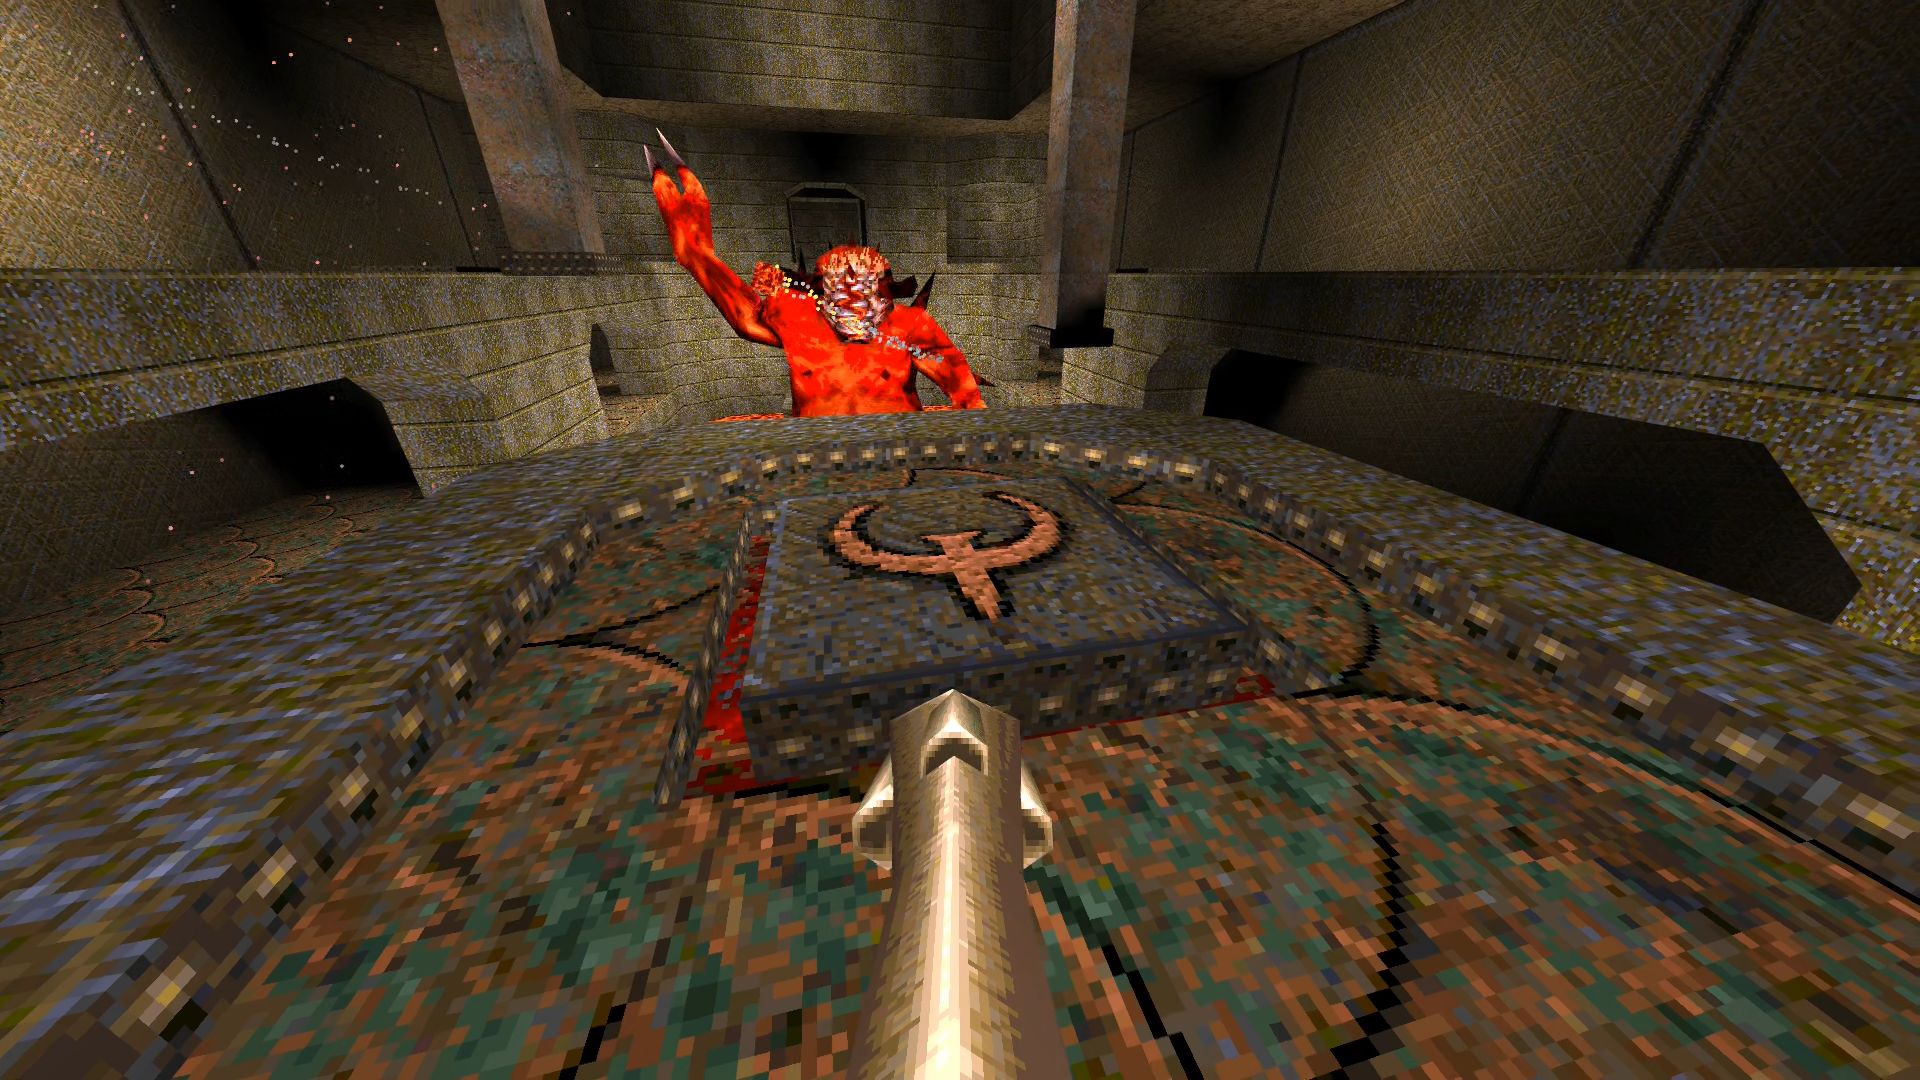
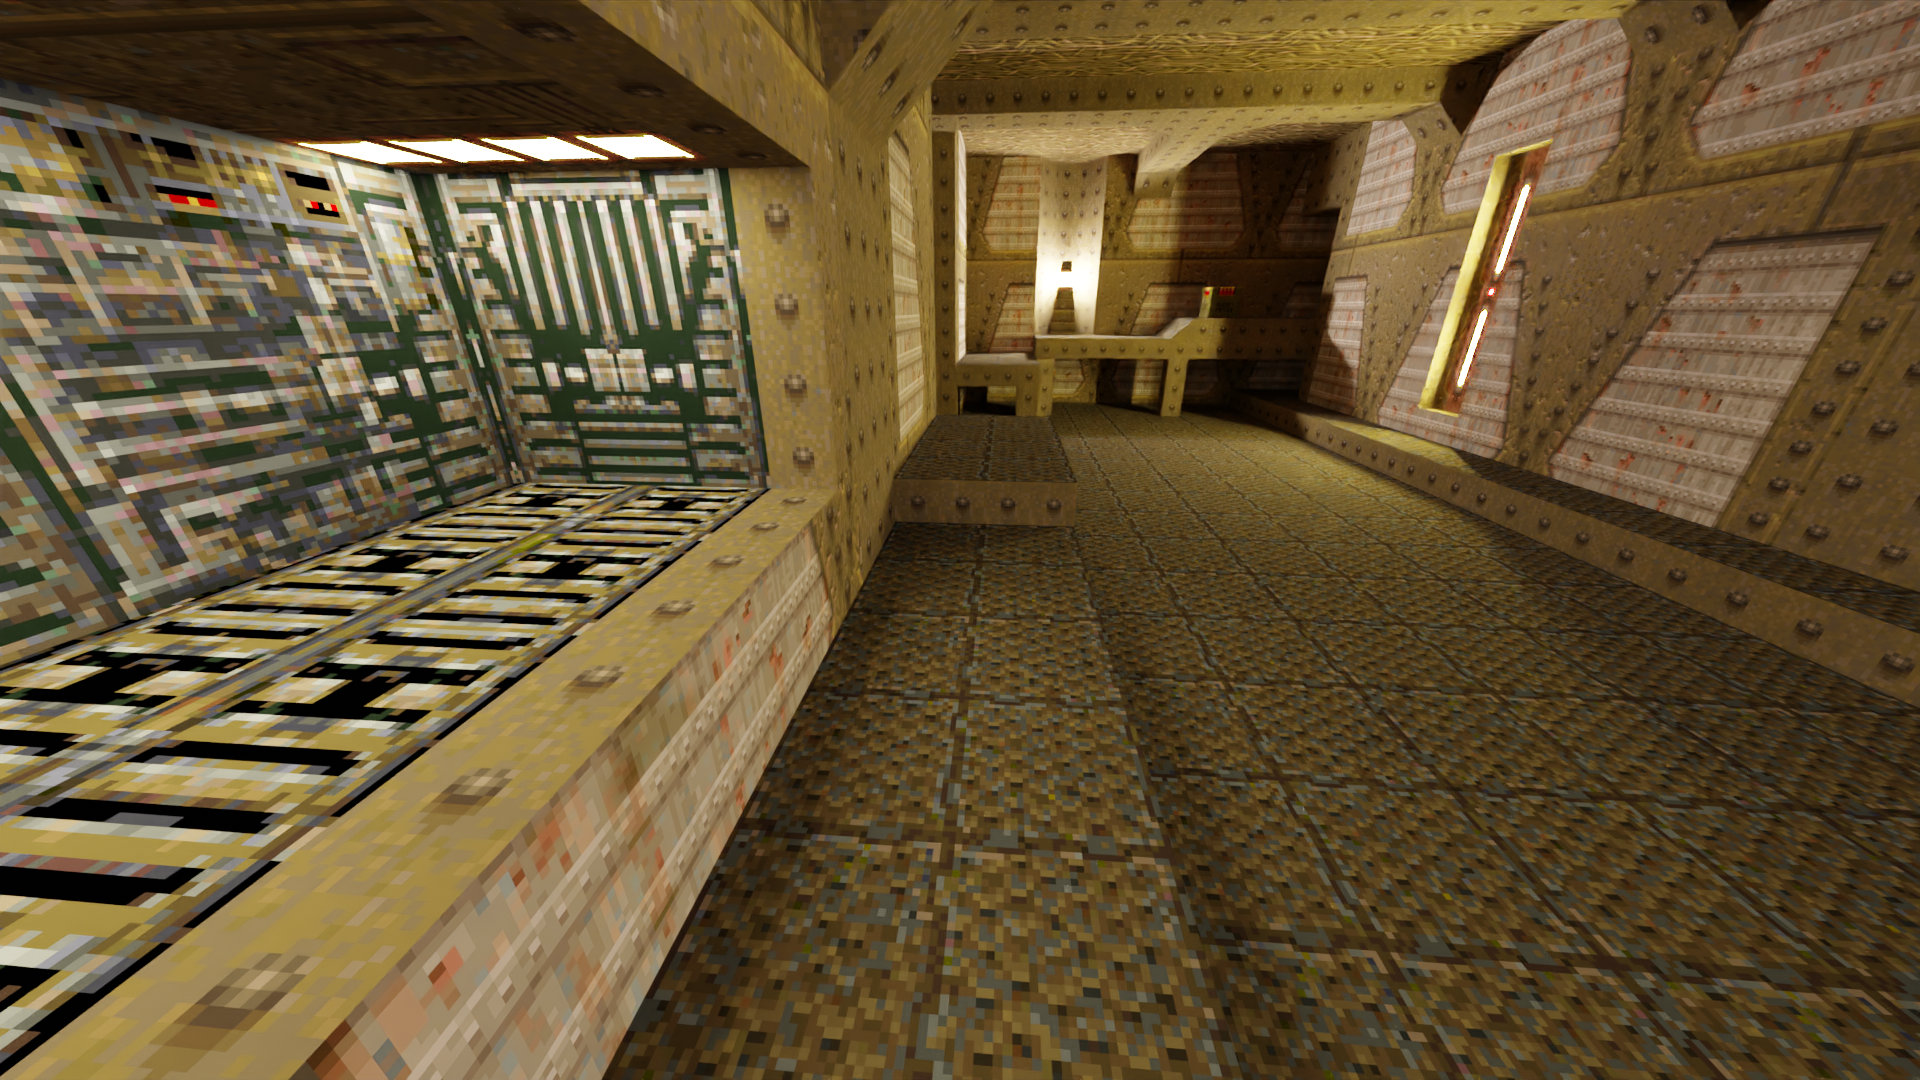
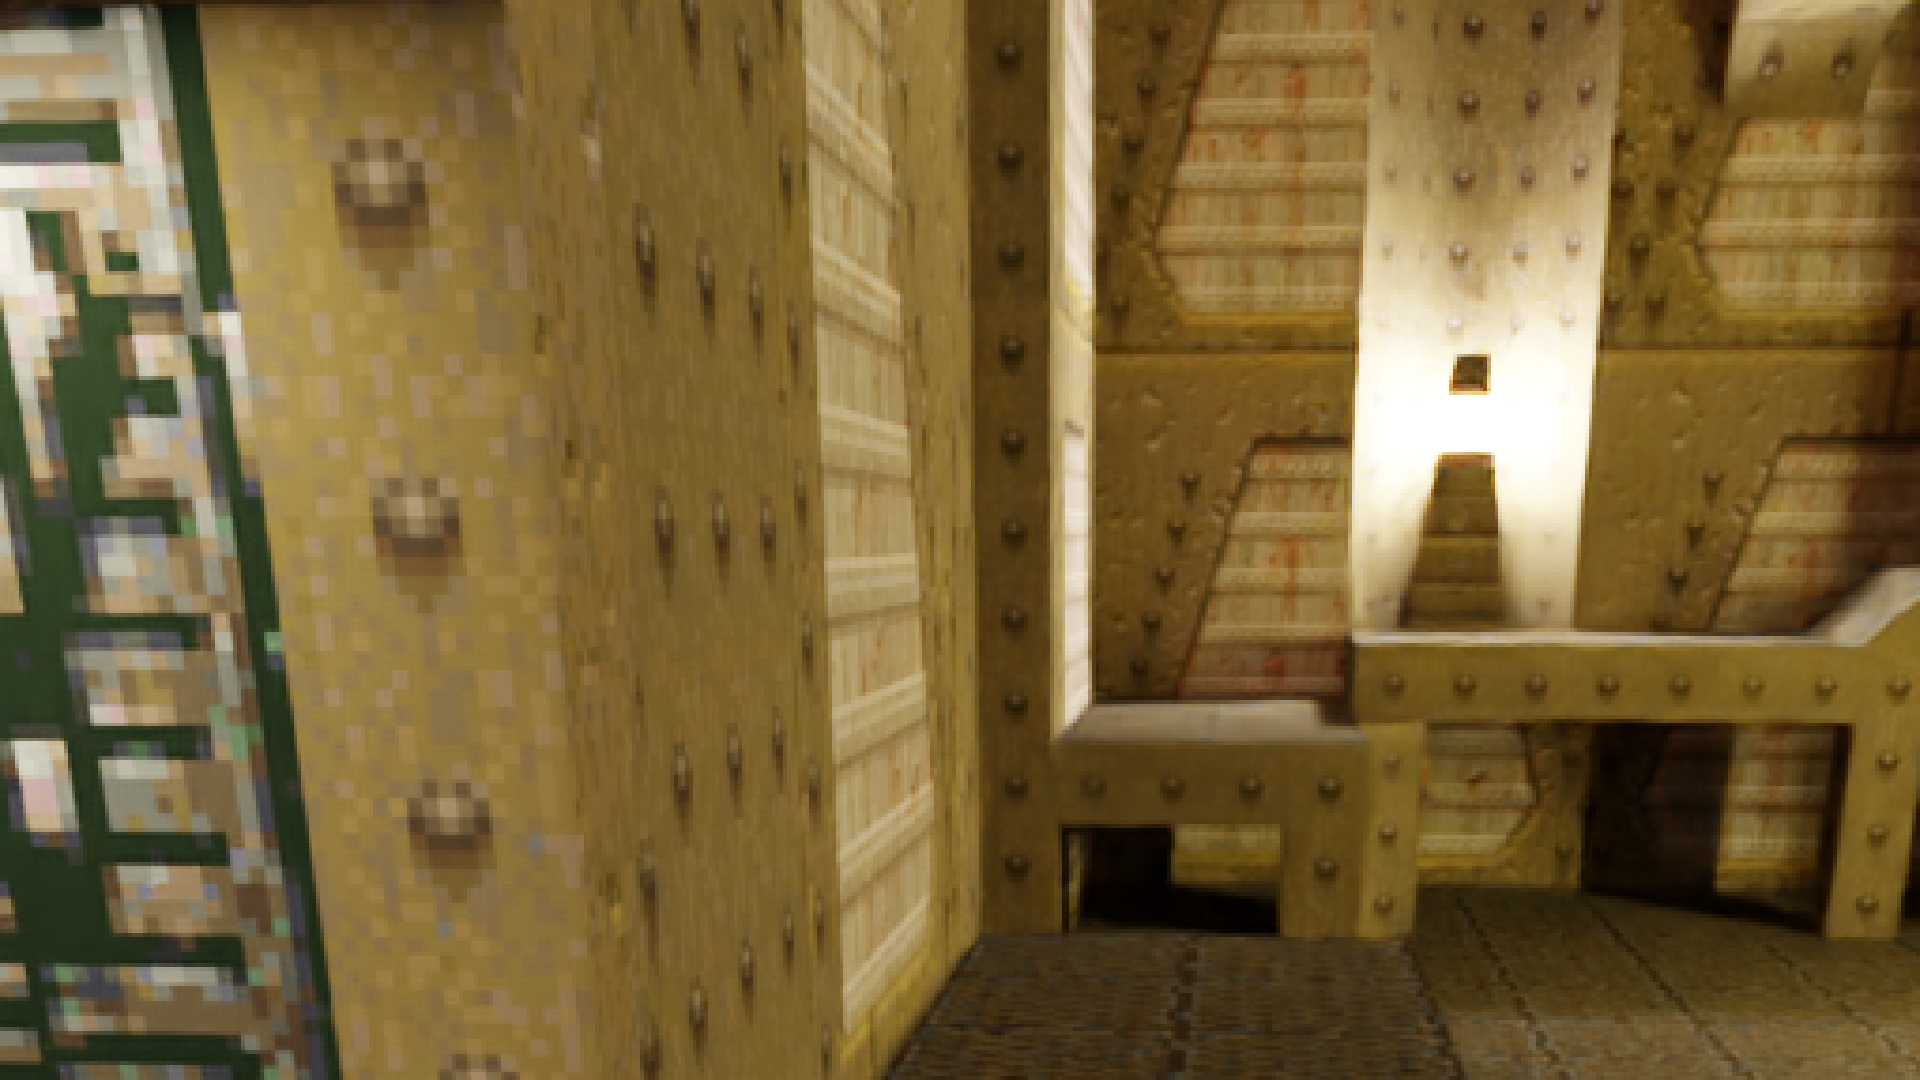
Quake rendered with Blender
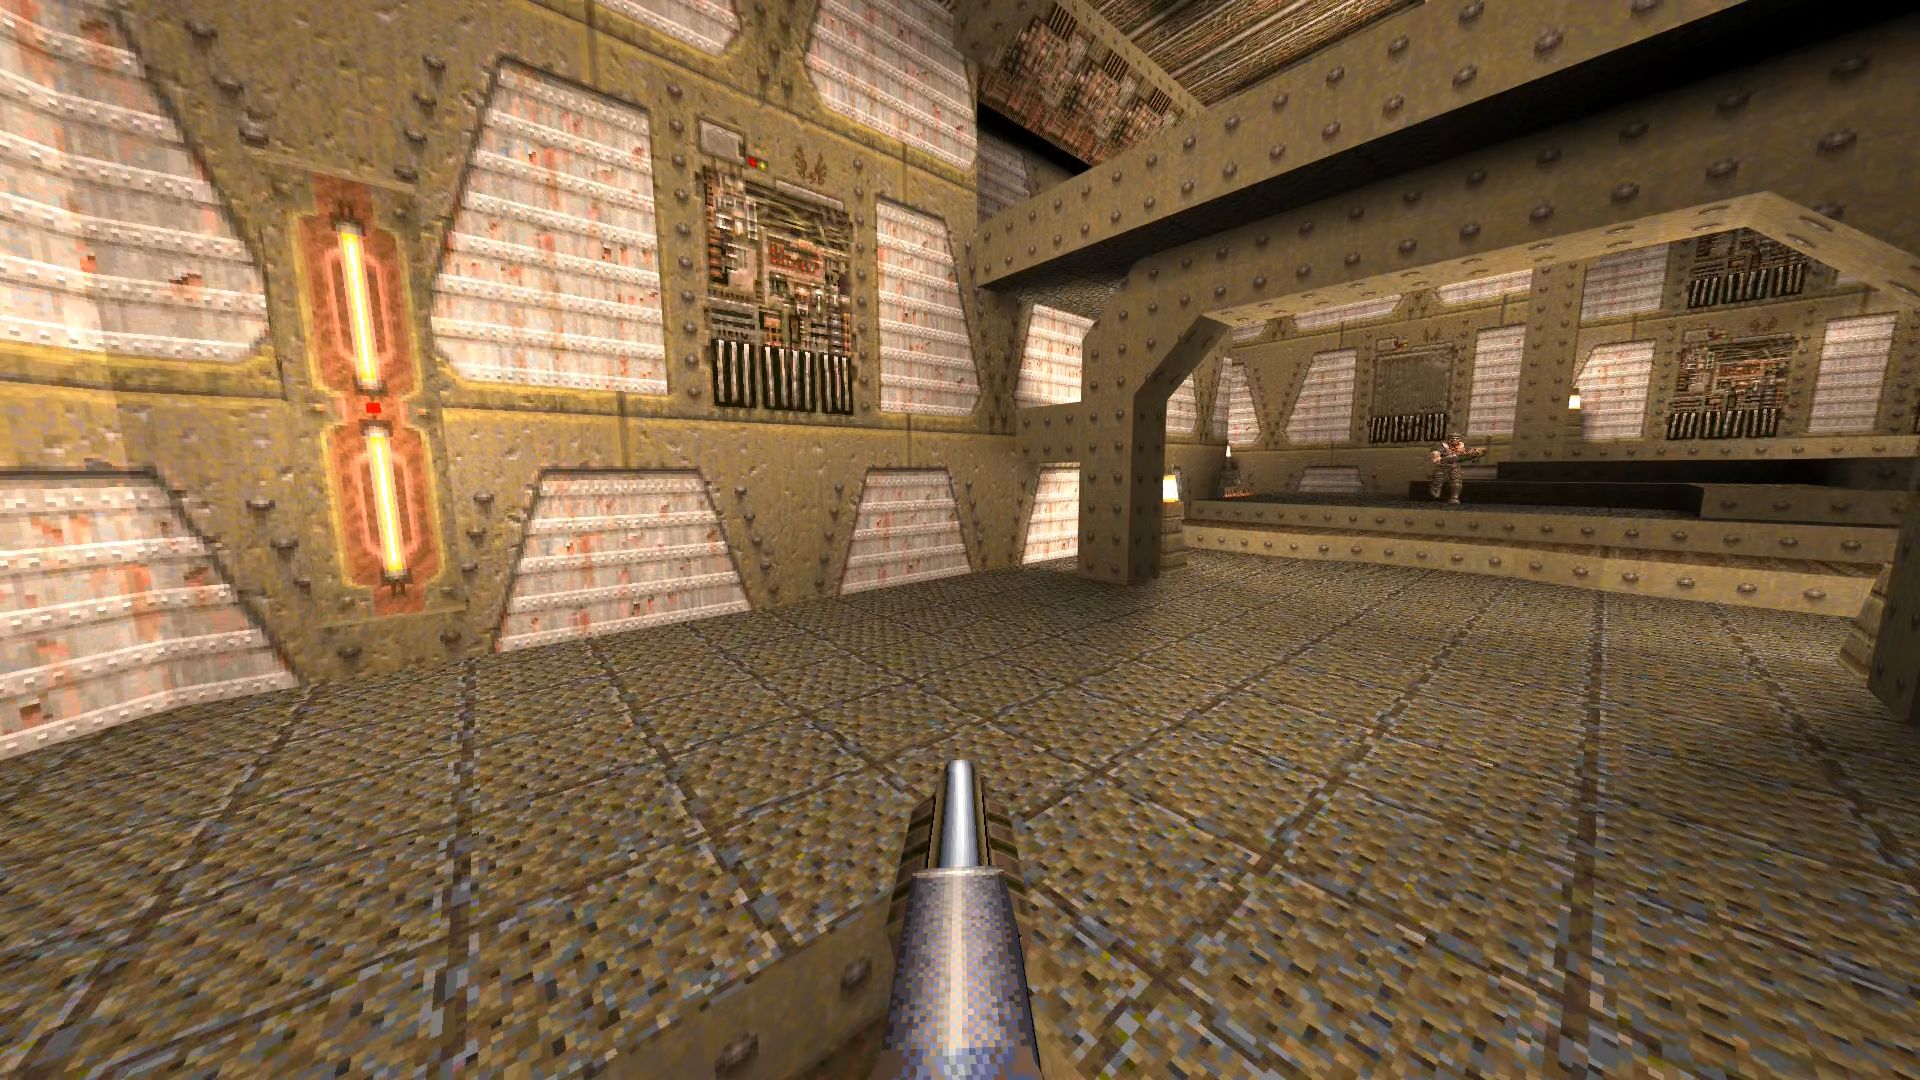
Screenshot from Quakespasm
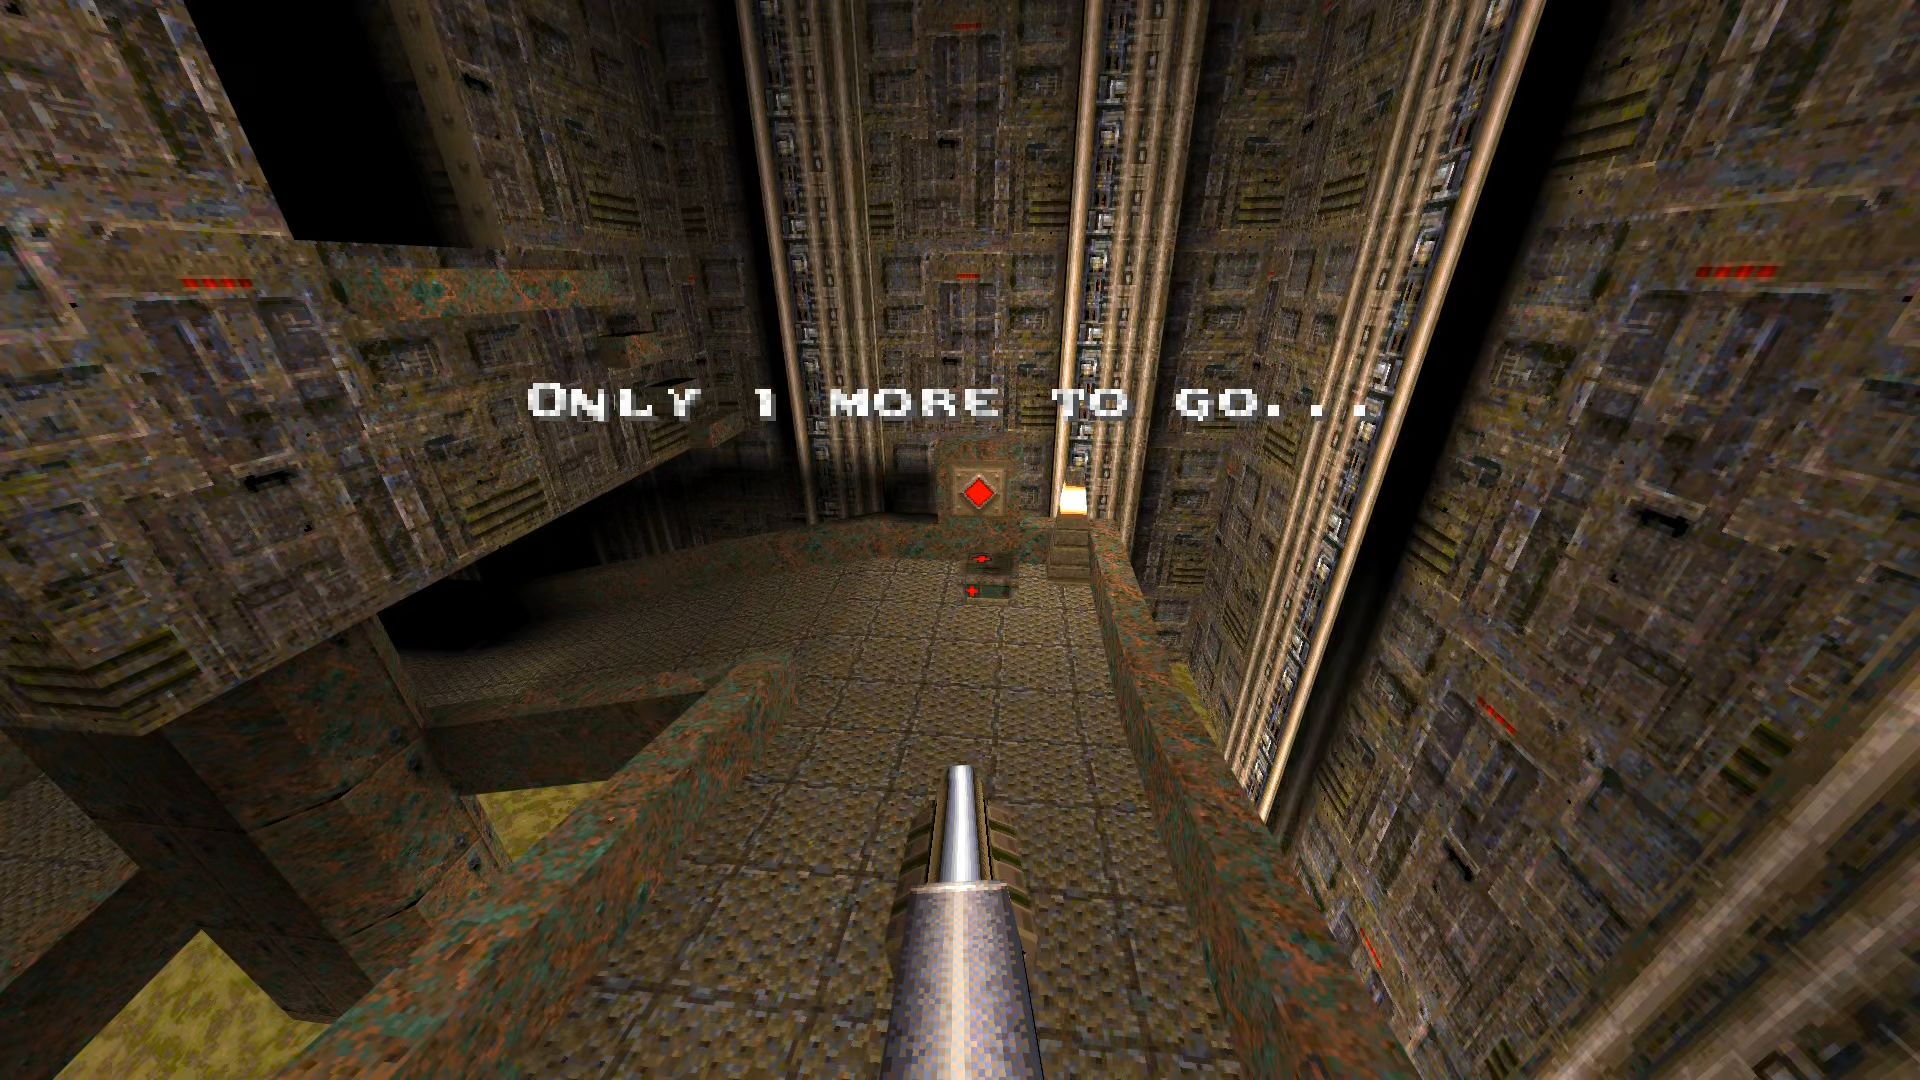
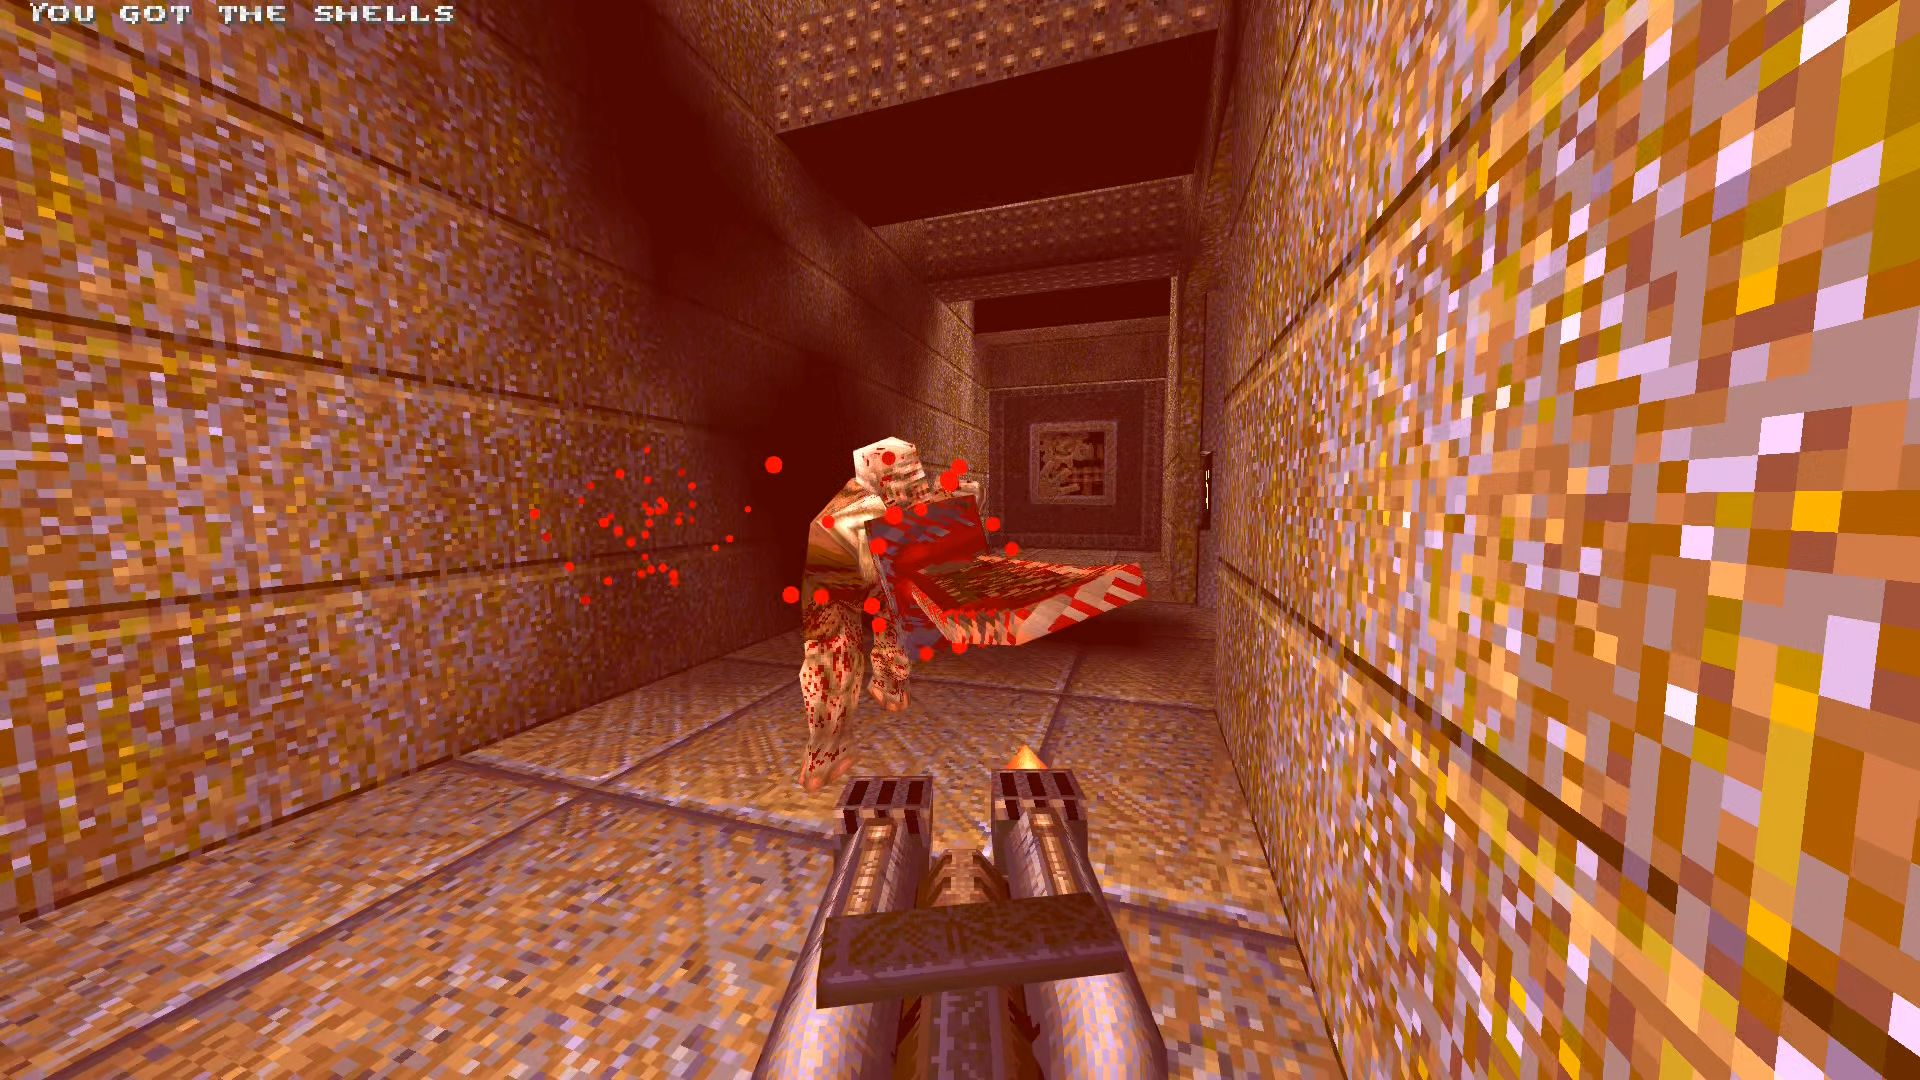
Quake rendered with Blender
Screenshot from Quakespasm
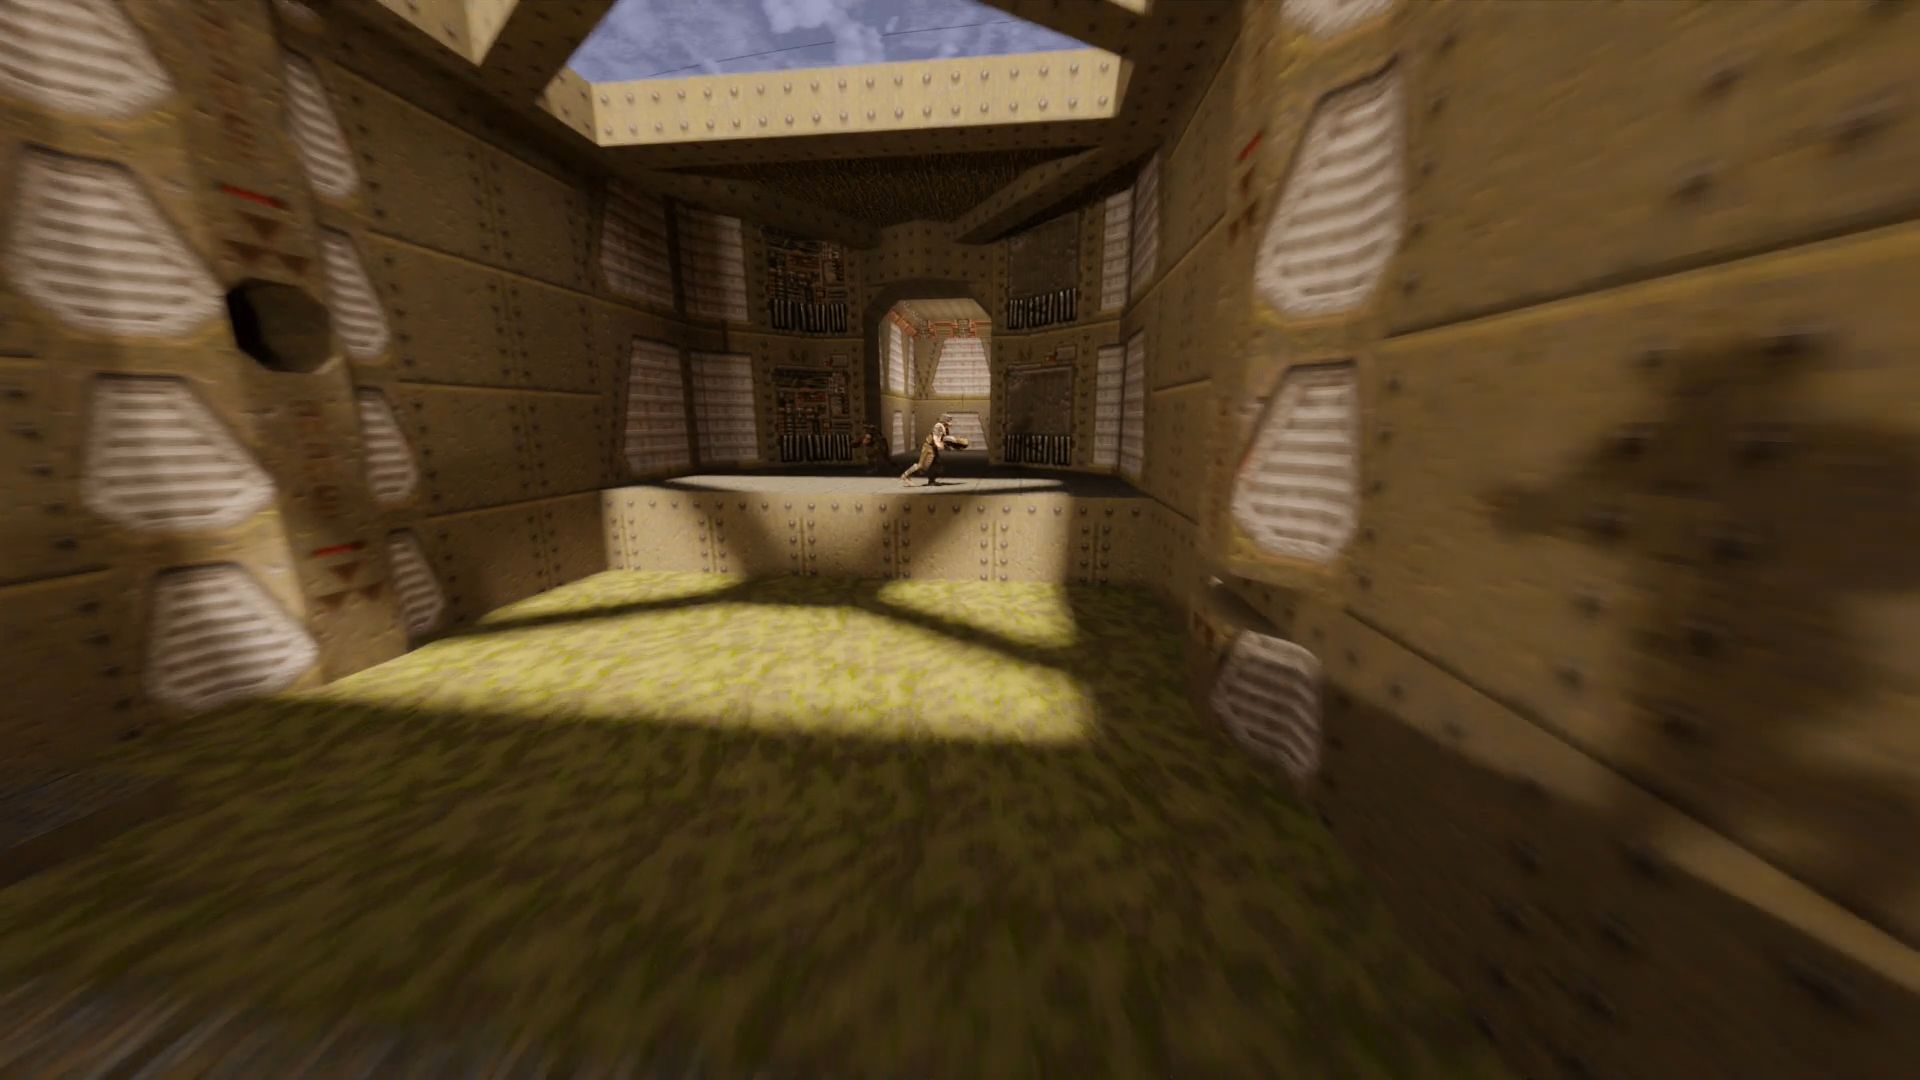
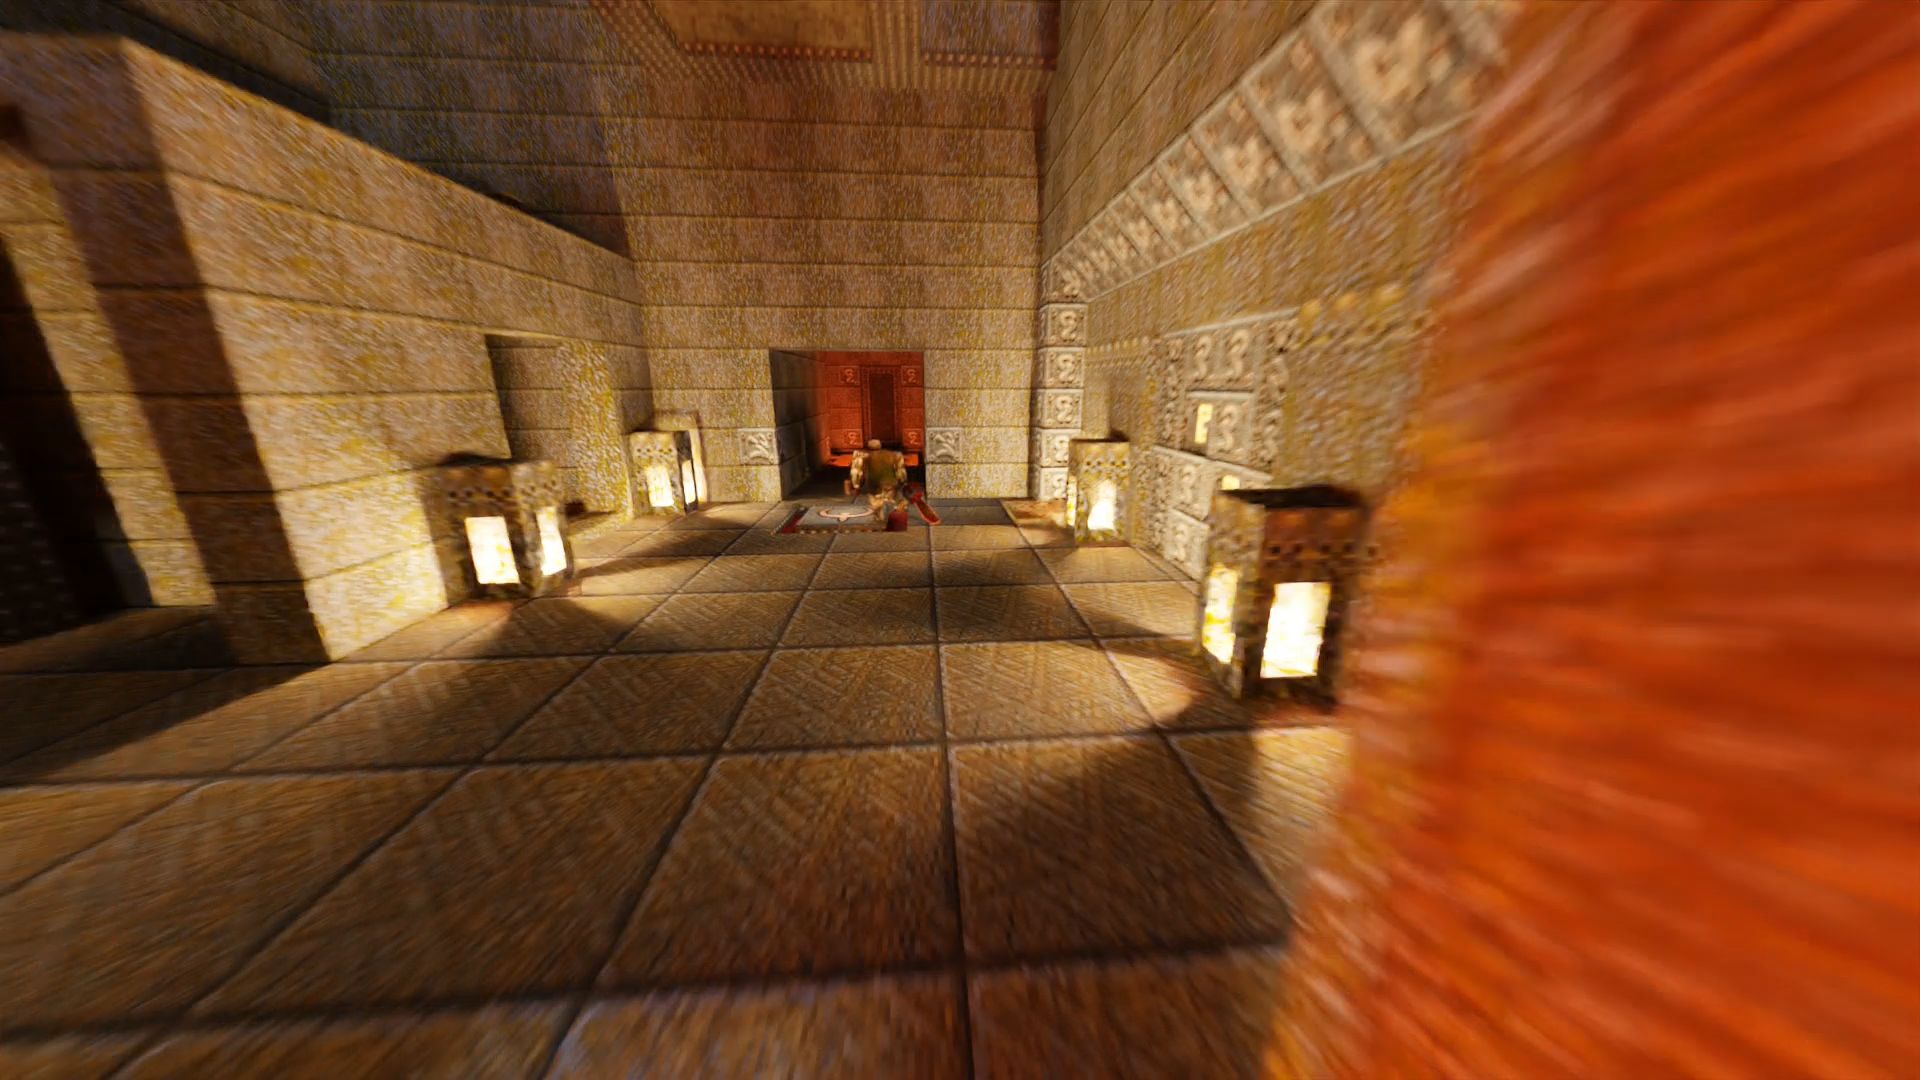
Quake rendered with Blender
Screenshot from Quakespasm
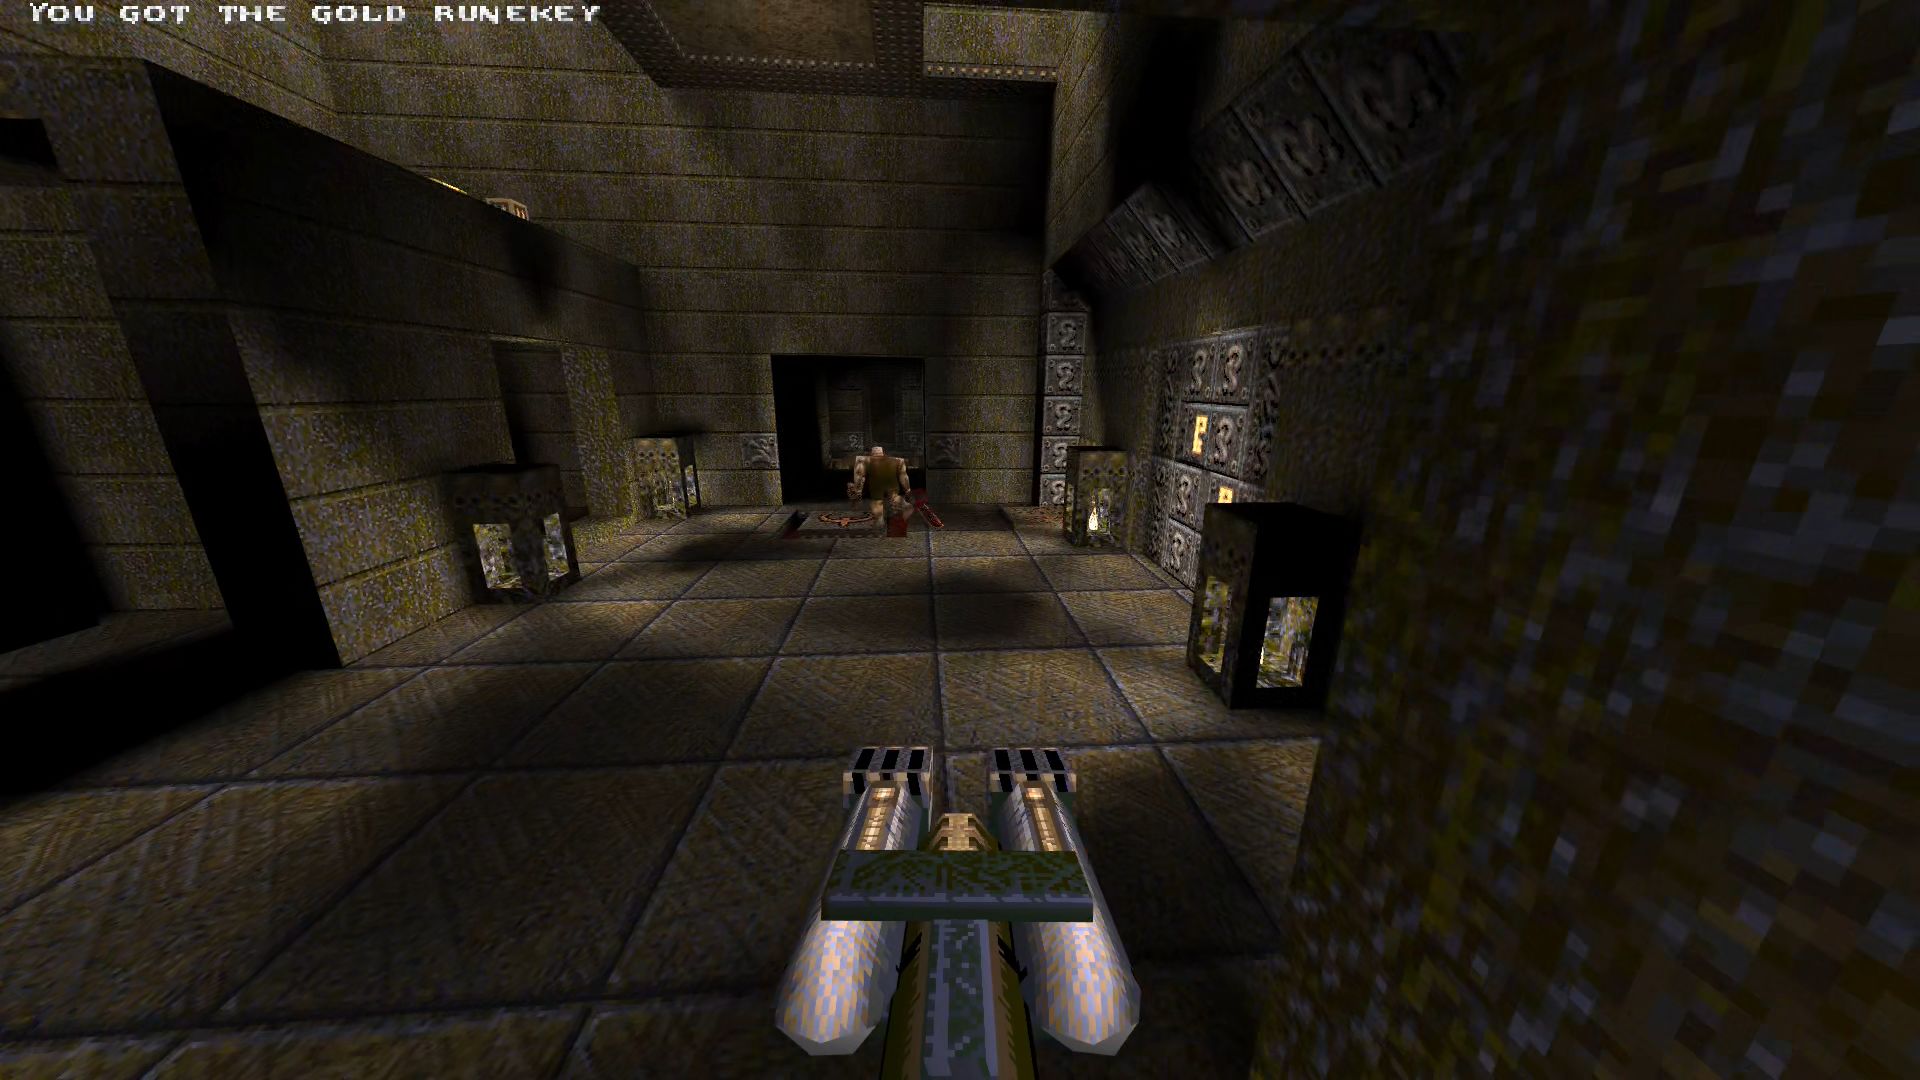
Quake rendered with Blender
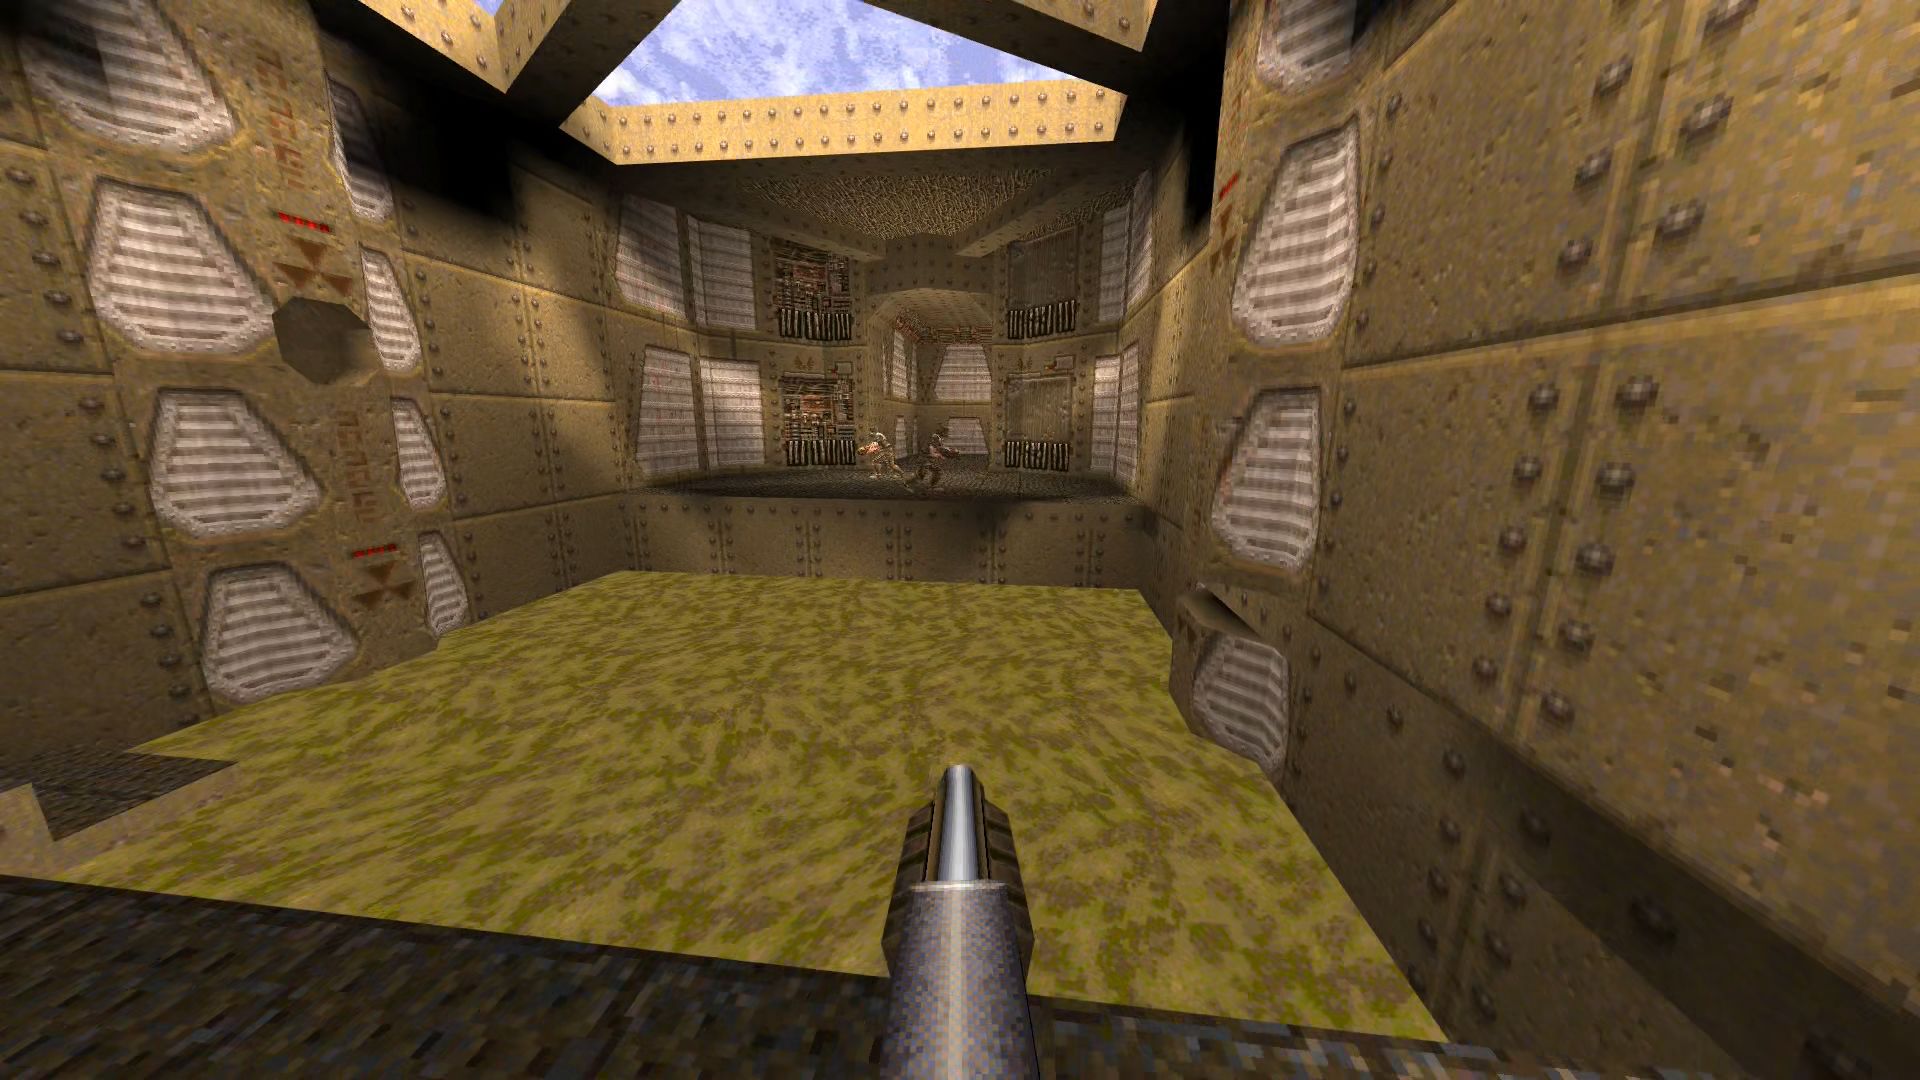
Screenshot from Quakespasm
Quake rendered with Blender
Screenshot from Quakespasm
Quake rendered with Blender
Screenshot from Quakespasm
Quake rendered with Blender
Screenshot from Quakespasm
Quake rendered with Blender
Screenshot from Quakespasm
Quake rendered with Blender
Screenshot from Quakespasm
Quake rendered with Blender
Screenshot from Quakespasm
Quake rendered with Blender
Screenshot from Quakespasm
Parsing demos
A demo file is a compact recording of a Quake game, for the purposes of sharing with other players, or for personal review. Being a multiplayer game, the game is split into client and server components. The demo is essentially a recording of the traffic that goes from server to client during the game. Given a demo, and an installation of Quake, it is then possible to reproduce exactly what the player saw at the time of recording:
Illustration of recording a demo. The client (right) communicates with the server (left). Traffic received by the client is recorded to the demo file..
Note that even in single player mode, there are still client and server components in the code, with the network layer replaced by a simple memory transfer, which means demos can be recorded in this setting too.
Since the demo file format is closely related to the Quake protocol, it can be understood by reading the appropriate layer of Quake’s networking code. It is then relatively straightforward, if a little laborious, to write a parser for the demo file format in Python.
When parsed, the demo file can be read a little like a script for a play. The initial commands set the scene, telling us which assets — the level, models, and sounds — will be used throughout the demo:
ServerMessagePrint(string='\x02\nVERSION 1.09 SERVER (5336 CRC)')
ServerMessageServerInfo(
    protocol=Protocol(version=<ProtocolVersion.NETQUAKE: 15>,
                      flags=<ProtocolFlags.0: 0>),
    max_clients=1, game_type=0, level_name='the Slipgate Complex',
    models=['maps/e1m1.bsp', '*1', '*2', '*3', '*4', '*5', '*6', '*7', '*8',
            '*9', '*10', '*11', '*12', '*13', '*14', '*15', '*16', '*17', '*18',
            '*19', '*20', '*21', '*22', '*23', '*24', '*25', '*26', '*27',
            '*28', '*29', '*30', '*31', '*32', '*33', '*34', '*35', '*36',
            '*37', '*38', '*39', '*40', '*41', '*42', '*43', '*44', '*45',
            '*46', '*47', '*48', '*49', '*50', '*51', '*52', '*53', '*54',
            '*55', '*56', '*57', 'progs/player.mdl', 'progs/eyes.mdl',
            'progs/h_player.mdl', 'progs/gib1.mdl', 'progs/gib2.mdl',
            'progs/gib3.mdl', 'progs/s_bubble.spr', 'progs/s_explod.spr',
            'progs/v_axe.mdl', 'progs/v_shot.mdl', 'progs/v_nail.mdl',
            'progs/v_rock.mdl', 'progs/v_shot2.mdl', 'progs/v_nail2.mdl',
            'progs/v_rock2.mdl', 'progs/bolt.mdl', 'progs/bolt2.mdl',
            'progs/bolt3.mdl', 'progs/lavaball.mdl', 'progs/missile.mdl',
            'progs/grenade.mdl', 'progs/spike.mdl', 'progs/s_spike.mdl',
            'progs/backpack.mdl', 'progs/zom_gib.mdl', 'progs/v_light.mdl',
            'progs/armor.mdl', 'progs/g_nail.mdl', 'progs/soldier.mdl',
            'progs/h_guard.mdl', 'maps/b_nail0.bsp', 'progs/quaddama.mdl',
            'maps/b_bh100.bsp', 'maps/b_shell0.bsp', 'maps/b_bh10.bsp',
            'maps/b_bh25.bsp', 'maps/b_nail1.bsp', 'progs/h_dog.mdl',
            'progs/dog.mdl', 'progs/suit.mdl', 'progs/g_shot.mdl',
            'maps/b_explob.bsp'], sounds=['weapons/r_exp3.wav',
            'weapons/rocket1i.wav', 'weapons/sgun1.wav', 'weapons/guncock.wav',
            'weapons/ric1.wav', 'weapons/ric2.wav', 'weapons/ric3.wav',
            'weapons/spike2.wav', 'weapons/tink1.wav', 'weapons/grenade.wav',
            'weapons/bounce.wav', 'weapons/shotgn2.wav', 'items/damage2.wav',
            'demon/dland2.wav', 'misc/h2ohit1.wav', 'items/itembk2.wav',
            'player/plyrjmp8.wav', 'player/land.wav', 'player/land2.wav',
            'player/drown1.wav', 'player/drown2.wav', 'player/gasp1.wav',
            'player/gasp2.wav', 'player/h2odeath.wav', 'misc/talk.wav',
            'player/teledth1.wav', 'misc/r_tele1.wav', 'misc/r_tele2.wav',
            'misc/r_tele3.wav', 'misc/r_tele4.wav', 'misc/r_tele5.wav',
            'weapons/lock4.wav', 'weapons/pkup.wav', 'items/armor1.wav',
            'weapons/lhit.wav', 'weapons/lstart.wav', 'items/damage3.wav',
            'misc/power.wav', 'player/gib.wav', 'player/udeath.wav',
            'player/tornoff2.wav', 'player/pain1.wav', 'player/pain2.wav',
            'player/pain3.wav', 'player/pain4.wav', 'player/pain5.wav',
            'player/pain6.wav', 'player/death1.wav', 'player/death2.wav',
            'player/death3.wav', 'player/death4.wav', 'player/death5.wav',
            'weapons/ax1.wav', 'player/axhit1.wav', 'player/axhit2.wav',
            'player/h2ojump.wav', 'player/slimbrn2.wav', 'player/inh2o.wav',
            'player/inlava.wav', 'misc/outwater.wav', 'player/lburn1.wav',
            'player/lburn2.wav', 'misc/water1.wav', 'misc/water2.wav',
            'ambience/buzz1.wav', 'doors/basetry.wav', 'doors/baseuse.wav',
            'doors/hydro1.wav', 'doors/hydro2.wav', 'misc/null.wav',
            'ambience/fl_hum1.wav', 'buttons/switch21.wav', 'plats/plat1.wav',
            'plats/plat2.wav', 'doors/stndr1.wav', 'doors/stndr2.wav',
            'doors/basesec1.wav', 'doors/basesec2.wav', 'misc/trigger1.wav',
            'soldier/death1.wav', 'soldier/idle.wav', 'soldier/pain1.wav',
            'soldier/pain2.wav', 'soldier/sattck1.wav', 'soldier/sight1.wav',
            'items/damage.wav', 'buttons/airbut1.wav', 'ambience/hum1.wav',
            'items/r_item2.wav', 'items/r_item1.wav', 'items/health1.wav',
            'doors/drclos4.wav', 'doors/doormv1.wav', 'dog/dattack1.wav',
            'dog/ddeath.wav', 'dog/dpain1.wav', 'dog/dsight.wav',
            'dog/idle.wav', 'items/suit.wav', 'items/suit2.wav',
            'misc/secret.wav', 'ambience/comp1.wav', 'ambience/drone6.wav'])
ServerMessageCdTrack(track=6, loop=6)
ServerMessageSetView(viewentity=1)
Next comes a series of baseline commands, which define a set of entities, each of which is associated with one of the aforementioned models, like a cast list in a play. Entities represent all objects in the game. An entity might be a monster, the player, a health pack, a lift, a button. Everything except for the static parts of the level:
ServerMessageSpawnBaseline(entity_num=0, model_num=1, frame=0, colormap=0, skin=0,
                           origin=(0.0, 0.0, 0.0), angles=(0.0, 0.0, 0.0))
ServerMessageSpawnBaseline(entity_num=1, model_num=59, frame=0, colormap=1, skin=0,
                           origin=(0.0, 0.0, 0.0), angles=(0.0, 0.0, 0.0))
ServerMessageSpawnBaseline(entity_num=8, model_num=2, frame=0, colormap=0, skin=0,
                           origin=(0.0, 0.0, 0.0), angles=(0.0, 0.0, 0.0))
ServerMessageSpawnBaseline(entity_num=9, model_num=3, frame=0, colormap=0, skin=0,
                           origin=(0.0, 0.0, 0.0), angles=(0.0, 0.0, 0.0))
ServerMessageSpawnBaseline(entity_num=11, model_num=85, frame=0, colormap=0, skin=0,
                           origin=(688.0, 480.0, 80.0), angles=(0.0, 0.0, 0.0))
ServerMessageSpawnBaseline(entity_num=12, model_num=4, frame=0, colormap=0, skin=0,
                           origin=(0.0, 0.0, 0.0), angles=(0.0, 0.0, 0.0))
ServerMessageSpawnBaseline(entity_num=13, model_num=5, frame=0, colormap=0, skin=0,
                           origin=(0.0, 0.0, 0.0), angles=(0.0, 0.0, 0.0))
ServerMessageSpawnBaseline(entity_num=14, model_num=6, frame=0, colormap=0, skin=0,
                           origin=(0.0, 0.0, 0.0), angles=(0.0, 0.0, 0.0))
ServerMessageSpawnBaseline(entity_num=15, model_num=7, frame=0, colormap=0, skin=0,
                           origin=(0.0, 0.0, 0.0), angles=(0.0, 0.0, 0.0))
ServerMessageSpawnBaseline(entity_num=22, model_num=8, frame=0, colormap=0, skin=0,
                           origin=(0.0, 0.0, -152.0), angles=(0.0, 0.0, 0.0))
ServerMessageSpawnBaseline(entity_num=24, model_num=9, frame=0, colormap=0, skin=0,
                           origin=(0.0, -240.0, 0.0), angles=(0.0, 0.0, 0.0))
ServerMessageSpawnBaseline(entity_num=25, model_num=10, frame=0, colormap=0, skin=0,
                           origin=(0.0, 0.0, 0.0), angles=(0.0, 0.0, 0.0))
ServerMessageSpawnBaseline(entity_num=31, model_num=86, frame=0, colormap=0, skin=0,
                           origin=(112.0, 2352.0, 16.0), angles=(0.0, 0.0, 0.0))
ServerMessageSpawnBaseline(entity_num=32, model_num=11, frame=0, colormap=0, skin=0,
                           origin=(0.0, 0.0, 0.0), angles=(0.0, 0.0, 0.0))
ServerMessageSpawnBaseline(entity_num=34, model_num=87, frame=0, colormap=0, skin=0,
                           origin=(248.0, 2392.0, 40.0), angles=(0.0, 3.141592653589793, 0.0))
ServerMessageSpawnBaseline(entity_num=35, model_num=89, frame=0, colormap=0, skin=0,
                           origin=(272.0, 2352.0, 64.0), angles=(0.0, 0.0, 0.0))
ServerMessageSpawnBaseline(entity_num=41, model_num=14, frame=0, colormap=0, skin=0,
                           origin=(0.0, 0.0, 0.0), angles=(0.0, 0.0, 0.0))
ServerMessageSpawnBaseline(entity_num=42, model_num=15, frame=0, colormap=0, skin=0,
                           origin=(0.0, 0.0, 0.0), angles=(0.0, 0.0, 0.0))
ServerMessageSpawnBaseline(entity_num=43, model_num=16, frame=0, colormap=0, skin=0,
                           origin=(0.0, 0.0, -66.0), angles=(0.0, 0.0, 0.0))
ServerMessageSpawnBaseline(entity_num=45, model_num=18, frame=0, colormap=0, skin=0,
                           origin=(0.0, 0.0, 0.0), angles=(0.0, 0.0, 0.0))
ServerMessageSpawnBaseline(entity_num=47, model_num=90, frame=0, colormap=0, skin=0,
                           origin=(544.0, 2480.0, -87.875), angles=(0.0, 0.0, 0.0))
ServerMessageSpawnBaseline(entity_num=48, model_num=20, frame=0, colormap=0, skin=0,
                           origin=(0.0, 0.0, 0.0), angles=(0.0, 0.0, 0.0))
ServerMessageSpawnBaseline(entity_num=50, model_num=22, frame=0, colormap=0, skin=0,
                           origin=(0.0, 0.0, 0.0), angles=(0.0, 0.0, 0.0))
ServerMessageSpawnBaseline(entity_num=51, model_num=23, frame=0, colormap=0, skin=0,
                           origin=(0.0, 0.0, -400.0), angles=(0.0, 0.0, 0.0))
ServerMessageSpawnBaseline(entity_num=53, model_num=24, frame=0, colormap=0, skin=0,
                           origin=(0.0, 0.0, 0.0), angles=(0.0, 0.0, 0.0))
ServerMessageSpawnBaseline(entity_num=55, model_num=91, frame=0, colormap=0, skin=0,
                           origin=(944.0, 1008.0, -271.875), angles=(0.0, 0.0, 0.0))
ServerMessageSpawnBaseline(entity_num=57, model_num=92, frame=0, colormap=0, skin=0,
                           origin=(296.0, 2136.0, -191.875), angles=(0.0, 0.0, 0.0))
ServerMessageSpawnBaseline(entity_num=58, model_num=93, frame=0, colormap=0, skin=0,
                           origin=(1424.0, 904.0, -431.875), angles=(0.0, 0.0, 0.0))
ServerMessageSpawnBaseline(entity_num=59, model_num=94, frame=0, colormap=0, skin=0,
                           origin=(1376.0, 808.0, -431.875), angles=(0.0, 0.0, 0.0))
ServerMessageSpawnBaseline(entity_num=60, model_num=94, frame=0, colormap=0, skin=0,
                           origin=(1176.0, 936.0, -431.875), angles=(0.0, 0.0, 0.0))
ServerMessageSpawnBaseline(entity_num=61, model_num=26, frame=0, colormap=0, skin=0,
                           origin=(0.0, 0.0, 0.0), angles=(0.0, 0.0, 0.0))
ServerMessageSpawnBaseline(entity_num=62, model_num=27, frame=0, colormap=0, skin=0,
                           origin=(0.0, 0.0, 0.0), angles=(0.0, 0.0, 0.0))
ServerMessageSpawnBaseline(entity_num=63, model_num=28, frame=0, colormap=0, skin=0,
                           origin=(0.0, 0.0, 0.0), angles=(0.0, 0.0, 0.0))
ServerMessageSpawnBaseline(entity_num=65, model_num=30, frame=0, colormap=0, skin=0,
                           origin=(0.0, 0.0, 0.0), angles=(0.0, 0.0, 0.0))
ServerMessageSpawnBaseline(entity_num=70, model_num=35, frame=0, colormap=0, skin=0,
                           origin=(0.0, 0.0, -16.0), angles=(0.0, 0.0, 0.0))
ServerMessageSpawnBaseline(entity_num=71, model_num=36, frame=0, colormap=0, skin=0,
                           origin=(0.0, 0.0, -16.0), angles=(0.0, 0.0, 0.0))
ServerMessageSpawnBaseline(entity_num=72, model_num=37, frame=0, colormap=0, skin=0,
                           origin=(0.0, 0.0, -16.0), angles=(0.0, 0.0, 0.0))
ServerMessageSpawnBaseline(entity_num=73, model_num=38, frame=0, colormap=0, skin=0,
                           origin=(0.0, 0.0, -16.0), angles=(0.0, 0.0, 0.0))
ServerMessageSpawnBaseline(entity_num=75, model_num=95, frame=0, colormap=0, skin=0,
                           origin=(1376.0, 1024.0, -279.875), angles=(0.0, 0.0, 0.0))
ServerMessageSpawnBaseline(entity_num=76, model_num=94, frame=0, colormap=0, skin=0,

ServerMessageSpawnBaseline(entity_num=78, model_num=93, frame=0, colormap=0, skin=0,
                           origin=(1256.0, 1704.0, -431.875), angles=(0.0, 0.0, 0.0))
ServerMessageSpawnBaseline(entity_num=83, model_num=39, frame=0, colormap=0, skin=0,
                           origin=(0.0, 0.0, 0.0), angles=(0.0, 0.0, 0.0))
ServerMessageSpawnBaseline(entity_num=85, model_num=94, frame=0, colormap=0, skin=0,
                           origin=(328.0, 848.0, -223.875), angles=(0.0, 0.0, 0.0))
ServerMessageSpawnBaseline(entity_num=86, model_num=94, frame=0, colormap=0, skin=0,
                           origin=(344.0, 920.0, -223.875), angles=(0.0, 0.0, 0.0))
ServerMessageSpawnBaseline(entity_num=87, model_num=93, frame=0, colormap=0, skin=0,
                           origin=(-16.0, 2064.0, -207.875), angles=(0.0, 0.0, 0.0))

...
Finally, a series of update and time commands provides the entities’ position, angle, and pose at the given time; in the play analogy, this is like a series of stage directions:
ServerMessageTime(time=1.4415020942687988)
ServerMessageClientData(
	view_height=22, ideal_pitch=0, punch_angles=(0, 0, 0), m_velocity=(0, 0, -32),
	items=<ItemFlags.SIGIL4|AXE|SHELLS|SHOTGUN: 2147488001>, on_ground=False,
	in_water=False, weapon_frame=0, armor=0, weapon_model_index=68, health=100,
    ammo=25, shells=25, nails=0, rockets=0, cells=0, active_weapon=<ItemFlags.SHOTGUN: 1>)
ServerMessageUpdate(
    entity_num=1, model_num=None, frame=13, colormap=None,
    skin=None, effects=None, origin=(480.0, -352.0, 88.0), angle=(None, None, None),
    step=False)
ServerMessageUpdate(
    entity_num=101, model_num=None, frame=None, colormap=None, skin=None, effects=None,
    origin=(None, None, None), angle=(None, None, None), step=False)
The above sequence repeats for every frame in the demo, with each frame
containing a ServerMessageUpdate command for each entity.
My Python code for parsing demo files can be found here.
Parsing assets
The level itself is defined in a .bsp file. This gives the geometry and texture information for the level, along with some other data structures which we will come onto later. The file format is well documented and, with a little effort, can be parsed into Python classes. Similarly, the models which represent things like monsters, weapon models and so on, are defined in .mdl files, which is also well documented. This project doesn’t handle sound (for the video at the top I simply dubbed a recording from the game), so there is no need to parse sound assets.
My Python code for parsing .bsp and .mdl files can be found here (.bsp) and here (.mdl).
Quakeguy running. Geometry, texture, and animation data are all stored in the .mdl file. .bsp files are similarly self-contained.
Loading into Blender
Blender has a rich Python scripting interface. In fact, Blender’s GUI works by interacting with a Python API, and so anything that can be done through the UI can also be scripted. Using this Python interface, I made a script to import the .bsp files and models parsed above into Blender. For most of the concepts in the Quake assets there are direct analogues in Blender:
- Quake models and map geometry can be represented as Blender meshes.
- Model poses in Quake models can be represented with shape-keys in Blender.
- Quake texture data can be represented as images.
- Texture coordinates can be encoded as Blender UV maps.
- Effects such as warping water, animated textures, and sky boxes can be implemented as shaders.
My code for importing the parsed .mdl and .bsp files into Blender is here (.mdl) and here (.bsp).
Importing the parsed demo consists of reading the intro section to tell us which
game assets (models and map) to convert into Blender assets, and then animating
them according to the baseline / update sections. I make use of Blender’s
animation support to do this. More specifically, I insert position,
orientation, and shape-key keyframes for every ServerMessageUpdate command in
the parsed demo. I also keyframe animated shaders such as warping water so that
they move according to the current game time. Below is a recording showing the
result of importing a demo from the first level in the game. My code for
importing demos files into Blender can be found
here.
Scrubbing through a demo imported into Blender
Lighting
At this point we have our geometry loaded and animated, with some textures applied. Still, we are missing light sources. When the Quake levels were designed, lights were defined as point light sources scattered throughout the level. A compilation process then converts these point light sources into light maps. This process works by assigning a low resolution texture to each surface in the level, and calculating how much each texel is directly illuminated by these point light sources. Since this process only measures direct illumination, level designers included secondary light sources to fake the effects of bounced light.
Since the original map sources are available, I could use these lights to illuminate my scene. However, because Blender can do accurate multi-bounce illumination by itself, including all of these original Quake lights would mean doubling up on bounced light, which would give an over illuminated scene.
Instead, I am going to illuminate the scene directly from the texture information. All textures in Quake are composed using a 256 colour palette:
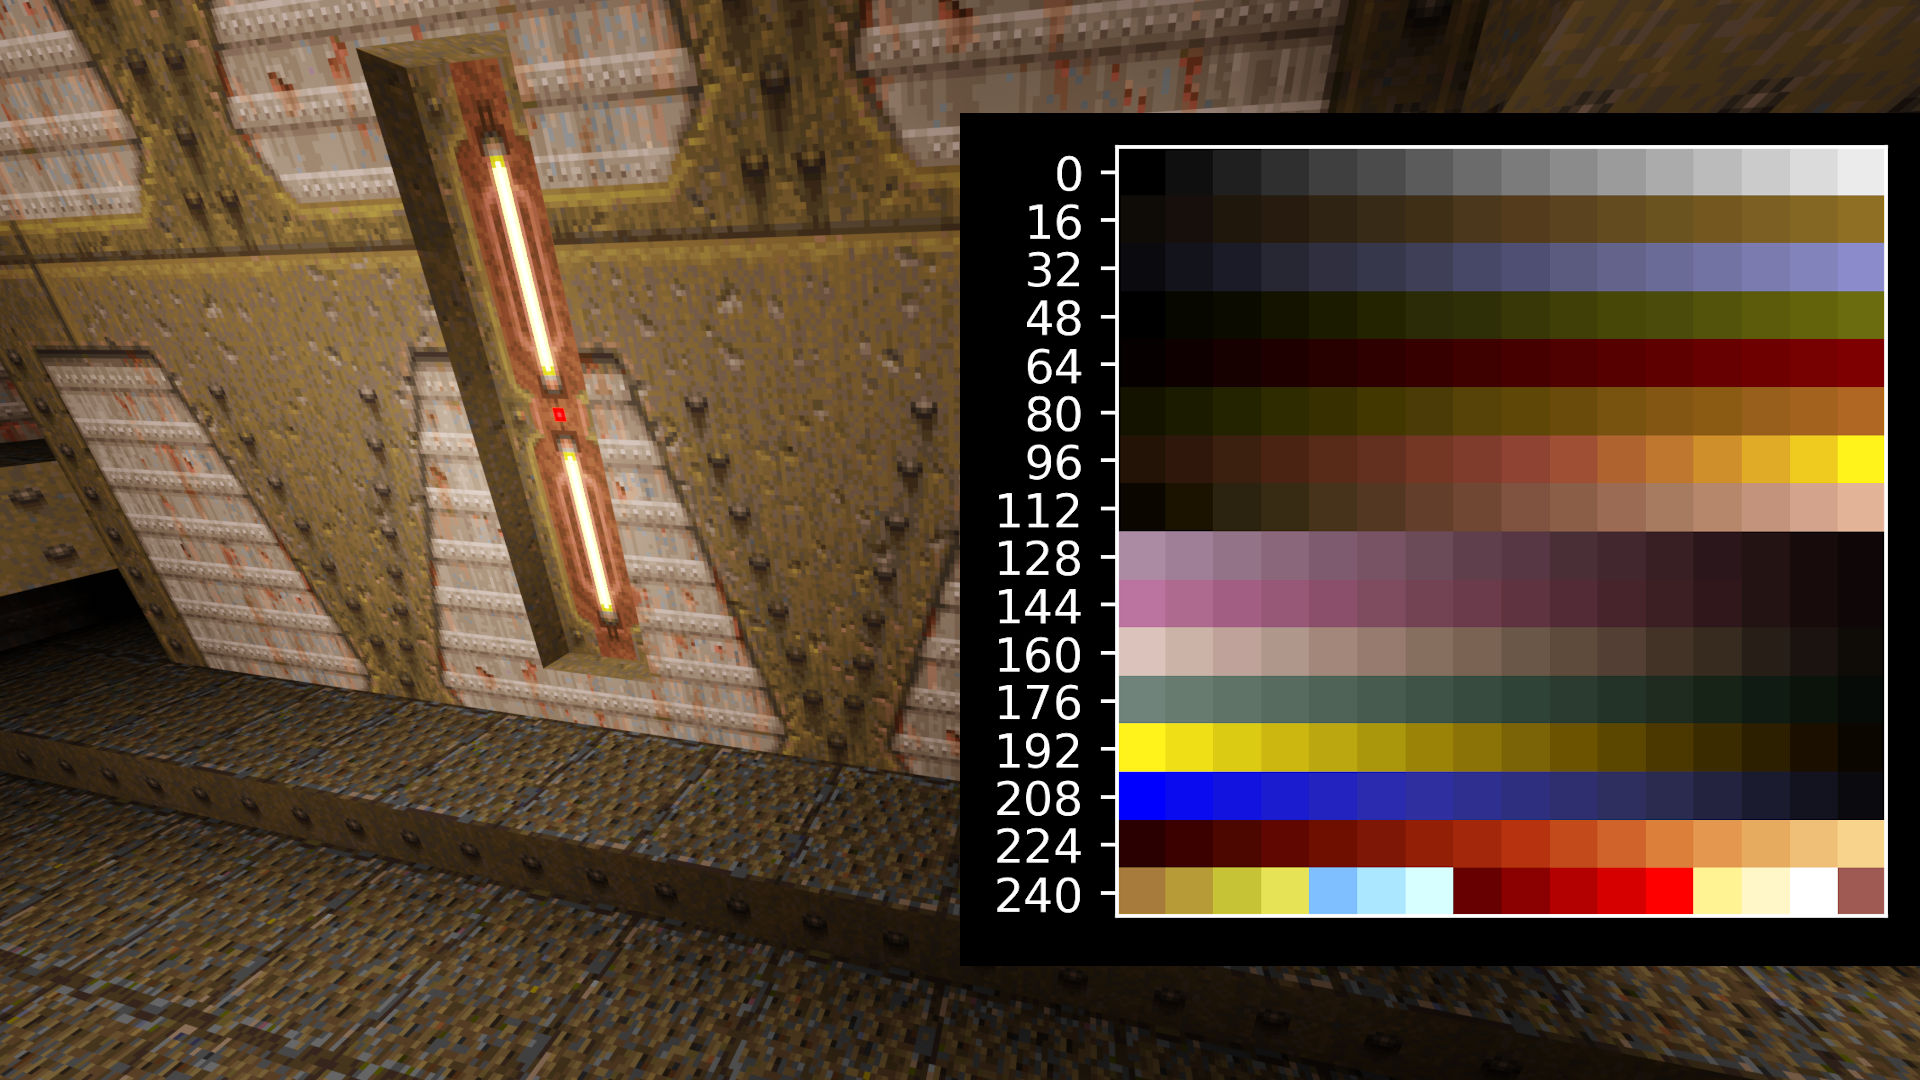
The last 32 colours in this palette are special in that they always appear as fullbright, that is to say, even when in shadow they still appear fully illuminated:
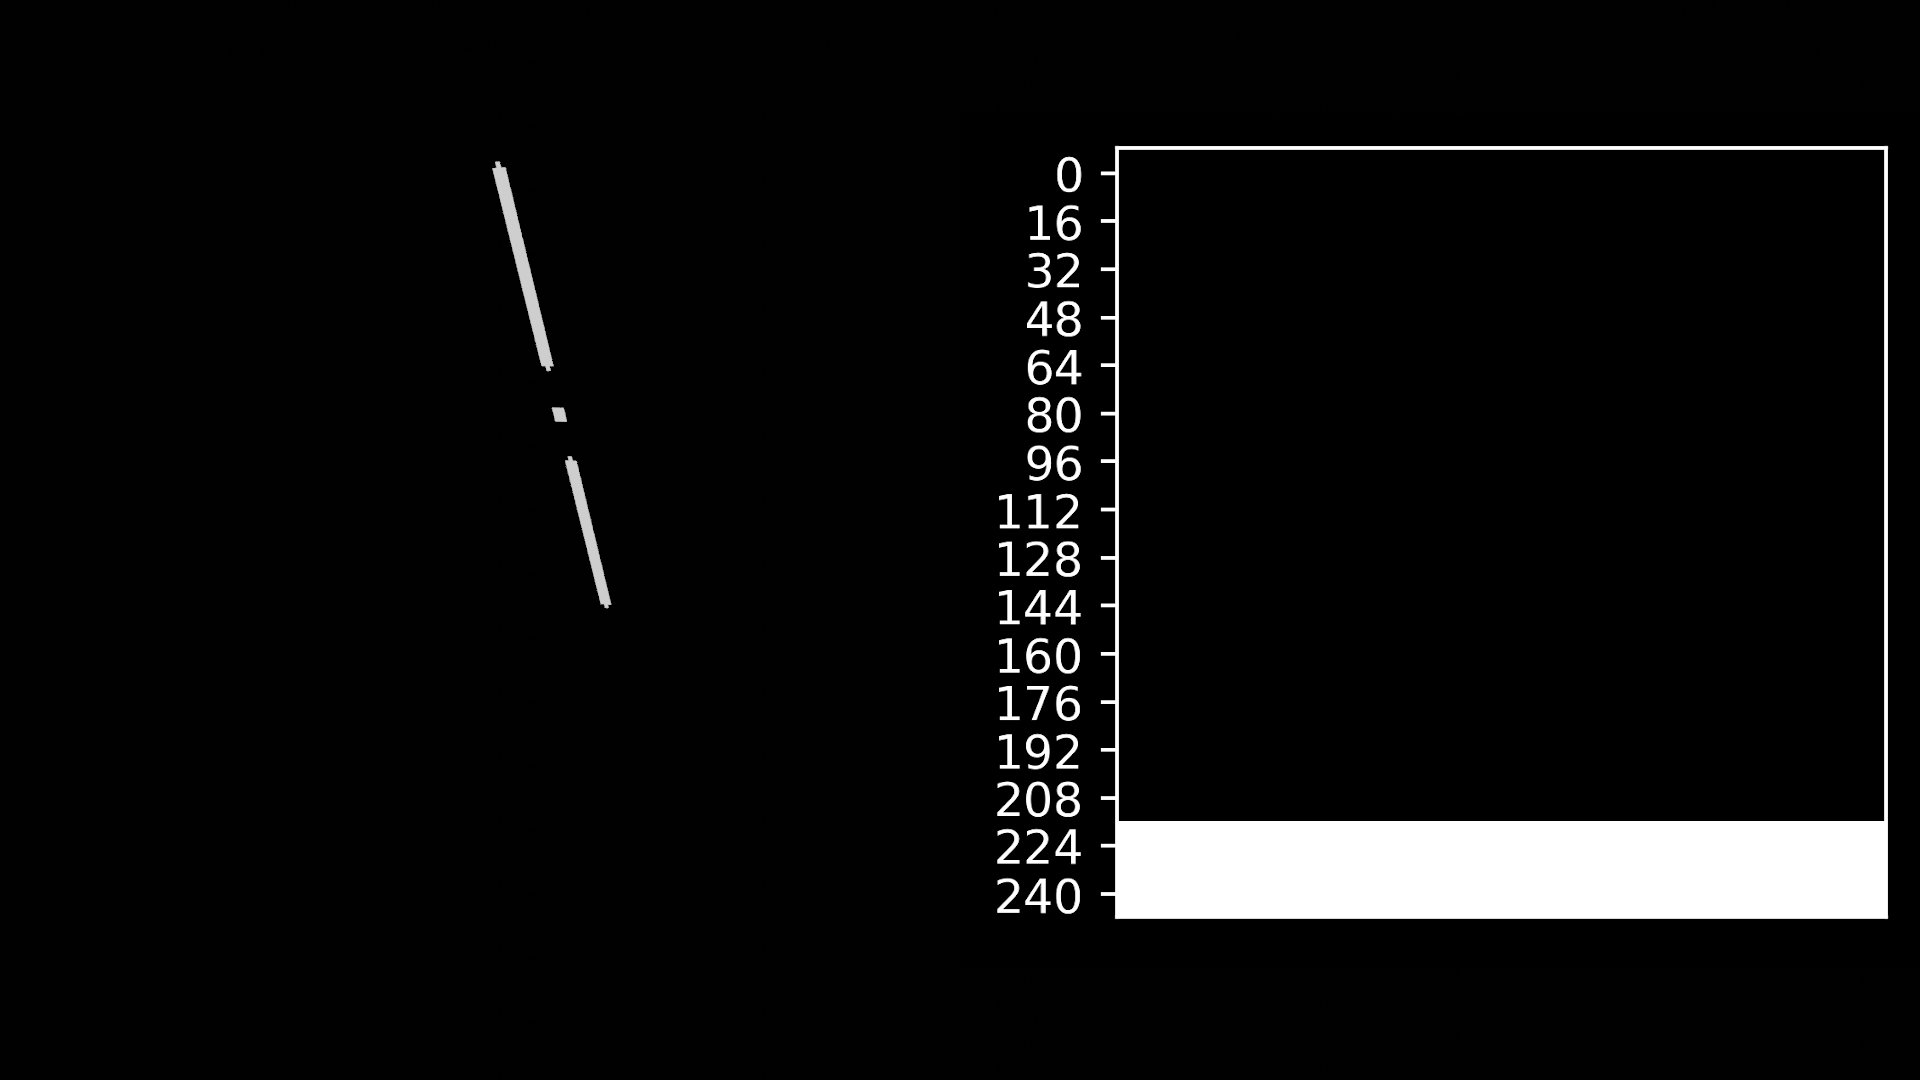
In my system, I treat these fullbright colours as being emissive, so that they illuminate the space around them as well as appearing bright to the camera:
In addition, I treat select models as being emissive, for example the flame models that are used in the non-tech levels.
So our scene is now set — our geometry is in place, textures are applied, and lighting is defined. Let’s render an image and see what we get:
Oh dear! This single frame took around 20 seconds to render on my GeForce RTX 2060, and it is still incredibly grainy! Even applying Blender’s bundled denoiser can’t recover a clean image. Blender can normally handle scenes of this complexity with no issues, so what’s going on?
Importance sampling
When Blender wishes to work out how well a point is illuminated, it (by default) randomly samples from all light sources in the scene, and averages the contribution from each light source. For most levels, there are far more light sources in the scene than are visible at any given time. This means that the contribution from most light sources is zero, and so the result is highly noisy, depending on whether a visible light happened to be sampled.
To illustrate this idea, say there are 100 lights in our scene, each one a single square in the below 10x10 grid. The camera’s location is shown as the green cross. Ignore the red box for now (we will come onto that later). For a particular point that our camera can see, the contribution of each light is represented by the brightness of the square. Due to occlusion by level geometry, only fifteen lights contribute to the illumination of the point.
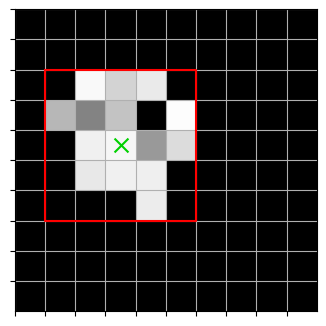
Contributions of the 100 lights in the scene.
We could just take the average value of all of these 100 lights to get an exact answer, but there are two problems with this:
- Sampling all the lights might take a really long time.
- In reality, each individual light is not uniform in contribution: the intensity might vary depending on where on the light we sample. Imagine a long flourescent tube that is partially occluded by a wall, or a light texture that is not uniformly emissive. In this case, taking just 100 samples would not be enough.
To avoid these issues, we use a stochastic approach known as Monte Carlo integration which works by random sampling. Let’s say we take 32 samples in order to measure the contribution to the point in question. We draw 32 times from the 100 lights, replacing each time, and average the resulting value, to give the sample mean. The answer we get is random, since it is dependent on the values we draw. Here is a plot that shows the distribution of these sample means after drawing 100,000 samples:
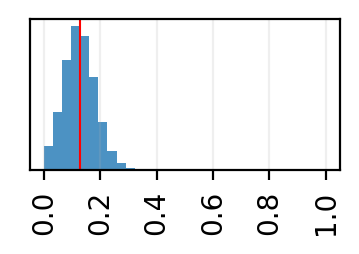
Distribution of sample means, after drawing from all lights. The mean of the sample means is indicated by the red line.
You can see that there is some variance here: the sample mean can realistically land between 0 and 0.3. This variance is undesirable, and manifests itself as noise in the resulting image.
Is there a way to reduce the variance of the sample mean, while still keeping the same mean (of the sample means)? It turns out there is a simple scheme we can use, a type of importance sampling. If we know a priori that none of the lights outside of the red box contribute to the final image, then we can simply draw our 32 samples from this 5x5 box instead. Since we are now drawing from 25 values rather than 100, we would expect the sample mean to be four times larger than when drawing from the full set of lights. We then correct for this by dividing our sample mean by four. Here is the distribution of the corrected means using this new scheme:
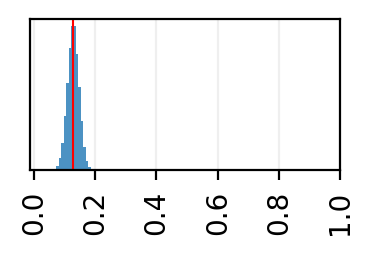
Distribution of corrected sample means, after drawing from the subset of lights.
As you can see, the variance is reduced, but the mean (of the sample means) stays the same, so we get a less noisy but still correct (in expectation) image.
This is a simplification of how Blender samples lights, but the essence is still
the same: noise can be reduced if we avoid sampling lights that do not
contribute to the final image. Blender has a inbuilt method to exclude lights
from being sampled, referred to as Multiple Importance Sampling in the UI, and
sample_as_light in the code. This flag can be animated with keyframes, so we
can make it change depending on the current player position and view angle.
The task then, is to come up with a heuristic to cull lights which do not influence the current view (or as many as is feasible). In other words, we want to avoid sampling lights that cannot be reached after a single bounce from the camera.
BSP visibility data
Fortunately .bsp files come with built-in data structures for solving a similar problem. One of the great innovations that enabled Quake to run efficiently on 1996 hardware is that of visible-surface determination, that is to say, working out which parts of the level are visible from any given player position.
In order to solve this problem, the .bsp file divides the level into a set of disjoint volumes called leaves. Each leaf contains a handful of faces.
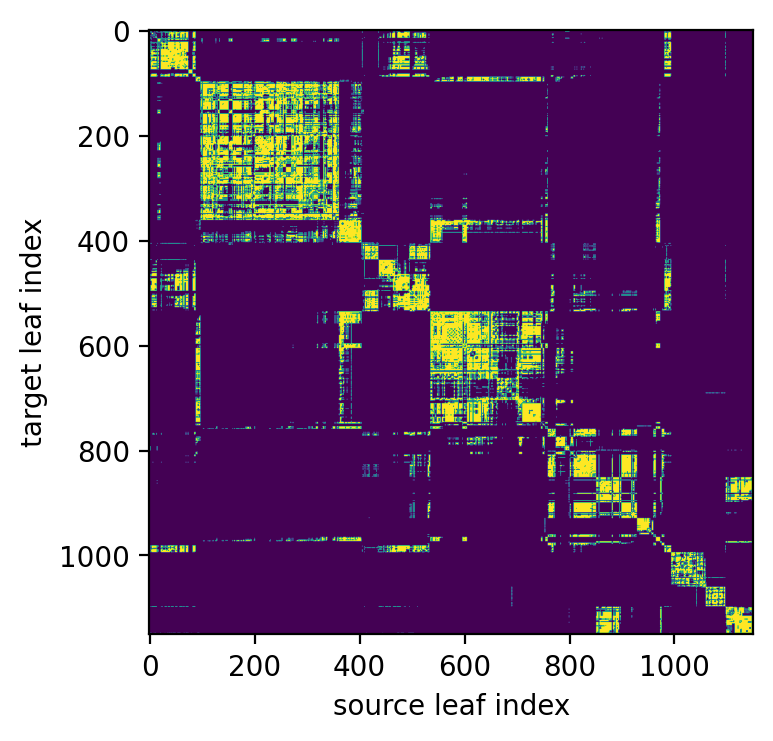
The visibility information in the BSP is a large (but compressed) pre-computed 2D bitmap telling us which leaves can potentially see each other. The set of leaves that a given leaf can potentially see is known as its potentially visible set, or PVS:
In the game, surfaces that lie outside of the camera’s PVS are not drawn. Our problem is slightly different in that we also need to sample lights that are invisible to the camera, but that are visible from at least one point that is visible to the camera.
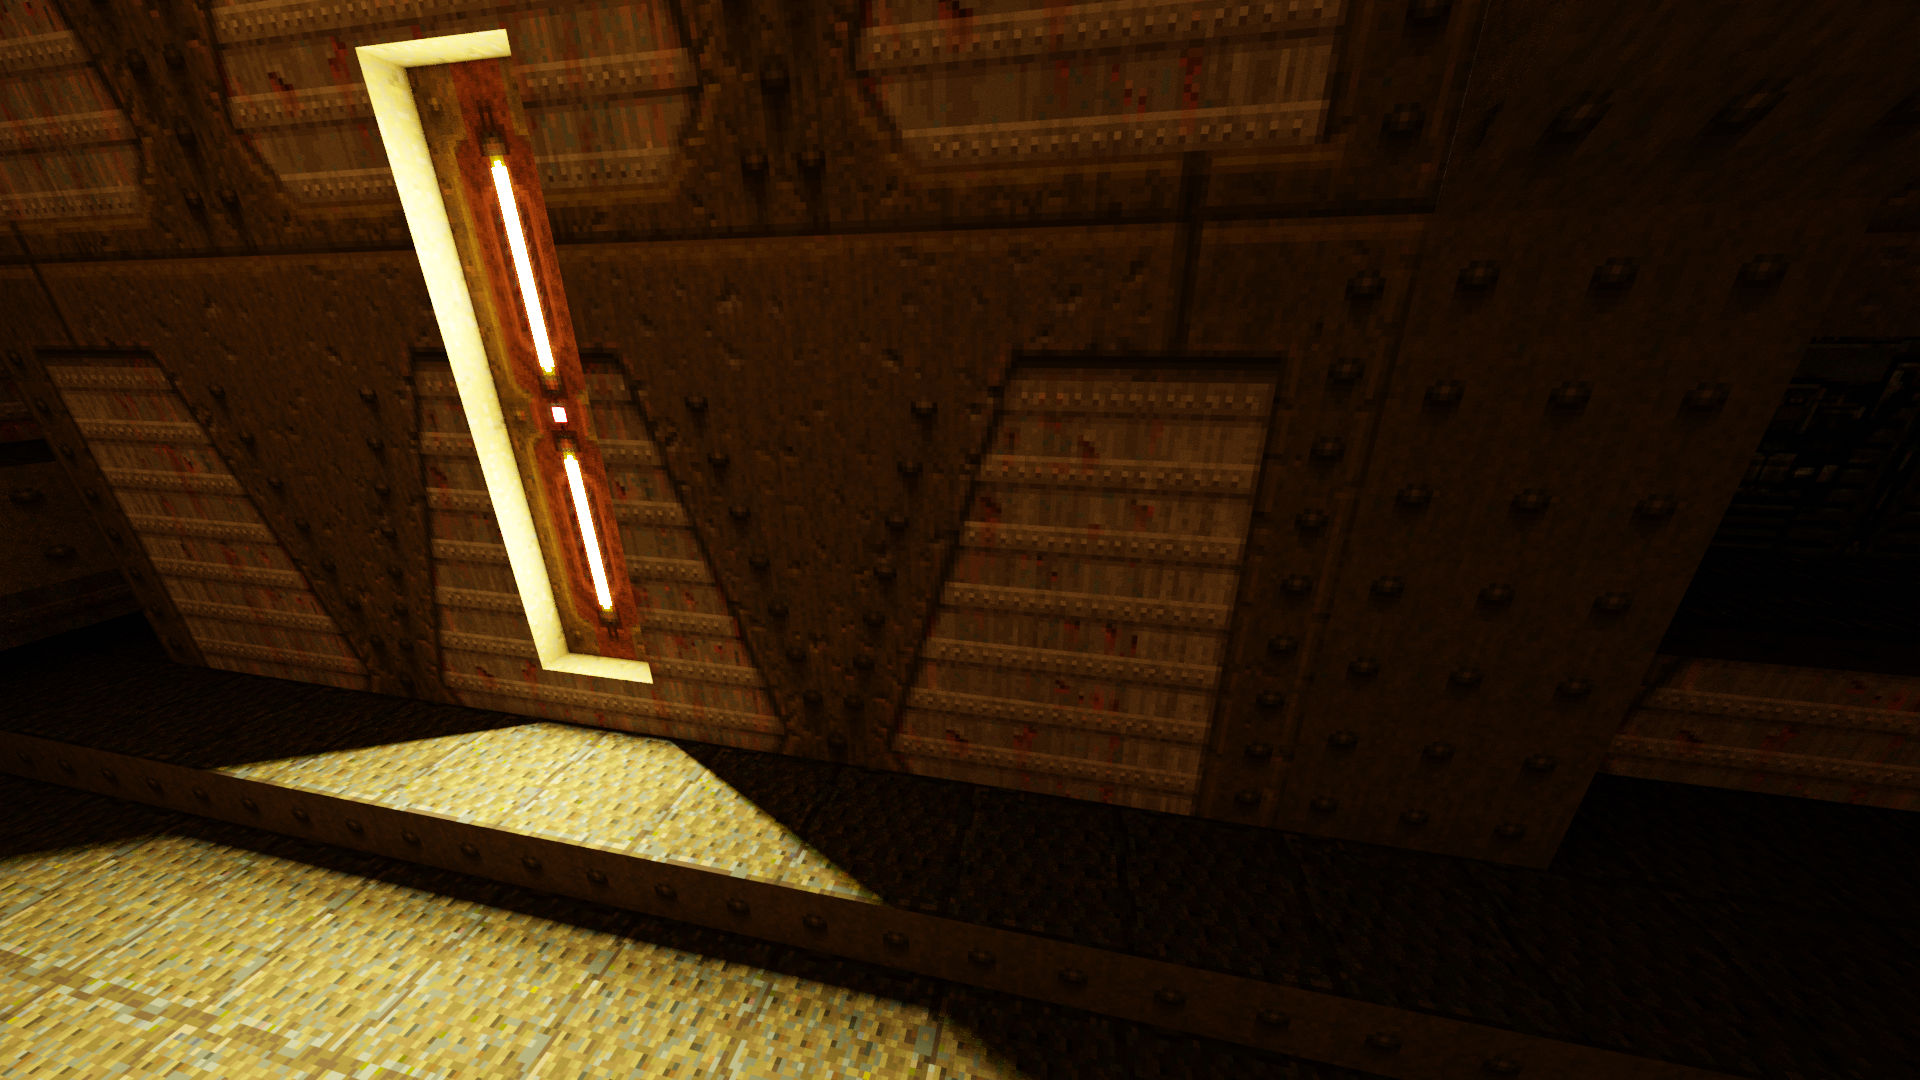
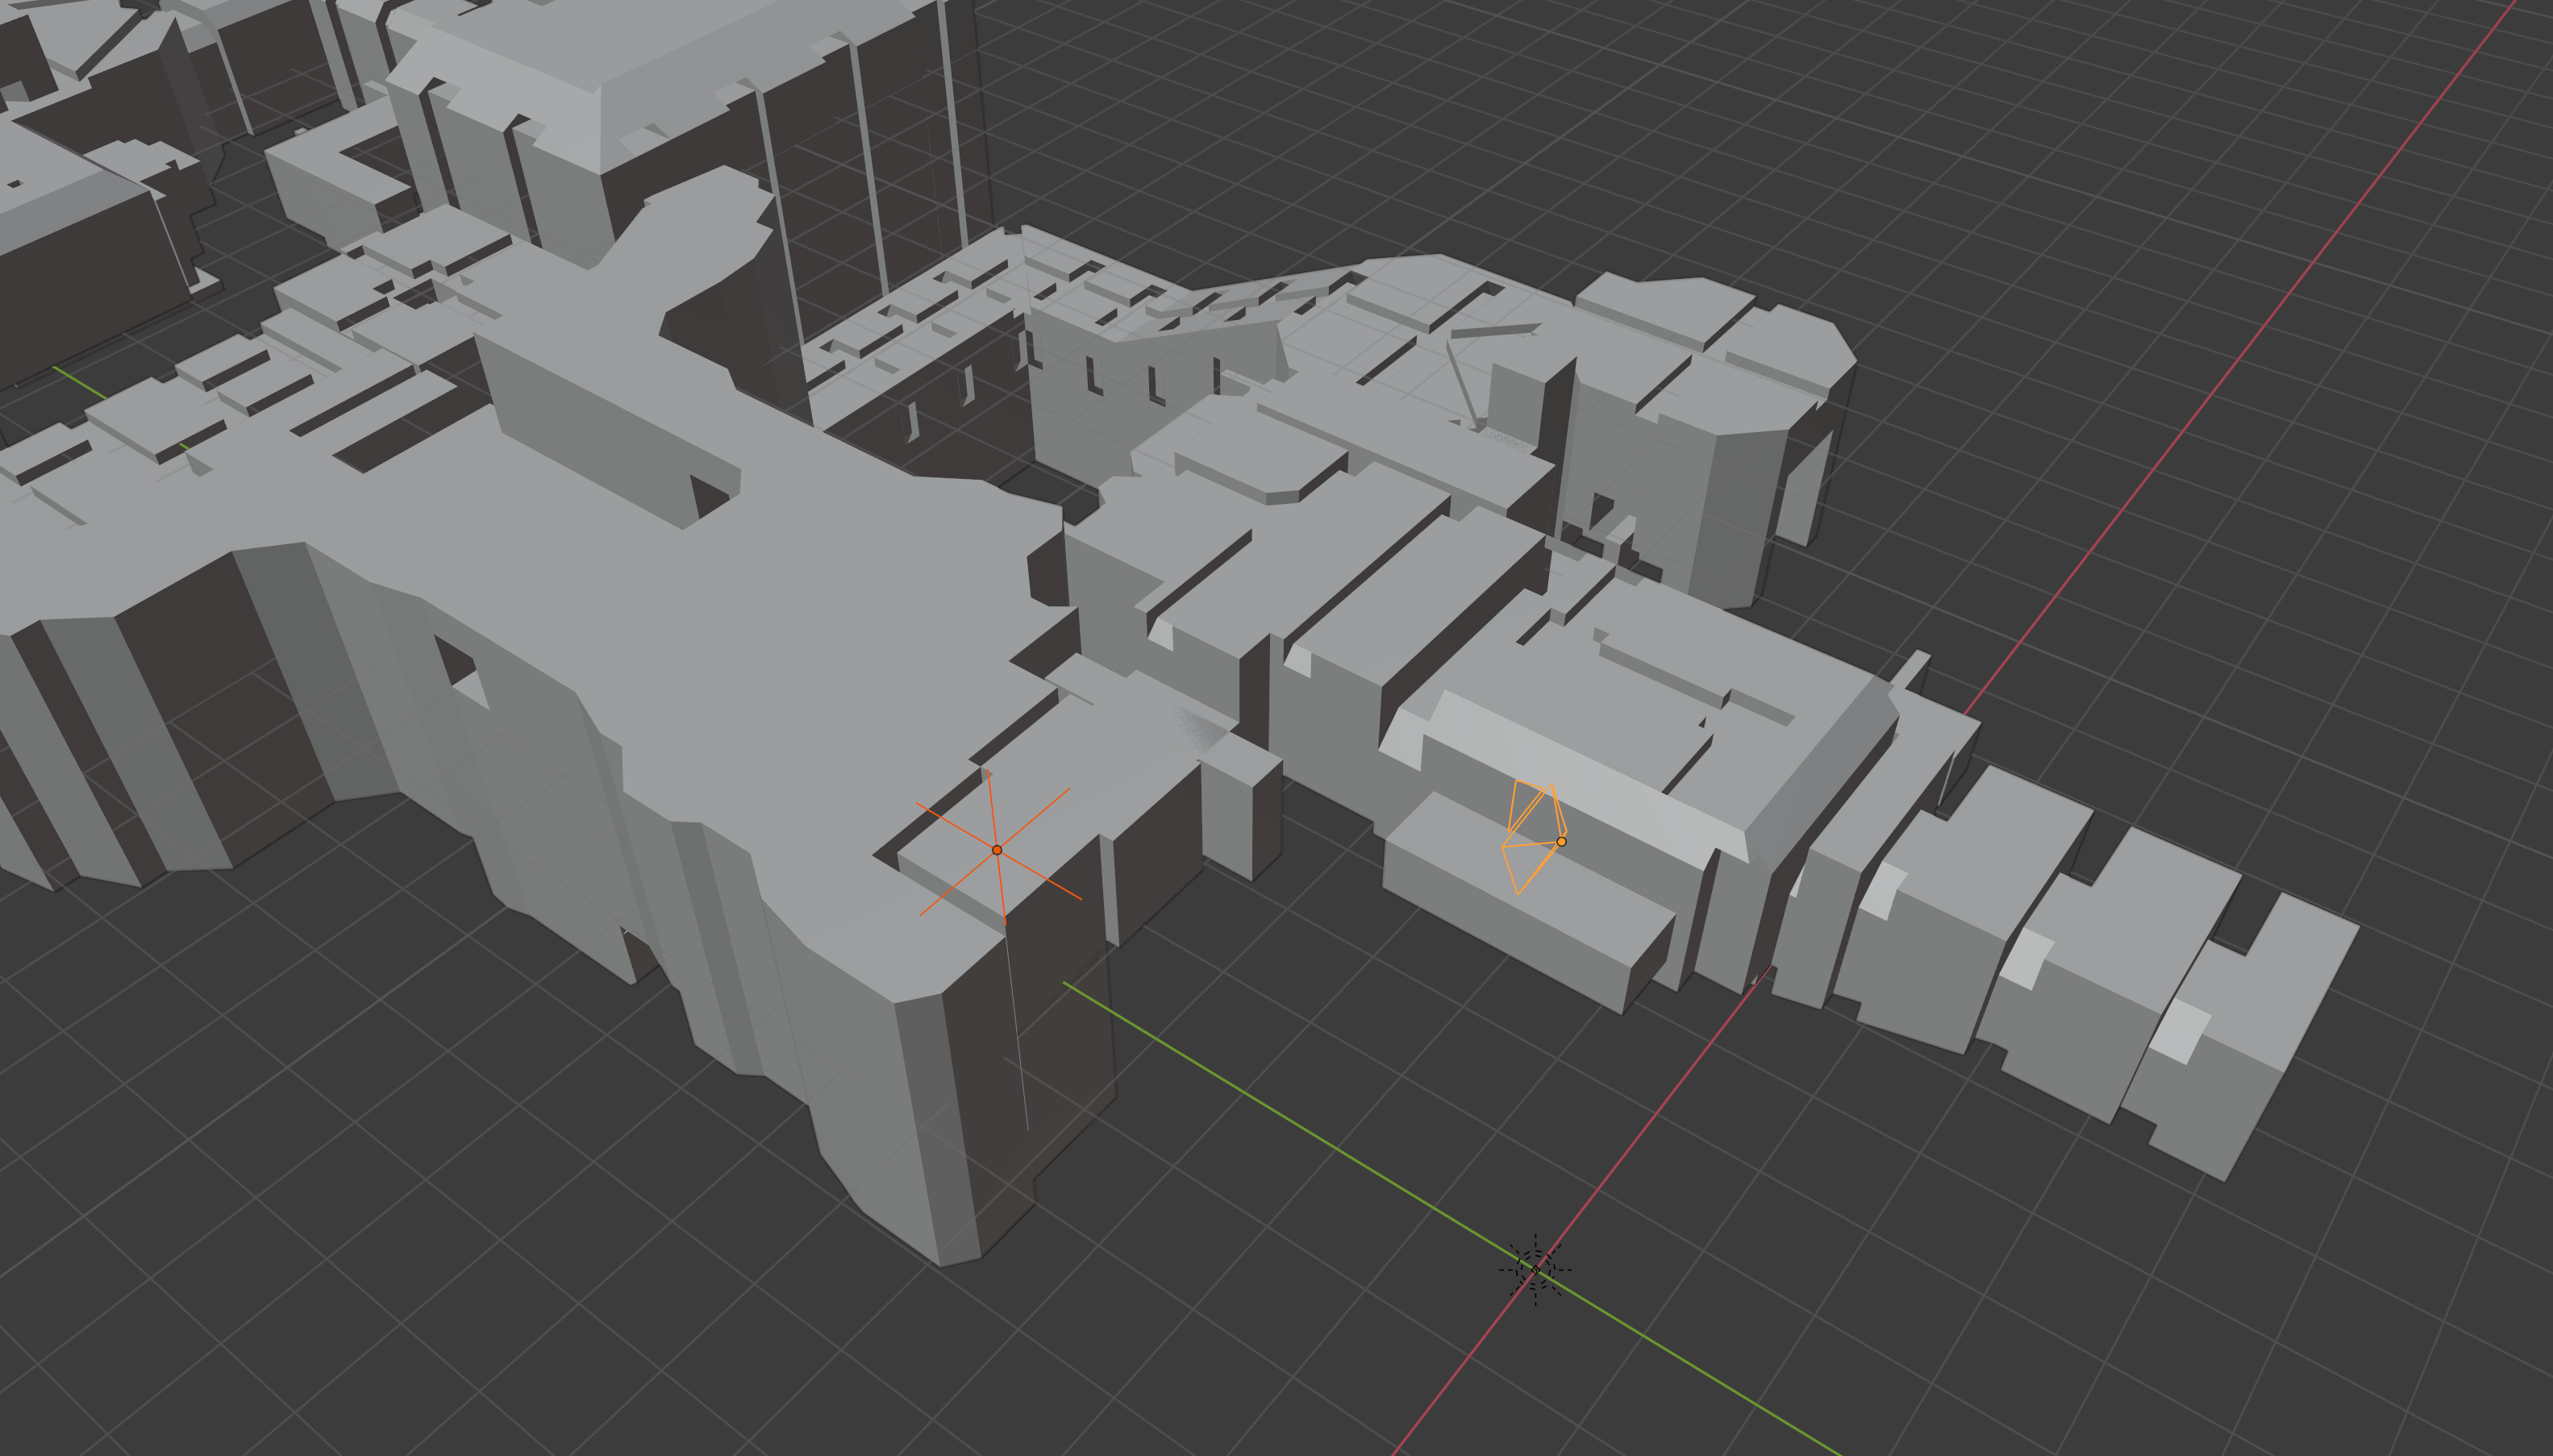
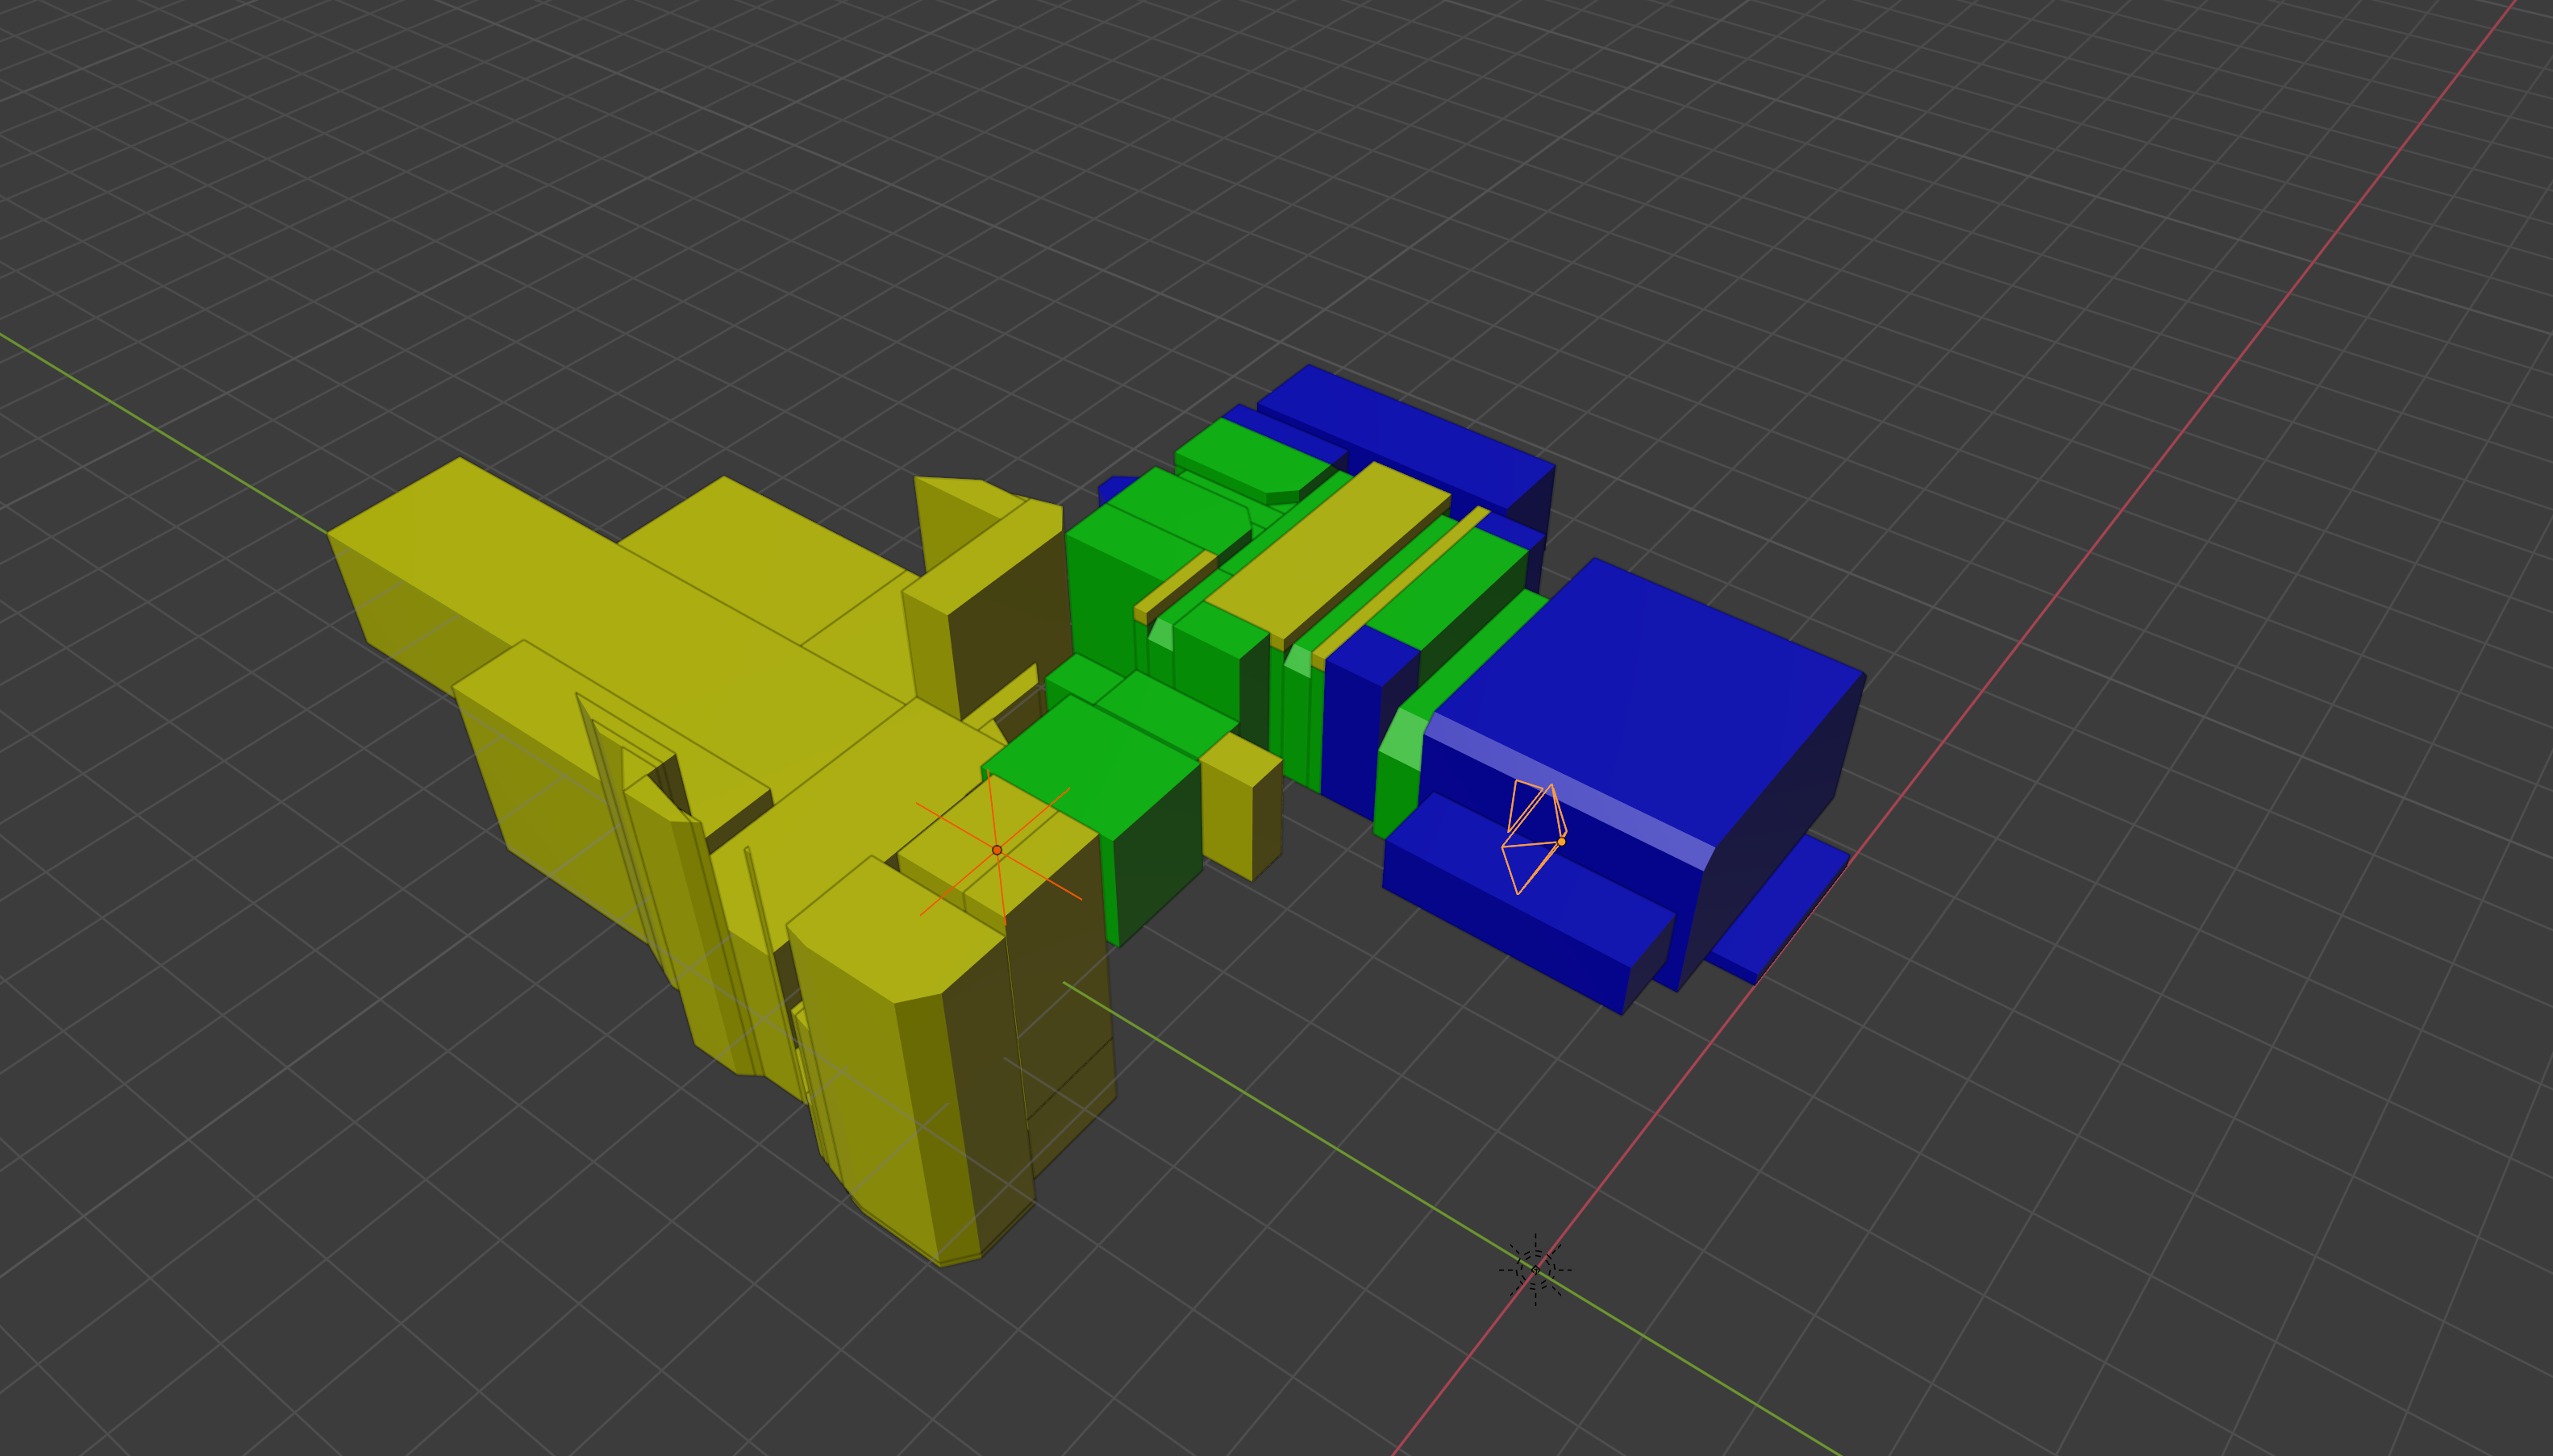
Let’s take an example where the light influences the image. Here is an external shot of the first corridor in the game, with a light, indicated by the orange star, just around the corner from the player, indicated by the lighter orange pyramid1.
As a first approximation, we can simply sample a light if and only if the camera’s PVS has any leaves in common with the light’s PVS. If we now draw the PVS of the light and the camera, we can see that there is in fact an intersection, so this light would be sampled with this method:
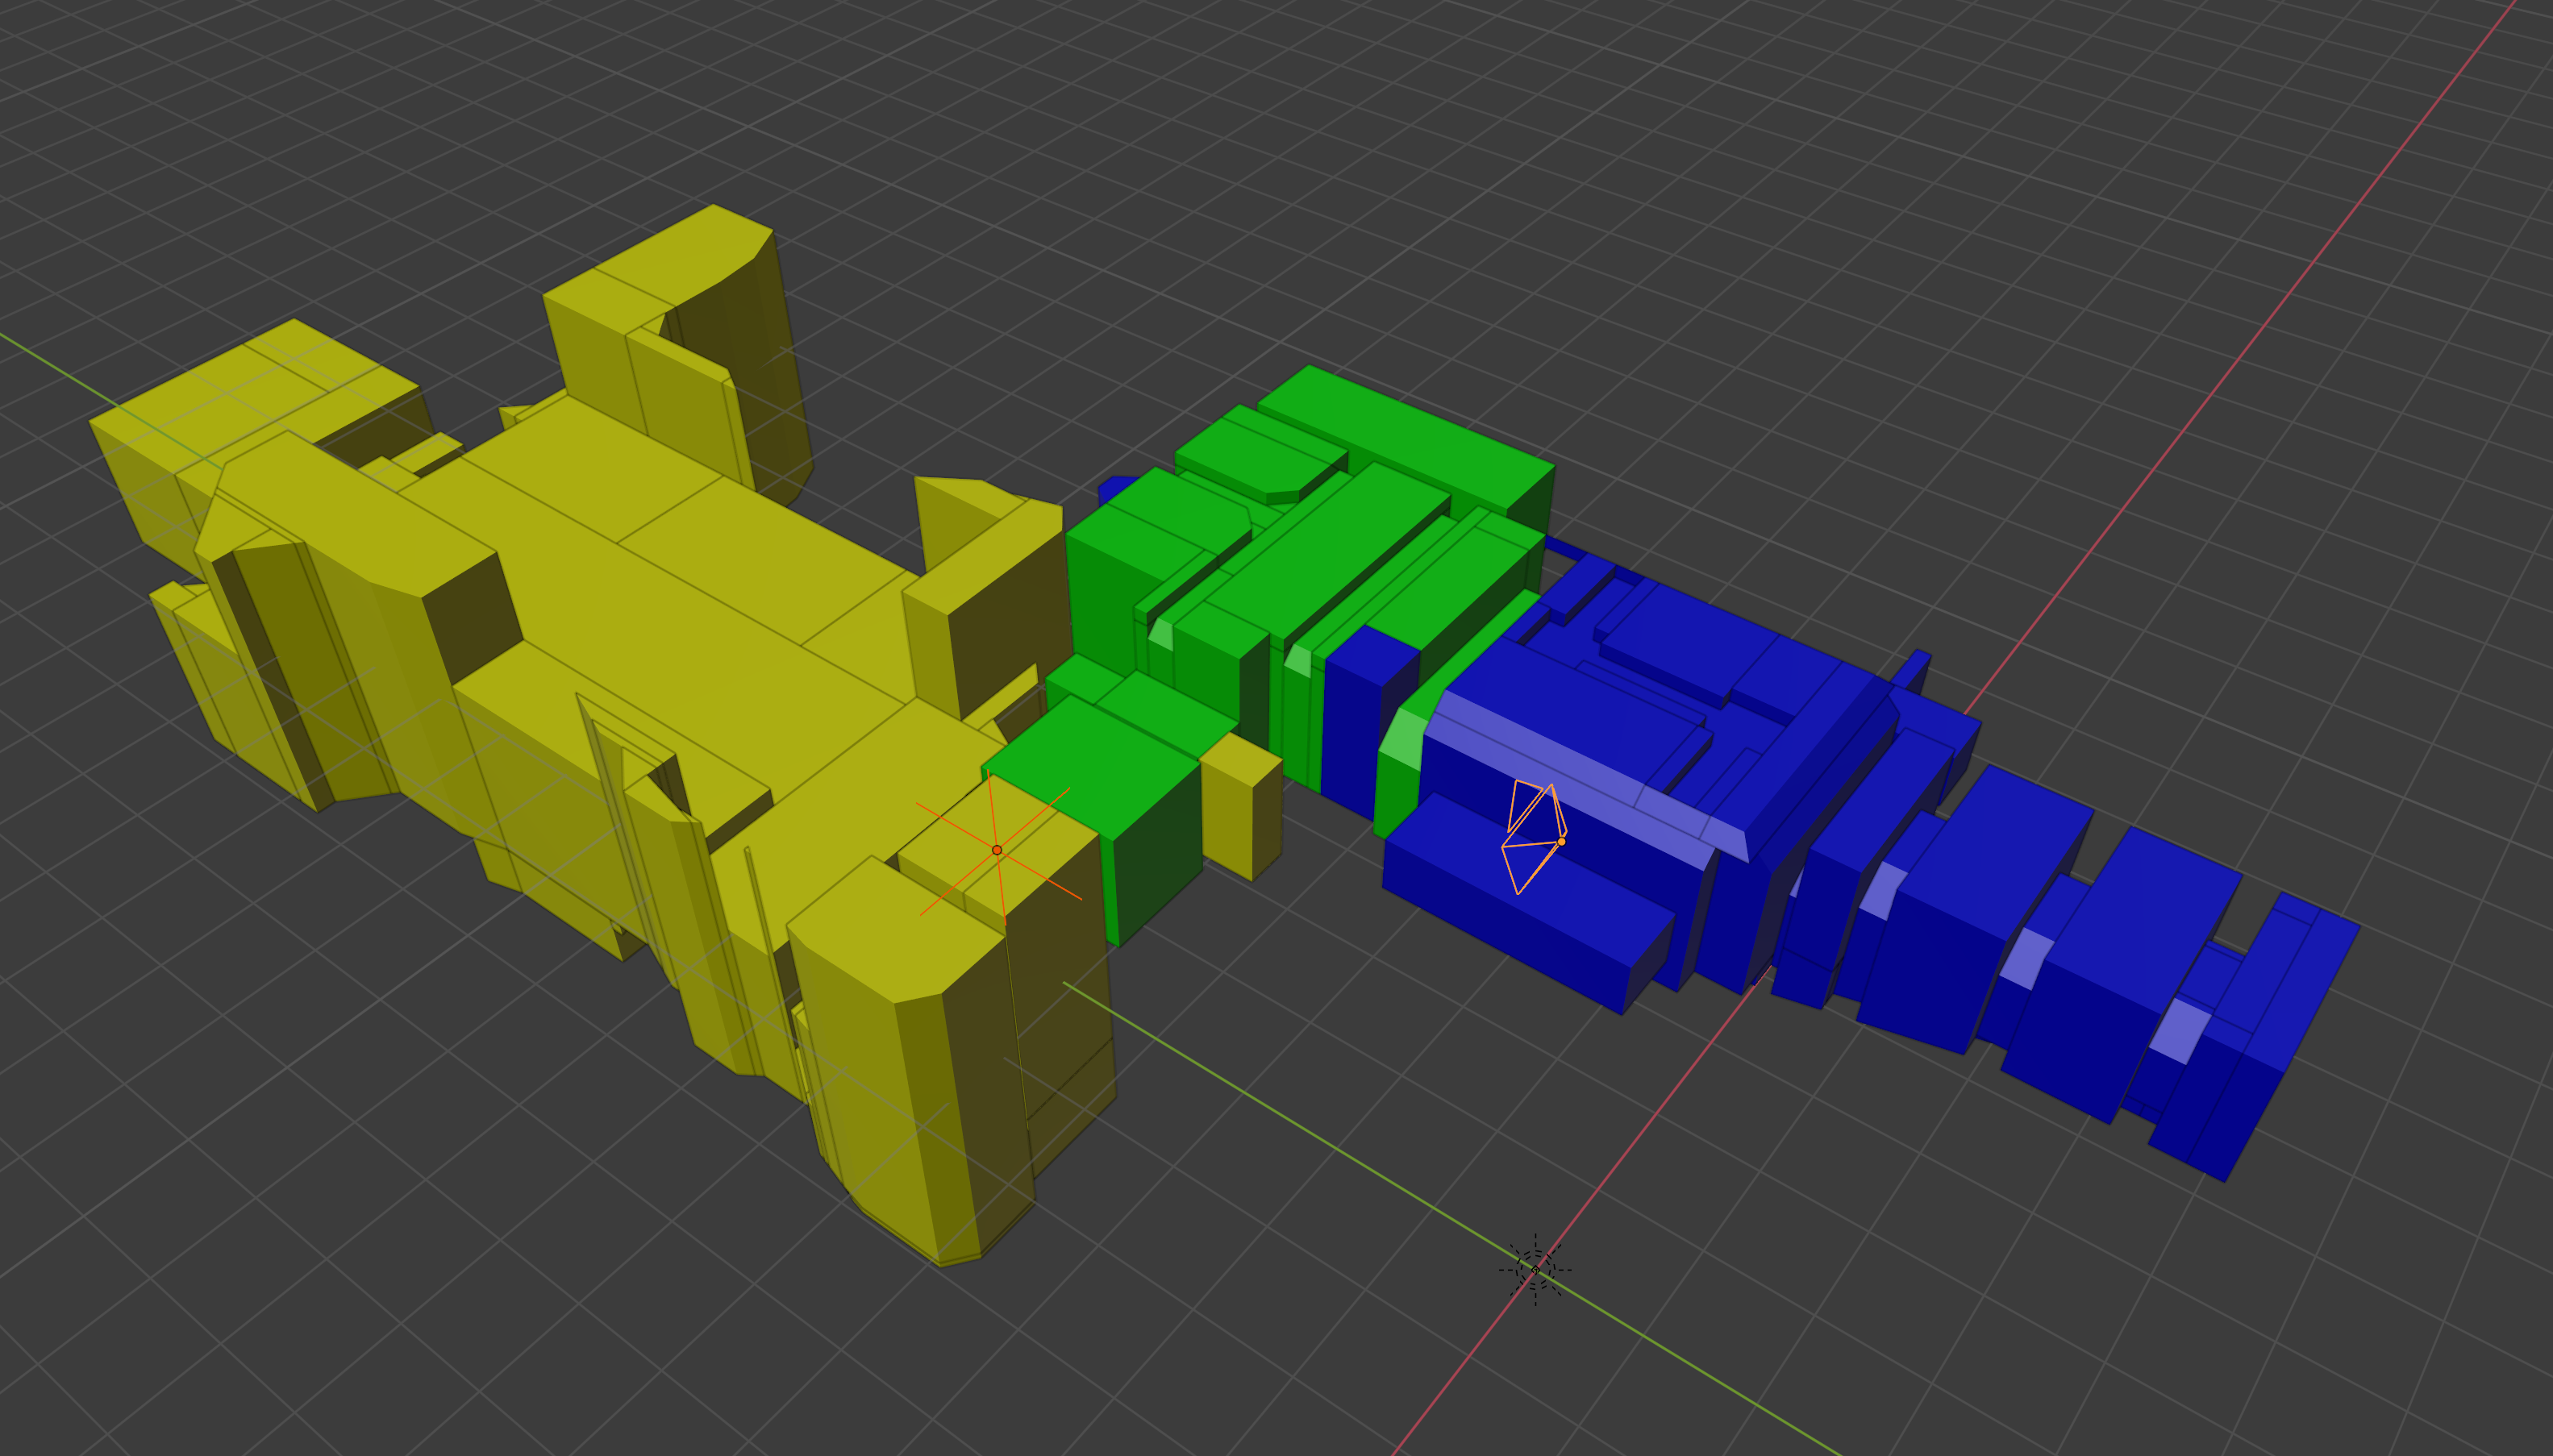
Leaves in the light’s PVS are shown in yellow, whereas leaves in the camera’s PVS are shown in blue. Leaves that are in both are shown in green.
This works well, and does improve the situation a bit. However, there is more that we can do. The problem is that the PVS is too conservative, meaning that there are still lots of fully occluded leaves that could be omitted but nevertheless appear in the PVS. Similarly, there are points in the light’s PVS that have very little illumination owing to limited power of the light and the inverse-square law. The net effect is that we still end up sampling many lights that have no contribution to the scene.
Frustum culling
To improve things, we again take inspiration from Quake’s visibility calculations and apply what’s known as frustum culling. With the camera we can associate a viewing frustum, that is to say, a volume whose faces correspond with the edges of the screen projected out from the camera’s origin. Any point lying outside of the viewing frustum will be invisible to the camera, and so we can exclude these leaves from the PVS. This has the effect of hiding leaves that are behind the player, or otherwise outside the bounds of the camera’s field of view.
A similar concept can be applied to the light’s PVS: practically, a light’s sphere of influence is bounded by the inverse-square law, and so we can place a bounding box around each light, whose size is determined by how bright the light is. We can therefore reduce the light’s PVS by intersecting with this bounding box.
The final system I use is based on seeing whether these two reduced PVS volumes intersect:
In this case they still do, however you can imagine if the player were turned to face the opposite direction then the intersection would now be nil and the light would (correctly) not be sampled.
This works better than unreduced system, and as you can see, a lot better than the system that simply samples all lights:

Applying Blender’s noise reduction system to the above yields an even cleaner looking image:
One caveat about this scheme for selecting lights to sample is that it ignores the potential for influence from multiple light bounces — a bright light at the end of a serpentine corridor might still illuminate the other end via multiple bounces, yet the above method would not sample this light. While this is an issue in theory, it doesn’t appear to be an issue in practice.
Finishing touches
There are a few extra bits required to produce the final result:
- In order to look correct, different light textures need different intensities. For example, a floodlight texture should be a lot brighter than a backlit sign. This information isn’t encoded in the game and so my system reads in a config file that contains, among other things, some good-looking intensity values for each texture.
- I treat the sky texture as emissive, using Blender’s sun light.
- Even though lights are independent of textures in the original game, the artists generally motivated a particular light source by placing it near a would-be emissive model or texture, so that visually the lighting makes sense. Despite this, there are still some areas in the original game that have unmotivated lights and so would be too dark in my rendering. To account for this I add in a select few lights from the original map sources to illuminate these areas. These light locations and intensities go into the config file mentioned above.
- The original game has a particle system used for explosions, teleport effects, and so on. I use Blender’s own particle system to display these.
There is still more that could be added in:
- Viewport gun. The original game shows the current weapon at the bottom of the screen.
- Lightning effects. As visible in the lightning gun, and in the final level of episode one.
- Sprites. There are a few sprites in the game, used for things such as the explosion effect (separate to the particles), and bubbles.
- Animated lights. The original game’s lightmaps could be animated, useful for things like flickering bulbs, or to have lights turned on and off by in-game triggers.
Conclusion
I have produced a system that imports Quake demo files and all the associated assets into Blender. In many ways this has been a case of replicating a decent chunk of Quake’s client into Python, replacing the rendering portion with code that duplicates the game’s state into Blender. This took a long time, so perhaps it would have been more efficient to re-use some of Quake’s code and introduce my code at a lower level. On the other hand, I have built up a library of code for interfacing with several of Quake’s file formats, and some supporting code (eg. a simplex solver). These might be useful for other projects within the Quake community.
Speaking of other uses, the scene produced by Blender could be used for player analysis. Speedruns of the game are often won or lost by small fractions of a second. Being able to load up multiple demos into the same scene and track exactly who is ahead at what point could give insight into where time can be gained.
While doing this project, one comparison that has been at the back of my mind is that of real-time renderers, particularly the Quake II RTX (Q2RTX) project. Even with all of my optimizations, rendering still takes several seconds per frame, whereas Q2RTX runs in real-time. Blender also supports hardware ray-tracing, so why is it still so much slower? I can think of a few possible reasons for this:
- Q2RTX employs temporal filtering to smooth its images. This means that samples from earlier frames contribute to the current frame. Blender doesn’t yet fully support temporal filtering, so I had to render each frame independently.
- My system has to determine lights to sample on a per-frame basis. An RTX based system could decide lights to sample on a per-path basis. Only a direct (zero bounce) PVS calculation needs to be done for each surface point whose incoming light is being integrated. This would naturally lead to fewer lights being sampled per pixel. From my reading I can’t confirm this to be the case with Q2RTX, but it seems likely.
- Blender’s path-tracing renderer, Cycles, is very general in that it has to be able to cope with a wide variety of scene types — different complexities of geometry, different number of lights, and so on. In contrast, Q2RTX is a very specialized renderer and can thus be optimized for the specific task of rendering Quake levels.
Footnotes
-
If you are familiar with this level you will know that there is a door that normally blocks this passage. For the purposes of this discussion we assume the door is open. ↩
If you enjoyed this post, please consider supporting my efforts: