Face swapping with The GIMP
Introduction
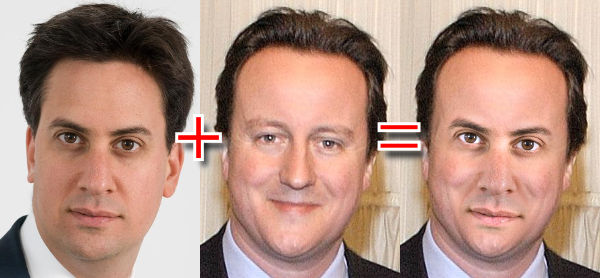
I’ve discovered a pretty quick and easy way to do face swaps such as the above using The GIMP. Here’s how:
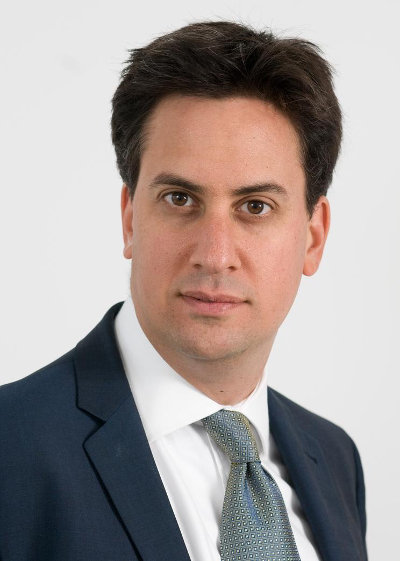
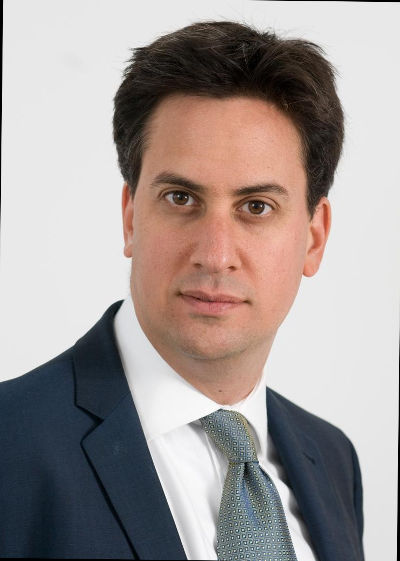
1. Obtaining images
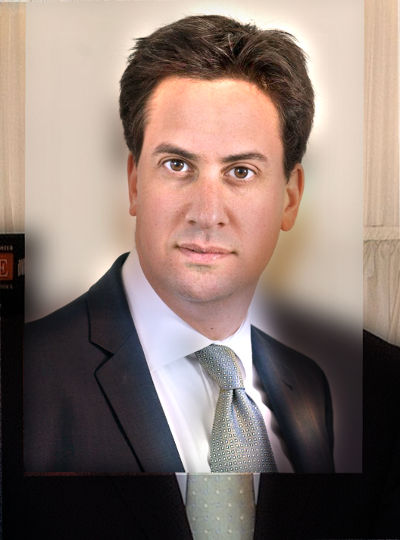
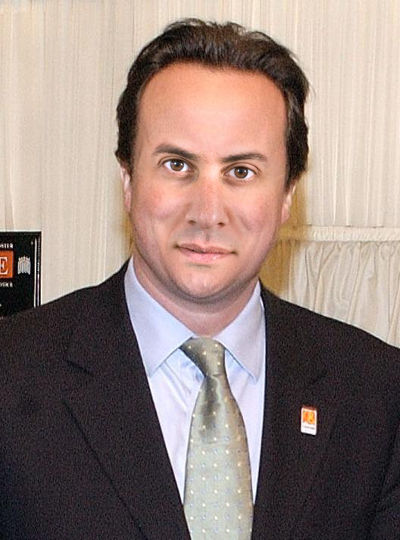
Obtain images of the subjects whose faces you wish to swap. For best results the faces should be looking in the same direction, and be of reasonable resolution:

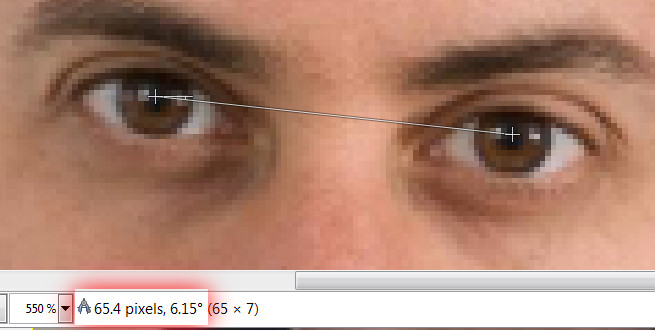
2. Aligning the images
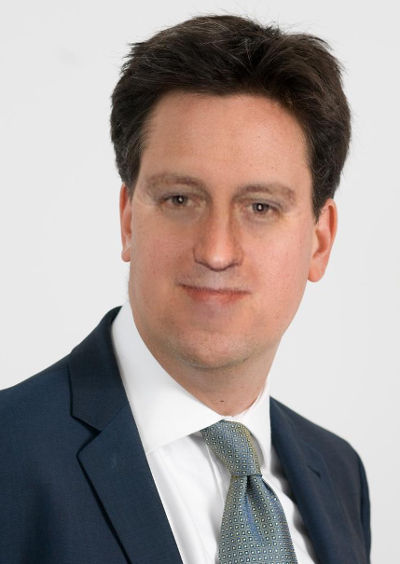
Load both images into The GIMP and then decide which face you’d like to swap onto which head. In my case I chose Ed’s face on Dave’s body.
Use the Measure tool (Shift-M) to measure the angle and distance between each image’s left and right eye, noting down as you go. You’ll also need to take note of whether The GIMP is measuring the angle above the horizontal axis or below; record the angle as negative for above the line and positive otherwise.
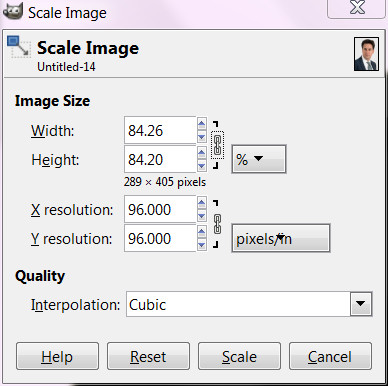
Break out a calculator and divide the head image’s eye distance by the face image’s eye distance, and scale the face image by this factor:
Now rotate the face image by the difference between the two eye-angles:
Copy the result, and paste it onto the head image as a new layer. Halve the new layer’s opacity and line up the two faces using the Move tool (M):

Return the top layer’s opacity to 100%.
3. Adjust the colour balance of the face layer
Make a copy of both layers, with the face copy on top and the head copy just below:
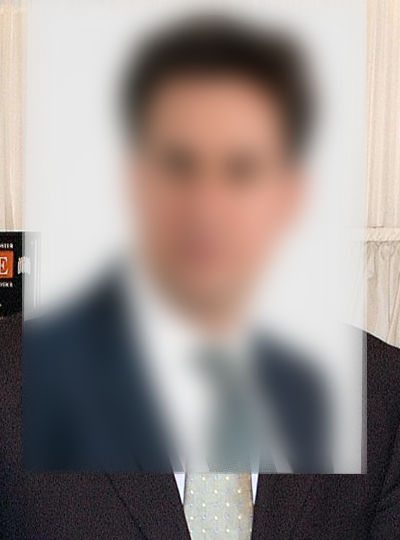
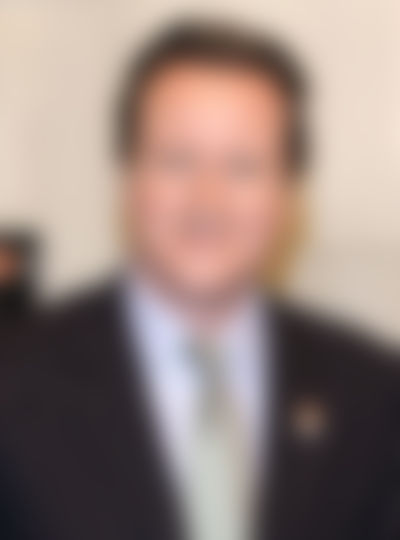
Now apply a gaussian blur to both. The blur amount should be as high as you can get without non-flesh tones from hair or background interfering with areas you want to transfer to the head image. About 2/3 of the head image eye-distance has worked well for me:
Now set the blurred face layer to divide, and the blurred head layer to multiply. The face image should now be shining through, but with the right lighting and fleshtones around the facial area:
At this point select Copy Visible from the Edit menu, and paste as a new layer.Move the new layer to second from bottom (right above the bottom head layer), and make all layers above it invisible.
4. Select facial features with a Layer Mask
Add a layer mask to the newly pasted, colour-corrected face layer. Initialise it to black (fully transparent). Now with the Brush tool draw over the eye, nose and mouth area in white (opaque):

Apply a gaussian blur to the layer mask, et voila:
Addendum
By swapping layers and re-doing the Copy Visible layer from step 3 one can easily get the reverse image:
Credits
Original Ed Miliband image by the Department of Energy, licensed under the Open Government License v1.0.
Original David Cameron image by Land of Hope and Glory, released into the public domain.
If you enjoyed this post, please consider supporting my efforts: